Перейти к основному содержанию

Sony Cyber-Shot DSC-TX9 LED Screen Replacement

Архивированное руководство
Это руководство сохранено для исторических целей. Используйте его обновлённую версию, чтобы выполнить ремонт.

Выберете то, что вам нужно

  1. Sony Cyber-Shot DSC-TX9 LED Screen Replacement, LED Screen: шаг 1, изображение 1 из 3 Sony Cyber-Shot DSC-TX9 LED Screen Replacement, LED Screen: шаг 1, изображение 2 из 3 Sony Cyber-Shot DSC-TX9 LED Screen Replacement, LED Screen: шаг 1, изображение 3 из 3
    • Remove all screws on the outside of the camera. A total of 6 screws will be removed.

    • Use a 0001 screw. Note: That the first two screws are in the first circle.

  2. Sony Cyber-Shot DSC-TX9 LED Screen Replacement: шаг 2, изображение 1 из 3 Sony Cyber-Shot DSC-TX9 LED Screen Replacement: шаг 2, изображение 2 из 3 Sony Cyber-Shot DSC-TX9 LED Screen Replacement: шаг 2, изображение 3 из 3
    • Once all screws are removed slide open the battery cover.

    • Pop off the front plate of the camera by moving the two pieces away from each other.

    • The front plate will partially be attached to the body of the camera by a ribbon. Detach with caution.

    • Next, remove the two silver screws on the inside of the camera.

  3. Sony Cyber-Shot DSC-TX9 LED Screen Replacement: шаг 3, изображение 1 из 2 Sony Cyber-Shot DSC-TX9 LED Screen Replacement: шаг 3, изображение 2 из 2
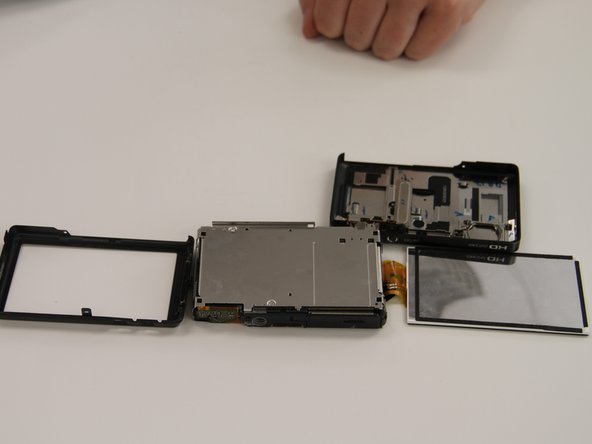
    • Pop off the back plate of the camera by gently pulling the inner plate out.

    • After the back plate is removed, the camera should appear like the second picture. The LED screen should be free and accessible to replace.

  4. Sony Cyber-Shot DSC-TX9 LED Screen Replacement: шаг 4, изображение 1 из 1
    Инструмент, используемый на этом этапе:
    Tweezers
    $4.99
    Купить
    • Use a pry stick to pop out the connector ribbon attached to the LCD screen.

    • A pair of tweezers may be needed to pull back a black slit to access the ribbon connector.

  5. Sony Cyber-Shot DSC-TX9 LED Screen Replacement: шаг 5, изображение 1 из 1
    • Attach the new LCD screen.

    • Follow the previous steps in reverse to put the camera back together.

Заключение

To reassemble your device, follow these instructions in reverse order.

Еще один человек закончил это руководство.

Melissa Pavelka

Участник с: 09/24/15

131 Репутация

1 руководство автора

Команда

Texas Tech, Team 19-1, Rauch Fall 2015 Участник Texas Tech, Team 19-1, Rauch Fall 2015

TTU-RAUCH-F15S19G1

4 членов

Автор 1 руководств

0 Комментариев

Добавить комментарий

Просмотр статистики:

За последние 24часов: 0

За последние 7 дней: 2

За последние 30 дней: 7

За всё время: 386