Перейти к основному содержанию
Присоединяйся к сообществу ремонтников - Создай аккаунт

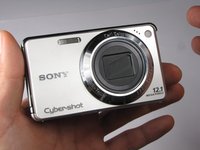
Sony Cyber-shot DSC-W290 Flash Bulb Replacement

Выберете то, что вам нужно

    1. Sony Cyber-shot DSC-W290 Flash Bulb Replacement, Battery: шаг 1, изображение 1 из 1
      • Find the hatch labeled "open" on the left side of the bottom of the camera.

      • Slide the hatch in the direction that the arrow is pointing. The hatch will open outward on its own.

      Спросите у FixBot

      Добавить комментарий

    2. Sony Cyber-shot DSC-W290 Flash Bulb Replacement: шаг 2, изображение 1 из 1
      • Slide the blue locking tab to release the battery.

      • Slide the battery out of the camera.

      Спросите у FixBot

      Добавить комментарий

    1. Sony Cyber-shot DSC-W290 Flash Bulb Replacement, Outer Casing: шаг 3, изображение 1 из 2 Sony Cyber-shot DSC-W290 Flash Bulb Replacement, Outer Casing: шаг 3, изображение 2 из 2
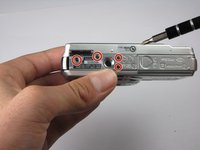
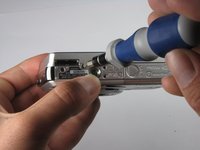
      • Replace hatch and rotate camera 180 degrees. You should still be looking at the bottom of the camera.

      • Remove the four 2.5mm Phillips #0 screws.

      Спросите у FixBot

      Добавить комментарий

    2. Sony Cyber-shot DSC-W290 Flash Bulb Replacement: шаг 4, изображение 1 из 3 Sony Cyber-shot DSC-W290 Flash Bulb Replacement: шаг 4, изображение 2 из 3 Sony Cyber-shot DSC-W290 Flash Bulb Replacement: шаг 4, изображение 3 из 3
      Инструмент, используемый на этом этапе:
      Tweezers
      $4.99
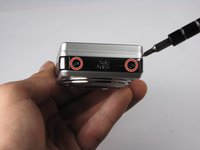
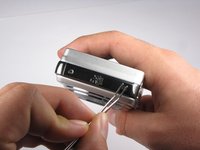
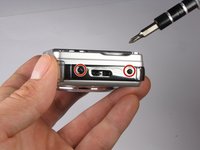
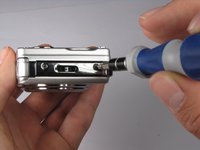
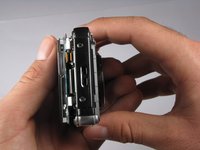
      • Turn the camera so the left side-panel reading "5x Optical Zoom" faces you.

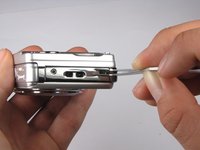
      • Remove the two 2.5mm Phillips #0 screws.

      • You may have to remove the screws with a pair of tweezers when the screws are almost out.

      Спросите у FixBot

      Добавить комментарий

    3. Sony Cyber-shot DSC-W290 Flash Bulb Replacement: шаг 5, изображение 1 из 3 Sony Cyber-shot DSC-W290 Flash Bulb Replacement: шаг 5, изображение 2 из 3 Sony Cyber-shot DSC-W290 Flash Bulb Replacement: шаг 5, изображение 3 из 3
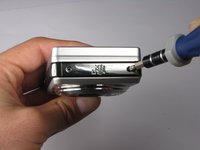
      • Turn the camera so the right side faces you.

      • Remove the two 2.5mm Phillips #0 screws.

      • You may have to remove the screws with a pair of tweezers when the screws are almost out.

      Спросите у FixBot

      Добавить комментарий

    4. Sony Cyber-shot DSC-W290 Flash Bulb Replacement: шаг 6, изображение 1 из 1
      • Rotate camera so that the back is facing you.

      • Pull the back casing directly away from the LCD screen.

      Спросите у FixBot

      Добавить комментарий

    5. Sony Cyber-shot DSC-W290 Flash Bulb Replacement: шаг 7, изображение 1 из 2 Sony Cyber-shot DSC-W290 Flash Bulb Replacement: шаг 7, изображение 2 из 2
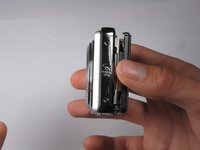
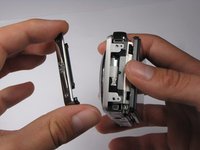
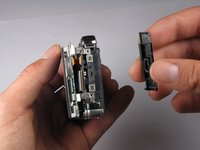
      • Turn the camera so that the left side is facing you.

      • Pull the left side-panel off of the camera.

      Спросите у FixBot

      Добавить комментарий

    6. Sony Cyber-shot DSC-W290 Flash Bulb Replacement: шаг 8, изображение 1 из 2 Sony Cyber-shot DSC-W290 Flash Bulb Replacement: шаг 8, изображение 2 из 2
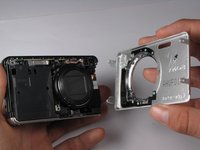
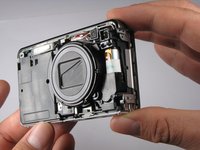
      • Turn camera so that the front of the camera is facing you.

      • Pull the front casing directly away from the camera.

      • The right side panel may fall off when you take the front panel off.

      Спросите у FixBot

      Добавить комментарий

    7. Sony Cyber-shot DSC-W290 Flash Bulb Replacement: шаг 9, изображение 1 из 2 Sony Cyber-shot DSC-W290 Flash Bulb Replacement: шаг 9, изображение 2 из 2
      • Turn the camera so that the right side is facing you.

      • Pull the right side-panel away from the rest of the camera.

      Спросите у FixBot

      Добавить комментарий

    8. Sony Cyber-shot DSC-W290 Flash Bulb Replacement: шаг 10, изображение 1 из 2 Sony Cyber-shot DSC-W290 Flash Bulb Replacement: шаг 10, изображение 2 из 2
      • This is what your camera should look like now that you have removed the casing from all sides.

      Спросите у FixBot

      Добавить комментарий

    1. Sony Cyber-shot DSC-W290 Flash Bulb Replacement, LCD Assembly: шаг 11, изображение 1 из 1
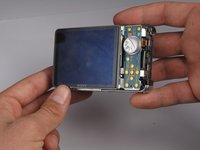
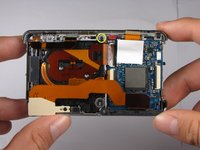
      • Gently pull the LCD and its casing away from the motherboard as shown.

      • Be careful not to rip out any ribbon cables.

      Спросите у FixBot

      Добавить комментарий

    2. Sony Cyber-shot DSC-W290 Flash Bulb Replacement: шаг 12, изображение 1 из 2 Sony Cyber-shot DSC-W290 Flash Bulb Replacement: шаг 12, изображение 2 из 2
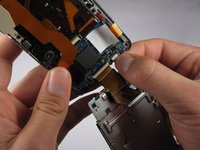
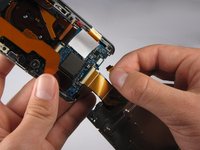
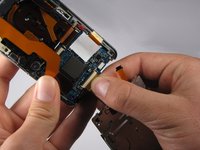
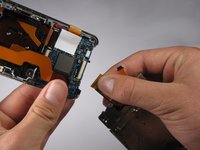
      • Disconnect the small ribbon-wire by gently pulling on the small ribbon-wire where it connects with the motherboard.

      • Do not use excessive force to remove the wire because this may cause it to tear.

      Спросите у FixBot

      Добавить комментарий

    3. Sony Cyber-shot DSC-W290 Flash Bulb Replacement: шаг 13, изображение 1 из 2 Sony Cyber-shot DSC-W290 Flash Bulb Replacement: шаг 13, изображение 2 из 2
      • Disconnect the large ribbon-wire by pulling on the large ribbon-wire where it connects to the motherboard.

      Спросите у FixBot

      Добавить комментарий

    4. Sony Cyber-shot DSC-W290 Flash Bulb Replacement: шаг 14, изображение 1 из 1
      • Pull the LCD and its casing away from the rest of the camera.

      Спросите у FixBot

      Добавить комментарий

    1. Sony Cyber-shot DSC-W290 Flash Bulb Replacement, Flash Bulb Assembly: шаг 15, изображение 1 из 2 Sony Cyber-shot DSC-W290 Flash Bulb Replacement, Flash Bulb Assembly: шаг 15, изображение 2 из 2
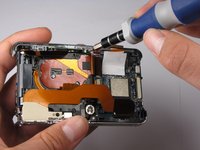
      • Turn the camera so the back is facing you.

      • Remove the 2.5mm Philips #0 screw at the top of the camera.

      Спросите у FixBot

      Добавить комментарий

    2. Sony Cyber-shot DSC-W290 Flash Bulb Replacement: шаг 16, изображение 1 из 3 Sony Cyber-shot DSC-W290 Flash Bulb Replacement: шаг 16, изображение 2 из 3 Sony Cyber-shot DSC-W290 Flash Bulb Replacement: шаг 16, изображение 3 из 3
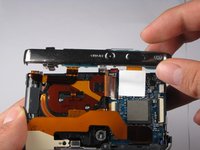
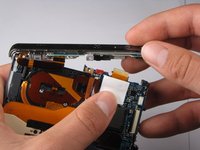
      • Tilt top casing up and towards you.

      • Carefully remove the right ribbon-wire from the top camera panel by pulling where the wire connects to the top.

      • Make sure to hold the camera with your thumb on the white square to ensure the ribbon-wire is not disconnected from the motherboard.

      • Carefully remove the left ribbon-wire from the top camera panel by pulling where the wire connects to the top.

      Спросите у FixBot

      Добавить комментарий

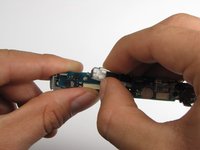
    1. Sony Cyber-shot DSC-W290 Flash Bulb Replacement, Flash Bulb: шаг 17, изображение 1 из 3 Sony Cyber-shot DSC-W290 Flash Bulb Replacement, Flash Bulb: шаг 17, изображение 2 из 3 Sony Cyber-shot DSC-W290 Flash Bulb Replacement, Flash Bulb: шаг 17, изображение 3 из 3
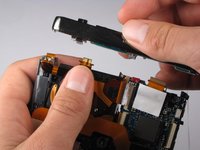
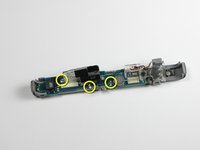
      • Pull the top of the camera off and turn it so the bottom is facing you.

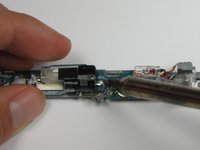
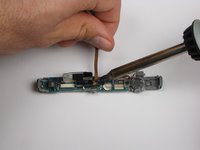
      • Desolder the three connections from the bulb to the small circuit board.

      • Remove the excess solder using your soldering iron and desoldering wick.

      Спросите у FixBot

      Добавить комментарий

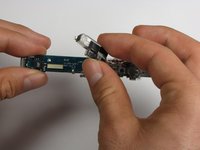
    2. Sony Cyber-shot DSC-W290 Flash Bulb Replacement: шаг 18, изображение 1 из 2 Sony Cyber-shot DSC-W290 Flash Bulb Replacement: шаг 18, изображение 2 из 2
      • Gently wiggle the flash bulb to remove it from the joints.

      • It may be necessary to use the soldering iron to heat up the joints as you pull it off.

      Спросите у FixBot

      Добавить комментарий

Заключение

To reassemble your device, follow these instructions in reverse order.

Отменить: Я не выполнил это руководство.

William Schill

Участник с: 10/04/10

225 Репутация

Автор 3 руководств

Команда

Cal Poly, Team 7-54, Amido Fall 2010 Участник Cal Poly, Team 7-54, Amido Fall 2010

CPSU-AMIDO-F10S7G54

4 членов

Автор 64 руководств

0 Комментарии к руководству

Добавить комментарий

Статистика просмотров:

За последние 24 часов: 1

За последние 7 дней: 12

За последние 30 дней: 48

За всё время: 7,714