Перейти к основному содержанию

Sony DVP-FX730 Screen Replacement

Выберете то, что вам нужно

  1. Sony DVP-FX730 Screen Replacement, Monitor: шаг 1, изображение 1 из 2 Sony DVP-FX730 Screen Replacement, Monitor: шаг 1, изображение 2 из 2
    • Use your hand to remove the small back cover by gently pulling upward.

  2. Sony DVP-FX730 Screen Replacement: шаг 2, изображение 1 из 1
    • Using a screwdriver, remove the two 12 mm pan head screws.

  3. Sony DVP-FX730 Screen Replacement: шаг 3, изображение 1 из 1
    • The screen should now detach from the primary device.

    • The wires, indicated with a blue box, will still connect the screen.

  4. Sony DVP-FX730 Screen Replacement: шаг 4, изображение 1 из 2 Sony DVP-FX730 Screen Replacement: шаг 4, изображение 2 из 2
    • Remove the wires attached to the white base using tweezers to pull them up.

  5. Sony DVP-FX730 Screen Replacement: шаг 5, изображение 1 из 2 Sony DVP-FX730 Screen Replacement: шаг 5, изображение 2 из 2
    • Referring back to Step 8, do the same with the wires attached to the black base.

  6. Sony DVP-FX730 Screen Replacement: шаг 6, изображение 1 из 1
    • The screen should now be completely separated from the main device.

  7. Sony DVP-FX730 Screen Replacement, Screen: шаг 7, изображение 1 из 1
    • Remove the four rubber feet and the screws beneath.

    • Remove the two exposed screws on the left side.

    • Pull back the cables until the screw is visible.

  8. Sony DVP-FX730 Screen Replacement: шаг 8, изображение 1 из 1
    • Using the spudger, separate the top and bottom covers.

  9. Sony DVP-FX730 Screen Replacement: шаг 9, изображение 1 из 1
    • Identify the gray back of the screen.

  10. Sony DVP-FX730 Screen Replacement: шаг 10, изображение 1 из 1
    • Remove the screws.

  11. Sony DVP-FX730 Screen Replacement: шаг 11, изображение 1 из 1
    • Remove the metal plates.

  12. Sony DVP-FX730 Screen Replacement: шаг 12, изображение 1 из 2 Sony DVP-FX730 Screen Replacement: шаг 12, изображение 2 из 2
    • Using spudger, push the lock clips to unlock the ribbon cable.

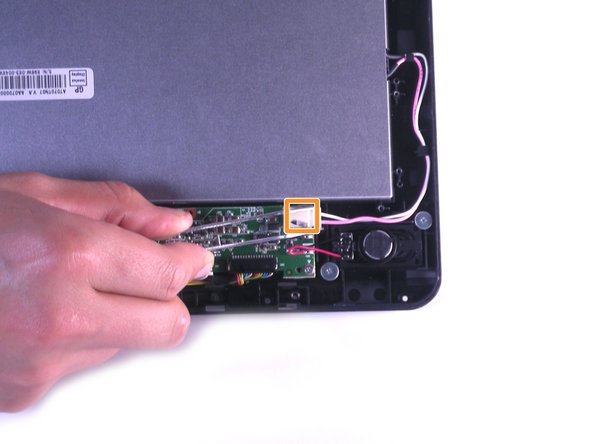
    • Using tweezers, pull the connector loose.

  13. Sony DVP-FX730 Screen Replacement: шаг 13, изображение 1 из 2 Sony DVP-FX730 Screen Replacement: шаг 13, изображение 2 из 2
    • Place your hand on the front of the screen and push upwards.

Заключение

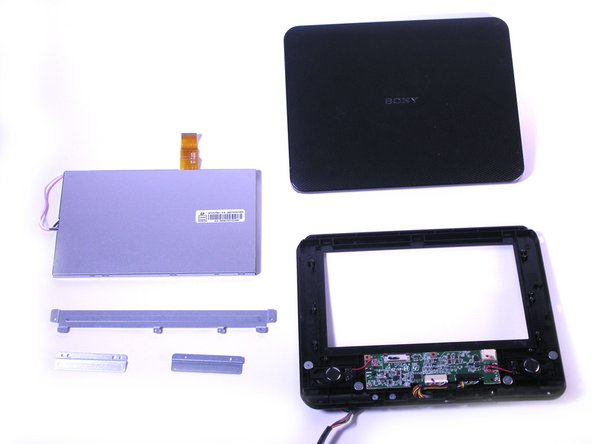
To reassemble your device, follow these instructions in reverse order.

2 участников успешно повторили данное руководство.

Oliver Woolsoncroft

Участник с: 01/20/12

78 Репутация

Автор 2 руководств

Команда

Cal Poly, Team 11-21, Maness Winter 2012 Участник Cal Poly, Team 11-21, Maness Winter 2012

CPSU-MANESS-W12S11G21

4 членов

Автор 5 руководств

0 Комментариев

Добавить комментарий

Просмотр статистики:

За последние 24часов: 0

За последние 7 дней: 5

За последние 30 дней: 17

За всё время: 2,714