Эта версия возможно содержит некорректные исправления. Переключить на последнюю проверенную версию.
Выберете то, что вам нужно
-
Этот шаг не переведен. Помогите перевести
-
Detach the back cover from the e-reader
-
Remove the black sticker, uncovering three additional screws. The sticker comes loose quite easy.
-
Unscrew all 10 screws (length 3.2mm).
-
Now take a spudger, and start opening the case at the top. There are four retaining clips at each side.
-
-
Этот шаг не переведен. Помогите перевести
-
Unscrew these 5 screws (length 4.3mm) . They hold the front bezel (white or black part of the main body).
-
There are other screws that hold the motherboard (10×, 1.8mm) to the grey back plate. You do not need to remove them, unless you want to remove the electronics board (for example to prevent damage when cleaning the back plate in a later step).
-
-
Этот шаг не переведен. Помогите перевести
-
Carefully unplug buses. For the screen bus. Simple pull it from connector. For the hard keys bus . First, open the connector by hook it from below. Then it'll be easy to unplug the bus.
-
-
-
Этот шаг не переведен. Помогите перевести
-
Now we need to remove a white cover. It helds by clips around the body. Please, pay attention to hooks in red ellipses on the photo. On the second photo you may see detached white cover.
-
-
Этот шаг не переведен. Помогите перевести
-
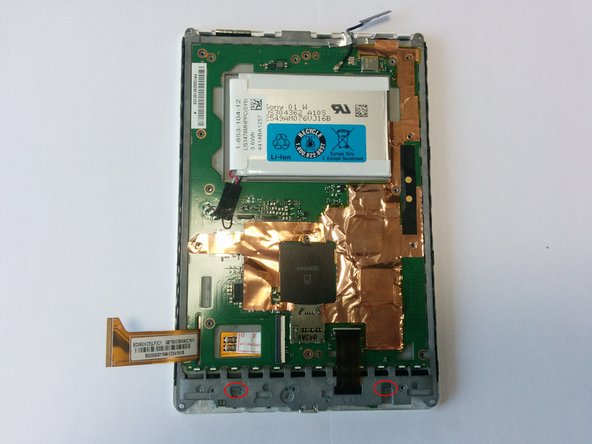
Unscrew screws marked by red cicles.
-
Carefully unplug a bus
-
Be careful, do not lose this tiny thing!
-
Remove black frame. It's attached to the screen by double sided tape
-
-
Этот шаг не переведен. Помогите перевести
-
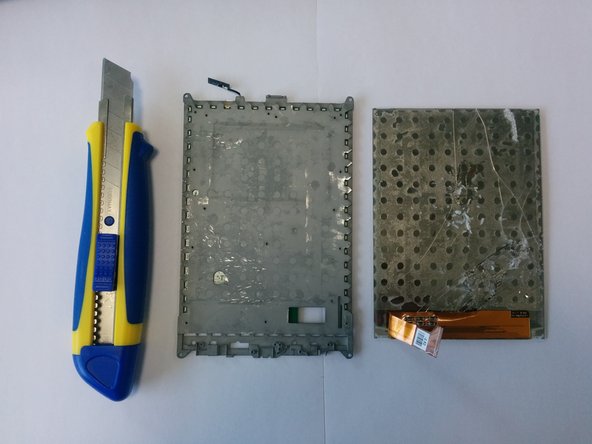
Use any suitable knife to detach broken screen from metal plate. Please, be very careful. Do not hurt yourself!
-
After you did this. You need to clean metal plate from the remnants of glue and double sided tape.
-
-
Этот шаг не переведен. Помогите перевести
-
Take a new screen. Apply double sided tape on back side.
-
Remove protective film from the screen
-
Put the screen into the black frame. Upper side of the screen should touch upper side of the frame.
-
-
Этот шаг не переведен. Помогите перевести
-
Carefully join the screen in a black frame with the metal plate.
-
Continue assembling in a reverse order
-


Отменить: Я не выполнил это руководство.
8 участников успешно повторили данное руководство.
18 Комментариев
This an incredibly useful guide. I have the new screen, but I have asked and have not gotten an answer about what double-sided tape is used to attach the new screen to the body. Could someone supply this information pleasae.
You may use any double-sided tape you'll find in a shop. I used a 0.5 mm tape or thinner. I found it in a Stationary shop.
mrdkonst -
Is the ED060XC5(LF)C1 screen, the same quality and matte as the original one? I don't trust asian sellers so much, but the only one that I found on internet is this one.
In my case it has the same quality. I bought it on Aliexpress also.
mrdkonst -
After installing replacement screen the touch functionallity does not work, screen itself seems to work but you cannot make any touch selections, does anyone has an idea?