Перейти к основному содержанию

Sony SRS-XB10 circuit board removal

Выберете то, что вам нужно

  1. Sony SRS-XB10 circuit board removal, Remove the plastic covering: шаг 1, изображение 1 из 3 Sony SRS-XB10 circuit board removal, Remove the plastic covering: шаг 1, изображение 2 из 3 Sony SRS-XB10 circuit board removal, Remove the plastic covering: шаг 1, изображение 3 из 3
    • Turn the speaker upside down.

    • On the underside, you'll find a layer of flexible black plastic. Peel this off. You may encounter a layer of white paste underneath.

  2. Sony SRS-XB10 circuit board removal, Remove the base: шаг 2, изображение 1 из 3 Sony SRS-XB10 circuit board removal, Remove the base: шаг 2, изображение 2 из 3 Sony SRS-XB10 circuit board removal, Remove the base: шаг 2, изображение 3 из 3
    • Remove four 8mm Phillips #1 screws from the base.

    • Grip the base by the vents and lift it off.

  3. Sony SRS-XB10 circuit board removal, Unscrew the board assembly: шаг 3, изображение 1 из 2 Sony SRS-XB10 circuit board removal, Unscrew the board assembly: шаг 3, изображение 2 из 2
    • Remove three 8mm Phillips #1 screws.

  4. Sony SRS-XB10 circuit board removal, Unplug the top cables: шаг 4, изображение 1 из 3 Sony SRS-XB10 circuit board removal, Unplug the top cables: шаг 4, изображение 2 из 3 Sony SRS-XB10 circuit board removal, Unplug the top cables: шаг 4, изображение 3 из 3
    • Remove the three plugs from the circuit board.

  5. Sony SRS-XB10 circuit board removal, Lift out the board assembly: шаг 5, изображение 1 из 2 Sony SRS-XB10 circuit board removal, Lift out the board assembly: шаг 5, изображение 2 из 2
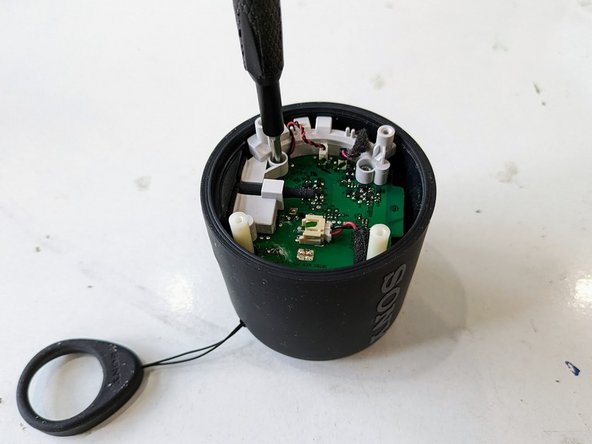
    • The circuit board is very tightly fitted inside the casing. The easiest way to remove it is to squeeze between the white plastic cylinders attached to the circuit board and the opposite side of the casing (as shown in the first picture). This will allow you to start angling the board.

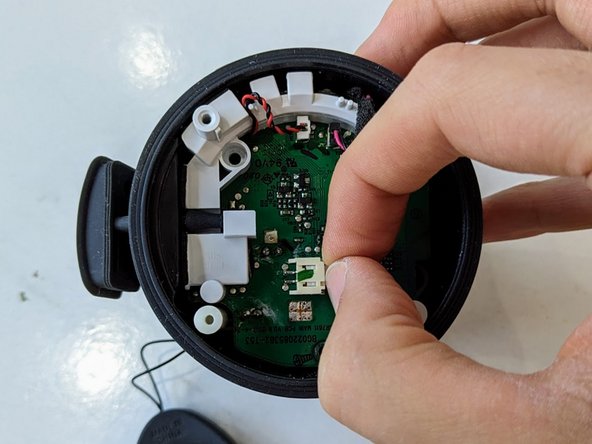
    • As the board starts to lift out, it can catch on the inside of the casing. At this point, it can be helpful to squeeze the casing, with your thumb next to the ports (see second picture), to free the board.

    • On the underside of the board is a fourth plug, so when the board does come loose try not to pull it away too quickly to avoid damaging that cable.

  6. Sony SRS-XB10 circuit board removal, Unplug the underside cable: шаг 6, изображение 1 из 1
    • Disconnect the cable plugged in to the underside of the board.

  7. Sony SRS-XB10 circuit board removal, Remove the plastic component cover: шаг 7, изображение 1 из 3 Sony SRS-XB10 circuit board removal, Remove the plastic component cover: шаг 7, изображение 2 из 3 Sony SRS-XB10 circuit board removal, Remove the plastic component cover: шаг 7, изображение 3 из 3
    • Undo the two 8mm Phillips #1 screws on the underside of the circuit board.

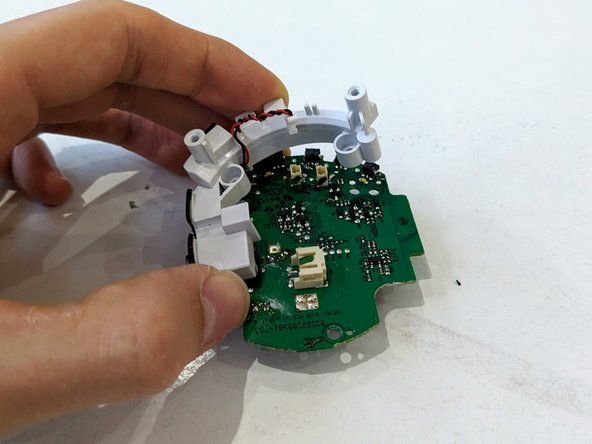
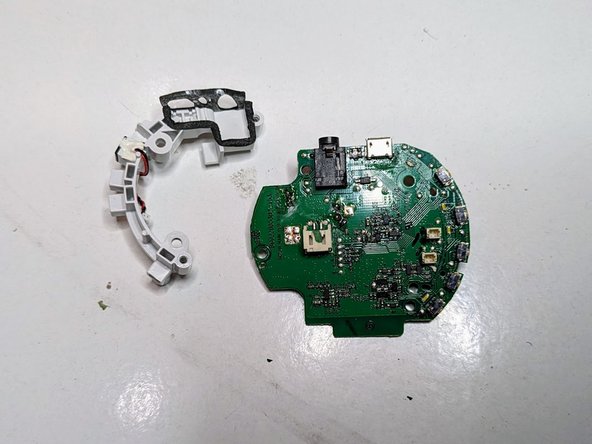
    • Lift the white plastic component cover off the circuit board.

    • The USB and audio ports are surrounded by a black sticky-back layer. Peel this layer off carefully, as you'll want to stick it back down in one piece when reassembling.

Заключение

To reassemble your device, follow these instructions in reverse order.

Harry Cutts

Участник с: 06/14/20

847 Репутация

Автор 6 руководств

0 Комментариев

Добавить комментарий

Просмотр статистики:

За последние 24часов: 1

За последние 7 дней: 4

За последние 30 дней: 49

За всё время: 379