Введение
If your computer in running slow it may be due to a hard drive error. This guide will show you how to replace the hard drive in your Sony Vaio PCG-16L.
Выберете то, что вам нужно
-
-
Turn your device upside down and remove the 6 10mm screws attaching the back casing to the device using a phillips head screwdriver.
-
-
-
Lift up underneath the keyboard using the iFixit opening tool to expose the ribbon wires connecting the keyboard to the motherboard.
-
-
-
Use a plastic opening tool or your fingernail to flip up the small retaining flaps, then pull the ribbon cables out of their connectors.
-
-
-
Remove the three 10 mm screws holding the casing to the top of the motherboard using a Phillips screwdriver.
-
-
-
-
Remove the 6 mm screw on the left side of the battery that holds the casing to the device using a phillips head screwdriver.
-
-
-
Turn the device upside down and remove the other 6 mm screw holding the casing to the device using a phillips head screwdriver.
-
-
-
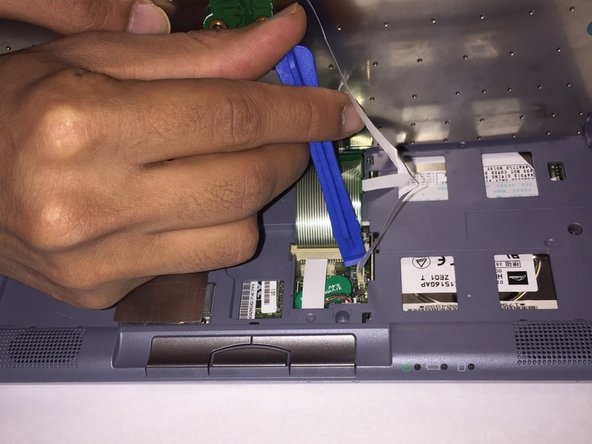
The ribbon cable covering the hard drive and connecting to the motherboard is held in using zero insertion force (ZIF) connector.
-
Use the tip of a spudger or your fingernail to flip up the small retaining flaps, then pull the ribbon cable out.
-
-
-
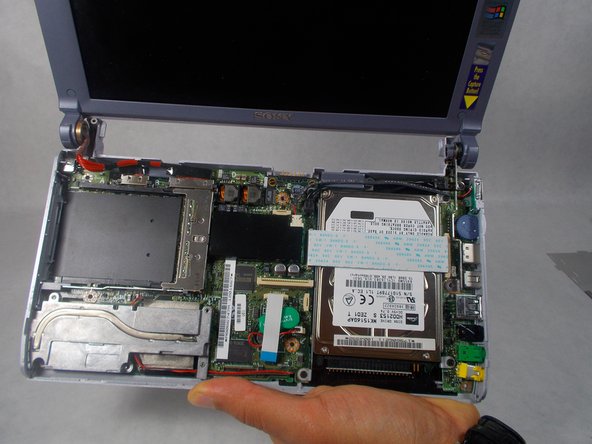
Remove the ribbon cable connecting the motherboard to the hard drive by pulling the female connector off of the pins attached the hard drive.
-


To reassemble your device, follow these instructions in reverse order.
To reassemble your device, follow these instructions in reverse order.
Отменить: Я не выполнил это руководство.
Еще один человек закончил это руководство.
Команда

UMass Dartmouth, Team S3-G2, Botvin Spring 2017 Участник UMass Dartmouth, Team S3-G2, Botvin Spring 2017
UMASSD-BOTVIN-S17S3G2
3 членов
Автор 8 руководств