Перейти к основному содержанию

Sony Vaio PCG-161L Speakers Replacement

Выберете то, что вам нужно

  1. Sony Vaio PCG-161L Speakers Replacement, Keyboard: шаг 1, изображение 1 из 1
    • Turn your device upside down and remove the 6 10mm screws attaching the back casing to the device using a phillips head screwdriver.

  2. Sony Vaio PCG-161L Speakers Replacement: шаг 2, изображение 1 из 2 Sony Vaio PCG-161L Speakers Replacement: шаг 2, изображение 2 из 2
    • Lift up underneath the keyboard using the iFixit opening tool to expose the ribbon wires connecting the keyboard to the motherboard.

  3. Sony Vaio PCG-161L Speakers Replacement: шаг 3, изображение 1 из 2 Sony Vaio PCG-161L Speakers Replacement: шаг 3, изображение 2 из 2
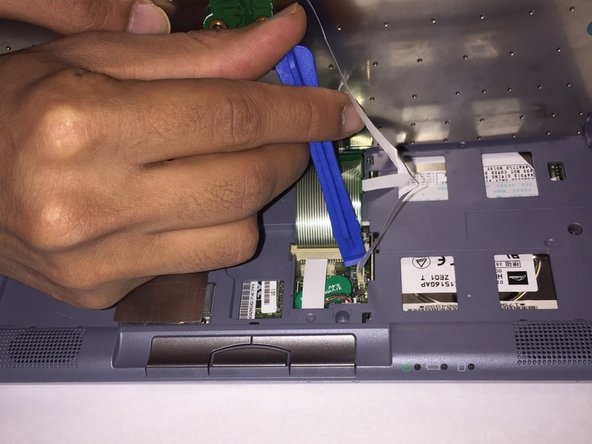
    • The two ribbon cables connecting the keyboard to the motherboard are held in using zero insertion force (ZIF) connectors.

    • Use a plastic opening tool or your fingernail to flip up the small retaining flaps, then pull the ribbon cables out of their connectors.

  4. Sony Vaio PCG-161L Speakers Replacement, Speakers: шаг 4, изображение 1 из 1
    • Remove the three 10 mm screws holding the casing to the top of the motherboard using a Phillips screwdriver.

  5. Sony Vaio PCG-161L Speakers Replacement: шаг 5, изображение 1 из 1
    • Remove the 6 mm Phillips #0 screw on the left side of the battery that holds the casing to the device.

  6. Sony Vaio PCG-161L Speakers Replacement: шаг 6, изображение 1 из 1
    • Turn the device upside down and remove the 6 mm Phillips #0 screw holding the casing to the device.

  7. Sony Vaio PCG-161L Speakers Replacement: шаг 7, изображение 1 из 1
    • Remove the top casing by lifting up on the plastic exposing the two speakers.

  8. Sony Vaio PCG-161L Speakers Replacement: шаг 8, изображение 1 из 1
    • Remove the two 4 mm screws attaching the broken speaker to the casing.

    • Each speaker has two 4mm screws holding it to the casing. If you are removing both speakers, remove all four screws.

  9. Sony Vaio PCG-161L Speakers Replacement: шаг 9, изображение 1 из 1
    • Disconnect the wire from the board by pulling the wire out of the harness.

    • These harnesses do not have any clips or tabs. Simply pull on the wire and it will come out of the harness.

Заключение

To reassemble your device, follow these instructions in reverse order.

Еще один человек закончил это руководство.

Roman Alshehri

Участник с: 03/08/17

407 Репутация

Автор 4 руководств

Команда

UMass Dartmouth, Team S3-G2, Botvin Spring 2017 Участник UMass Dartmouth, Team S3-G2, Botvin Spring 2017

UMASSD-BOTVIN-S17S3G2

3 членов

Автор 8 руководств

0 Комментариев

Добавить комментарий

Просмотр статистики:

За последние 24часов: 0

За последние 7 дней: 3

За последние 30 дней: 4

За всё время: 286