Перейти к основному содержанию

Sony Vaio VGN-NW240F (PCG-7184L) Network Card Replacement

Выберете то, что вам нужно

  1. Sony Vaio VGN-NW240F (PCG-7184L) Network Card Replacement, Battery: шаг 1, изображение 1 из 1
    • Power off the laptop.

    • Unplug the charging cable and any other cables plugged into the laptop.

    • Failure to remove or unplug any cables could result in electric shock.

    • Turn the laptop over so that the back panel is facing upwards.

  2. Sony Vaio VGN-NW240F (PCG-7184L) Network Card Replacement: шаг 2, изображение 1 из 1
    • Locate two switches above the battery that lock it into place.

    • Push the left-hand switch, that says "lock" above it, so that it is unlocked.

  3. Sony Vaio VGN-NW240F (PCG-7184L) Network Card Replacement: шаг 3, изображение 1 из 1
    • Push and hold the right-hand switch, which says "release" above it, and lift the battery up out of its place.

  4. Sony Vaio VGN-NW240F (PCG-7184L) Network Card Replacement, Optical Drive: шаг 4, изображение 1 из 1
    • Locate and unscrew the two highlighted 8 mm Phillips #1 screws.

    • There will be three dots next to the desired screws

  5. Sony Vaio VGN-NW240F (PCG-7184L) Network Card Replacement: шаг 5, изображение 1 из 1
    • Grip the cover of the optical drive and slide it out.

    • If it does not come out, do not force it. Double check to make sure the screws are entirely removed.

  6. Sony Vaio VGN-NW240F (PCG-7184L) Network Card Replacement, Back Panel: шаг 6, изображение 1 из 3 Sony Vaio VGN-NW240F (PCG-7184L) Network Card Replacement, Back Panel: шаг 6, изображение 2 из 3 Sony Vaio VGN-NW240F (PCG-7184L) Network Card Replacement, Back Panel: шаг 6, изображение 3 из 3
    • Remove all the 8mm Phillips #1 screws on the backside of the laptop.

    • There are three 3mm and two 5.3mm screws under the battery that also need to be taken out.

    • There are three 3mm screws under the optical drives that also need to be taken out.

    • Remove the RAM panel in addition to the other screws. For further instructions, refer to the RAM replacement guide.

  7. Sony Vaio VGN-NW240F (PCG-7184L) Network Card Replacement: шаг 7, изображение 1 из 3 Sony Vaio VGN-NW240F (PCG-7184L) Network Card Replacement: шаг 7, изображение 2 из 3 Sony Vaio VGN-NW240F (PCG-7184L) Network Card Replacement: шаг 7, изображение 3 из 3
    • Pry along the edges of the back panel using the spudger.

    • If you are struggling to remove the back panel with a moderate amount of force, do NOT apply any additional force, instead double check to make sure all the screws were removed before attempting again.

  8. Sony Vaio VGN-NW240F (PCG-7184L) Network Card Replacement, Network Card: шаг 8, изображение 1 из 1
    • Pull the two cables off of the network card.

    • Make sure to pull the cables straight up as the connectors are fragile.

  9. Sony Vaio VGN-NW240F (PCG-7184L) Network Card Replacement: шаг 9, изображение 1 из 1
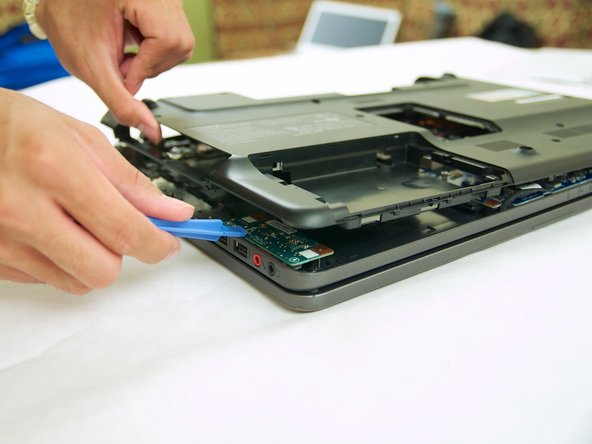
    • Remove the two Phillips 5.3mm screws from the network card.

    • After the screws are released, the network chip should lift up at an angle.

    • Gently pull out the network card.

Заключение

To reassemble your device, follow these instructions in reverse order.

Еще один человек закончил это руководство.

Sid

Участник с: 05/18/14

311 Репутация

Автор 2 руководств

Команда

Cal Poly, Team 9-17, Regan Spring 2014 Участник Cal Poly, Team 9-17, Regan Spring 2014

CPSU-REGAN-S14S9G17

4 членов

Автор 18 руководств

0 Комментариев

Добавить комментарий

Просмотр статистики:

За последние 24часов: 0

За последние 7 дней: 2

За последние 30 дней: 15

За всё время: 2,209