Введение
This guide will show you how to locate and remove the fan inside a Sony Vaio SVE111B11L laptop.
The fan is the laptop’s cooling system, a crucial component to any computer. Laptops especially need proper cooling, and an overheated computer can cause slowdowns, shutdowns, or even long term damage. Laptop fans tend to collect dust that hinders performance, and may occasionally need to be removed and cleaned.
Disconnect the laptop from any external power source and remove the battery pack before disassembly.
Выберете то, что вам нужно
-
-
Locate the battery on the bottom of the computer.
-
Flip the computer so that the battery faces you.
-
-
-
Remove the memory door on the bottom of the computer to access the screw for the keyboard.
-
-
-
-
Slide the wires out, away from the solder connections.
-
Flip the computer over and open it.
-
-
-
Gently pry the keyboard assembly from the screen side, using an opening tool. You will need to lift the keyboard about two inches.
-
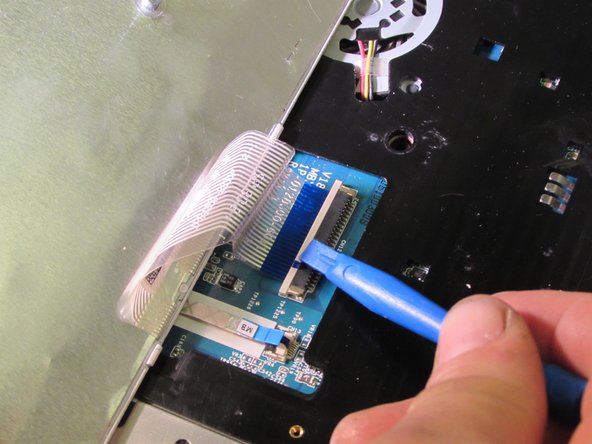
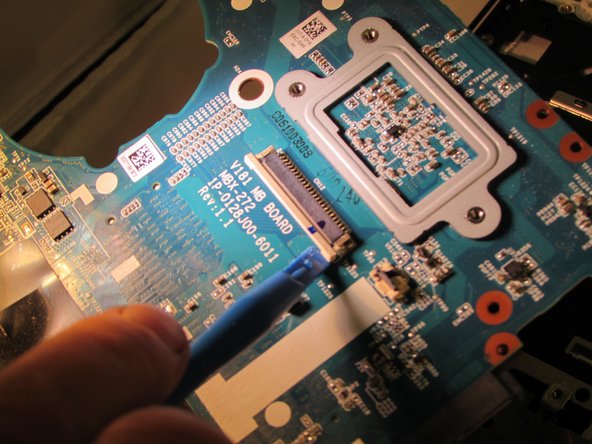
Using an opening tool, gently pull out and slightly up on the connector clip.
-
Gently lift the keyboard assembly up and out.
-
To reassemble your device, follow these instructions in reverse order.
To reassemble your device, follow these instructions in reverse order.
Отменить: Я не выполнил это руководство.
Еще один человек закончил это руководство.
Один комментарий
There are missing steps. For example - after removing keyboard assembly, there are 4 screws under it.
Keyboard assembly is not ment to be removed in way showed in pictures. There are melted plastic tabs to keep top cover in place. By prying that, you will broke them and top cover will not be possible to put back as before.
Only keyboard itself should be removed by prying it out, starting from bottom (thoucpad). Top of keyboard has larger “ears“ and they are hooked under top cover.


