Перейти к основному содержанию

Sony Vaio Tap 11 Wifi Module Replacement

Выберете то, что вам нужно

  1. Sony Vaio Tap 11 Wifi Module Replacement, Screen Assembly: шаг 1, изображение 1 из 1
    • Begin by opening the HDMI/USB port cover on the left edge.

    • Remove the three #000 headed, 3 mm long screws located underneath the port cover.

  2. Sony Vaio Tap 11 Wifi Module Replacement: шаг 2, изображение 1 из 1
    • Locate and open the Micro SD slot on the top side of the device.

    • Remove the two screws located beneath the cover.

  3. Sony Vaio Tap 11 Wifi Module Replacement: шаг 3, изображение 1 из 2 Sony Vaio Tap 11 Wifi Module Replacement: шаг 3, изображение 2 из 2
    • Attach the suction cup to the top right area of the screen.

    • Pull to separate the screen from the rest of the device.

    • Be aware of the front camera cable that is still connected to the rest of the device.

    • Detach the display ribbon cable.

  4. Sony Vaio Tap 11 Wifi Module Replacement, Solid State Disk: шаг 4, изображение 1 из 1
    • Unplug the battery connector located beside the fan.

    • Locate the SSD on the right side of the device, above the battery and beneath the WiFi chip.

  5. Sony Vaio Tap 11 Wifi Module Replacement: шаг 5, изображение 1 из 1
    • Remove the two 3 mm Phillips #000 screws from the right edge of the SSD.

  6. Sony Vaio Tap 11 Wifi Module Replacement: шаг 6, изображение 1 из 2 Sony Vaio Tap 11 Wifi Module Replacement: шаг 6, изображение 2 из 2
    • Pull the SSD towards the right and slightly up, removing it from the back assembly.

  7. Sony Vaio Tap 11 Wifi Module Replacement, Wifi Module: шаг 7, изображение 1 из 3 Sony Vaio Tap 11 Wifi Module Replacement, Wifi Module: шаг 7, изображение 2 из 3 Sony Vaio Tap 11 Wifi Module Replacement, Wifi Module: шаг 7, изображение 3 из 3
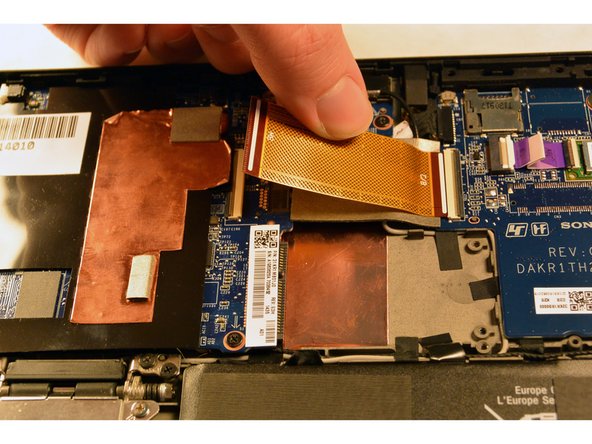
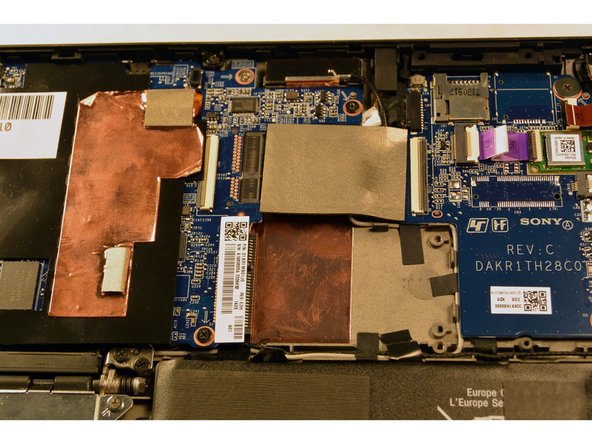
    • Begin by removing the orange ribbon cable connecting the motherboard to the daughterboard, located above the SSD.

    • Gently tug either side until it releases, then pull out the other end.

  8. Sony Vaio Tap 11 Wifi Module Replacement: шаг 8, изображение 1 из 1
    • Remove the grey foam separator that was underneath the orange ribbon cable.

  9. Sony Vaio Tap 11 Wifi Module Replacement: шаг 9, изображение 1 из 1
    • Remove the silver 3 mm Phillips screw that holds the WiFi module in place.

  10. Sony Vaio Tap 11 Wifi Module Replacement: шаг 10, изображение 1 из 1
    • Remove the black and grey antenna cables from the right side of the device.

  11. Sony Vaio Tap 11 Wifi Module Replacement: шаг 11, изображение 1 из 1
    • Remove module by gently pulling towards the right.

Заключение

To reassemble your device, follow these instructions in reverse order.

2 участников успешно повторили данное руководство.

Alexander Bridges

Участник с: 09/16/15

1 217 Репутация

Автор 7 руководств

Команда

IUPUI, Team 1-2, Harley Fall 2015 Участник IUPUI, Team 1-2, Harley Fall 2015

IUPUI-HARLEY-F15S1G2

4 членов

Автор 20 руководств

0 Комментариев

Добавить комментарий

Просмотр статистики:

За последние 24часов: 0

За последние 7 дней: 7

За последние 30 дней: 12

За всё время: 2,147