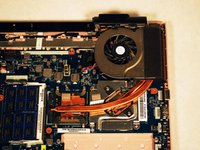
Перейти к основному содержанию

Sony Vaio VPCW21FX Fan Replacement

Архивированное руководство
Это руководство сохранено для исторических целей. Используйте его обновлённую версию, чтобы выполнить ремонт.

Выберете то, что вам нужно

  1. Sony Vaio VPCW21FX Fan Replacement, Battery: шаг 1, изображение 1 из 1
    • Make sure your device is powered off and unplugged to avoid electric shock.

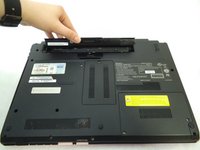
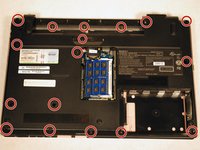
    • Place your device upside down with the bottom panel facing upwards.

    • Orient the device so the battery is away from you as shown

  2. Sony Vaio VPCW21FX Fan Replacement: шаг 2, изображение 1 из 2 Sony Vaio VPCW21FX Fan Replacement: шаг 2, изображение 2 из 2
    • Unlock the battery by sliding the lock switch to the right.

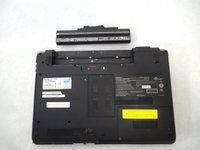
    • Locate the release latch. Slide the latch to the left to remove the battery from your laptop.

    • Be sure to lift up on the battery while you slide the latch to the left.

  3. Sony Vaio VPCW21FX Fan Replacement: шаг 3, изображение 1 из 2 Sony Vaio VPCW21FX Fan Replacement: шаг 3, изображение 2 из 2
    • Remove the battery from your laptop.

  4. Sony Vaio VPCW21FX Fan Replacement, Headphone Jack: шаг 4, изображение 1 из 2 Sony Vaio VPCW21FX Fan Replacement, Headphone Jack: шаг 4, изображение 2 из 2
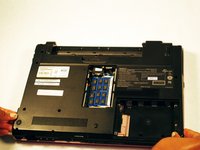
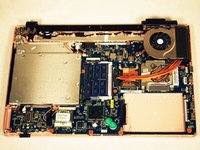
    • Place the laptop upside down with the bottom panel facing upwards.

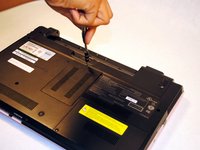
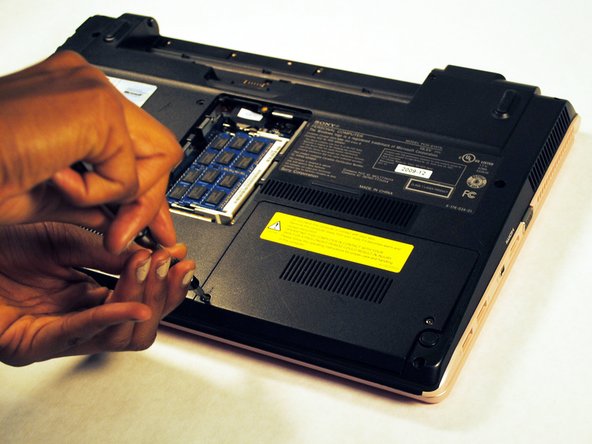
    • Locate the screw that holds the small panel covering your laptop's Ram. This panel should be in the dead center of your laptop.

    • Unscrew the screw and remove the panel.

  5. Sony Vaio VPCW21FX Fan Replacement: шаг 5, изображение 1 из 1
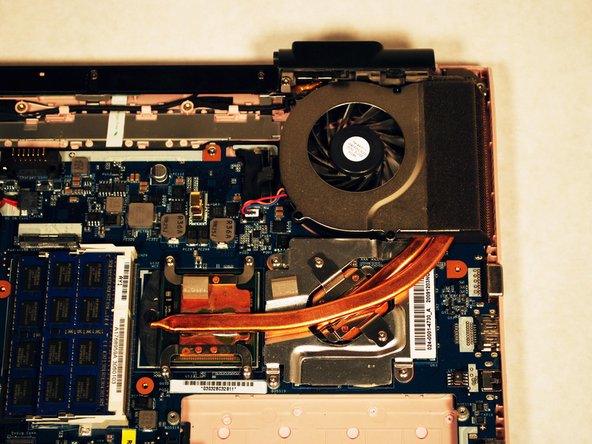
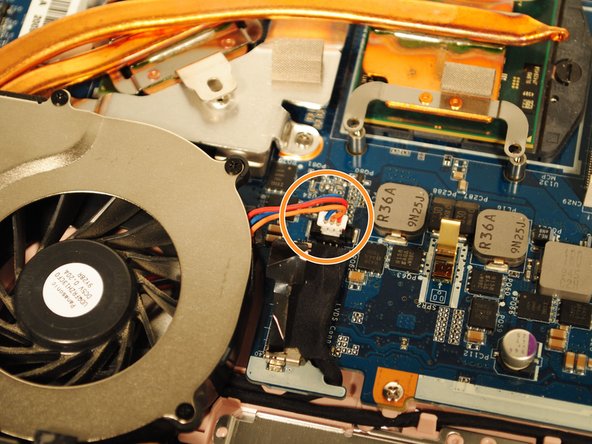
    • Before you move away from where your RAM is located, be sure to unplug the wire labeled To MB. If you do not unplug this, the back panel you are trying to remove will not come off.

  6. Sony Vaio VPCW21FX Fan Replacement: шаг 6, изображение 1 из 3 Sony Vaio VPCW21FX Fan Replacement: шаг 6, изображение 2 из 3 Sony Vaio VPCW21FX Fan Replacement: шаг 6, изображение 3 из 3
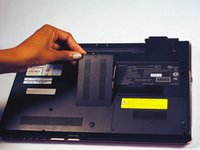
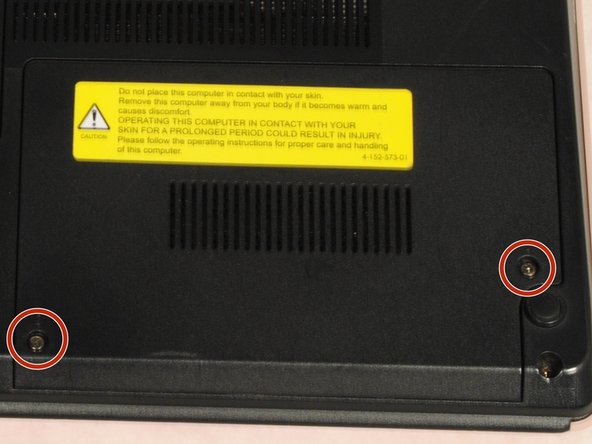
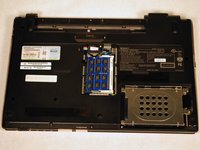
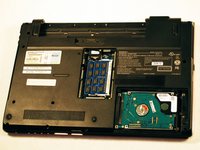
    • Next, locate the panel covering your laptop's hard drive. This panel should be located on the lower right hand side of your laptop.

    • Unscrew the cover on the hard drive.

    • Remove the hard drive cover.

  7. Sony Vaio VPCW21FX Fan Replacement: шаг 7, изображение 1 из 3 Sony Vaio VPCW21FX Fan Replacement: шаг 7, изображение 2 из 3 Sony Vaio VPCW21FX Fan Replacement: шаг 7, изображение 3 из 3
    • Remove screws.

    • Remove screws and remove panel.

  8. Sony Vaio VPCW21FX Fan Replacement: шаг 8, изображение 1 из 3 Sony Vaio VPCW21FX Fan Replacement: шаг 8, изображение 2 из 3 Sony Vaio VPCW21FX Fan Replacement: шаг 8, изображение 3 из 3
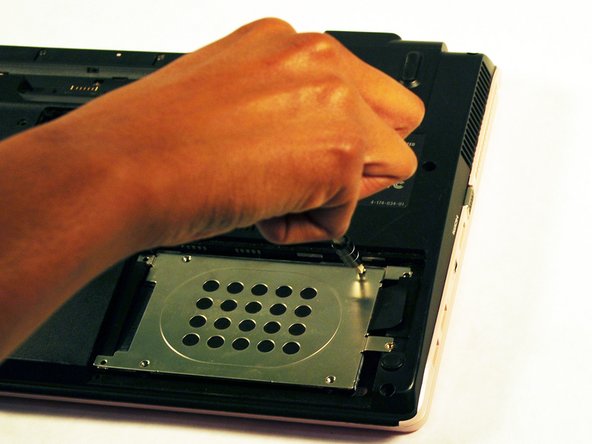
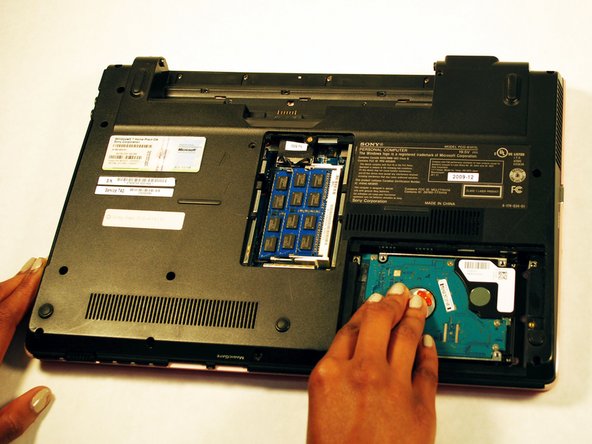
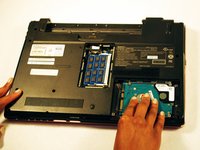
    • Remove the hard drive by gently pressing down on it and sliding it to the right.

    • Remember to have a clean work space to place the parts you take off your laptop. It'd be embarrassing to forget to reassemble a part or have a screw or two left over.

  9. Sony Vaio VPCW21FX Fan Replacement: шаг 9, изображение 1 из 3 Sony Vaio VPCW21FX Fan Replacement: шаг 9, изображение 2 из 3 Sony Vaio VPCW21FX Fan Replacement: шаг 9, изображение 3 из 3
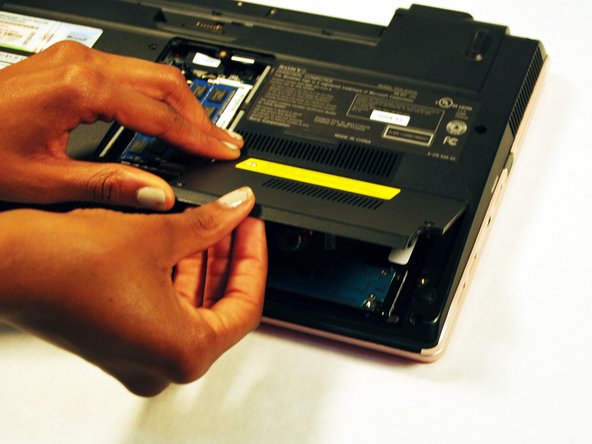
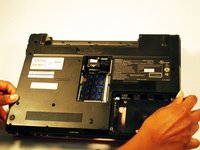
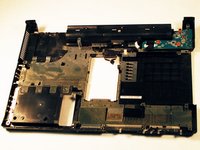
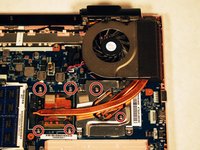
    • Remove the screws holding the rest of the outside panel down.

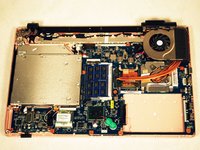
    • Gently lift the panel up to remove it once all the screws have been removed.

  10. Sony Vaio VPCW21FX Fan Replacement: шаг 10, изображение 1 из 3 Sony Vaio VPCW21FX Fan Replacement: шаг 10, изображение 2 из 3 Sony Vaio VPCW21FX Fan Replacement: шаг 10, изображение 3 из 3
    • Once the back panel has been removed, set the rest of your laptop to the side and place the panel you just removed in front of you.

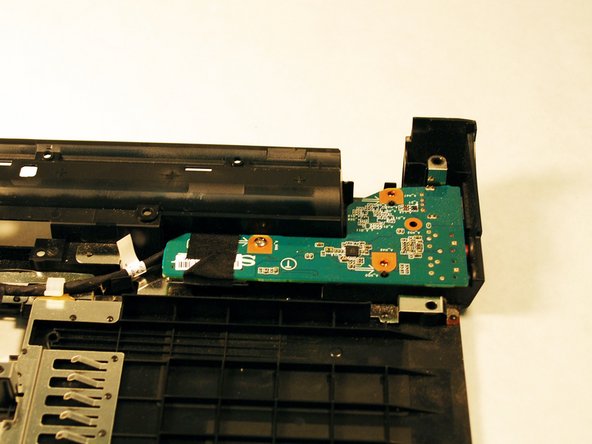
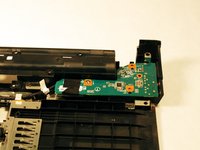
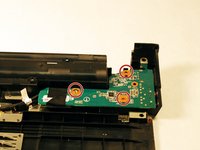
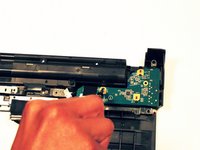
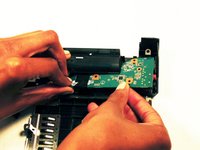
    • Locate the headphone jack, which will be in the top right hand corner of the panel. The headphone jack board is a bright green, you can't miss it.

  11. Sony Vaio VPCW21FX Fan Replacement: шаг 11, изображение 1 из 2 Sony Vaio VPCW21FX Fan Replacement: шаг 11, изображение 2 из 2
    • Remove the screws holding the headphone jack board down.

  12. Sony Vaio VPCW21FX Fan Replacement: шаг 12, изображение 1 из 2 Sony Vaio VPCW21FX Fan Replacement: шаг 12, изображение 2 из 2
    • Gently pull the board to remove it.

  13. Sony Vaio VPCW21FX Fan Replacement, Fan: шаг 13, изображение 1 из 2 Sony Vaio VPCW21FX Fan Replacement, Fan: шаг 13, изображение 2 из 2
    • Locate the fan on the top right hand corner of your laptop.

  14. Sony Vaio VPCW21FX Fan Replacement: шаг 14, изображение 1 из 2 Sony Vaio VPCW21FX Fan Replacement: шаг 14, изображение 2 из 2
    • Remove screws.

    • Unplug the wires connecting the fan and the motherboard.

  15. Sony Vaio VPCW21FX Fan Replacement: шаг 15, изображение 1 из 1
    • Gently pick up the fan to remove it.

Заключение

To reassemble your device, follow these instructions in reverse order.

Еще один человек закончил это руководство.

Summer

Участник с: 10/10/16

250 Репутация

Автор 2 руководств

Команда

Sam Houston State, Team 12-6, Blackburne Fall 2016 Участник Sam Houston State, Team 12-6, Blackburne Fall 2016

SHSU-BLACKBURNE-F16S12G6

3 членов

Автор 5 руководств

Один комментарий

Добавить комментарий

Просмотр статистики:

За последние 24часов: 1

За последние 7 дней: 2

За последние 30 дней: 14

За всё время: 1,272