Введение
This guide will take you step by step through the process of replacing your Sony Xperia L2 battery. This guide will help those who have a dead or faulty battery to extend the life of your phone. If your phone is overheating, not powering on, or not charging properly, replacing the battery may fix those problems.
Выберете то, что вам нужно
-
-
Use the plastic opening tool to pry the back case of the phone off.
-
Disconnect the fingerprint sensor.
-
-
-
-
Unscrew all 10 screws from the top and bottom portion of the phone using a T4 Torx screwdriver.
-
Use the plastic opening tool to remove the unscrewed top and bottom portion of the phone.
-
-
-
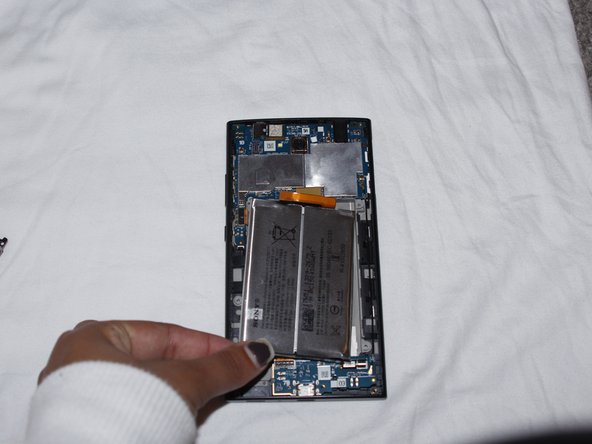
Disconnect the battery cable from the motherboard.
-
Pry up the battery and remove it from the device.
-


To reassemble your device, follow these instructions in reverse order.
To reassemble your device, follow these instructions in reverse order.
Отменить: Я не выполнил это руководство.
2 участников успешно повторили данное руководство.
Команда

University of Alabama, Team S2-G6, Bedsole Fall 2018 Участник University of Alabama, Team S2-G6, Bedsole Fall 2018
UA-BEDSOLE-F18S2G6
4 членов
Автор 5 руководств
2 Комментариев
I do not recommend this procedure. The battery is very flimsy, can be easily deformed, and often tightly glued down. Any slight deformation can cause it to short and explode. Would be safer to get a different phone (not Sony).
Once the battery has been disconnected from PCB and you cant pry the battery out easily then it is glued in position instead of double sided tape you will need to very gently warm it up with a hair drier (not on the highest setting and not a heat gun as its too hot which will cause the battery to explode) and gently pry it out. I do recommend Sony mobiles, used them for years and are very stable, Never had a battery explode from over charging like on all Samsung mobiles. Unfortunately I learned the hard way and used too much force removing the battery that I damaged the connector on the ribbon cable for the screen. Ordered a 2nd hand L2 to replace the cable. Also its a Torx 5 needed not a torx 4 as stated at the top of the website.