Перейти к основному содержанию

Sony Xperia Sola Speaker Replacement

Выберете то, что вам нужно

  1. Sony Xperia Sola Speaker Replacement, Speaker: шаг 1, изображение 1 из 1
    • Lay the phone as shown and put the camera facing up.

  2. Sony Xperia Sola Speaker Replacement: шаг 2, изображение 1 из 2 Sony Xperia Sola Speaker Replacement: шаг 2, изображение 2 из 2
    • Push the back cover as shown, then lift the cover off.

  3. Sony Xperia Sola Speaker Replacement: шаг 3, изображение 1 из 3 Sony Xperia Sola Speaker Replacement: шаг 3, изображение 2 из 3 Sony Xperia Sola Speaker Replacement: шаг 3, изображение 3 из 3
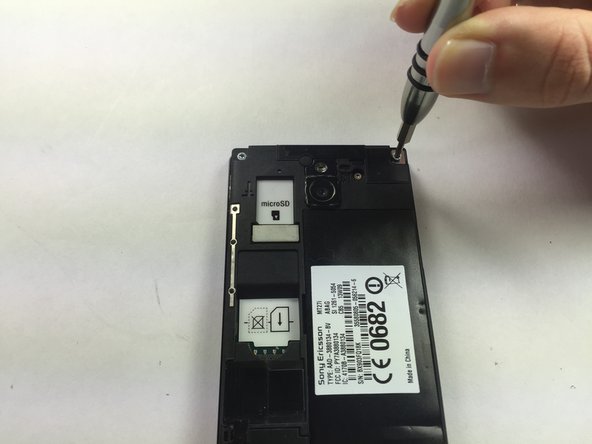
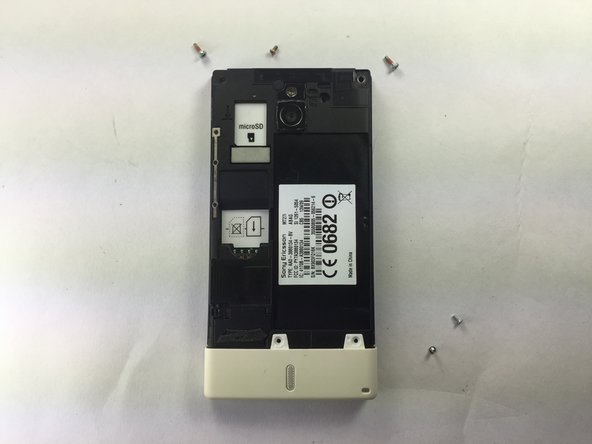
    • Remove the five screws as shown on the phone by using 26 Bit Kit.

    • Use a T6 screwdriver bit to remove top two screws.

    • Use a J000 screwdriver bit to remove the bottom two screws.

    • Use a T3 screwdriver bit to remove the middle screw (close to camera).

  4. Sony Xperia Sola Speaker Replacement: шаг 4, изображение 1 из 2 Sony Xperia Sola Speaker Replacement: шаг 4, изображение 2 из 2
    • Use plastic opening tool to remove the bottom white cover as shown.

  5. Sony Xperia Sola Speaker Replacement: шаг 5, изображение 1 из 2 Sony Xperia Sola Speaker Replacement: шаг 5, изображение 2 из 2
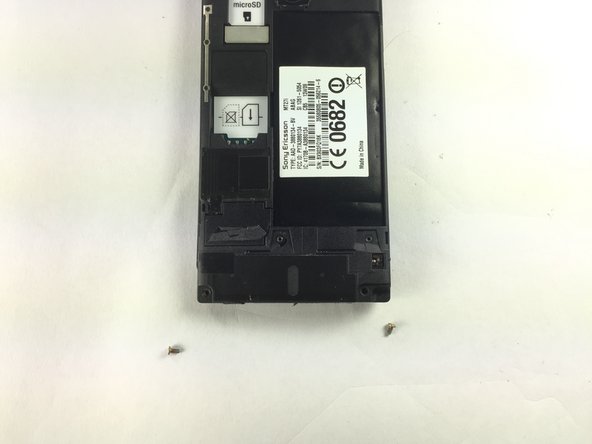
    • There are two additional screws under the bottom white cover as shown.

    • Use T3 drivers to remove two additional screws as shown.

  6. Sony Xperia Sola Speaker Replacement: шаг 6, изображение 1 из 3 Sony Xperia Sola Speaker Replacement: шаг 6, изображение 2 из 3 Sony Xperia Sola Speaker Replacement: шаг 6, изображение 3 из 3
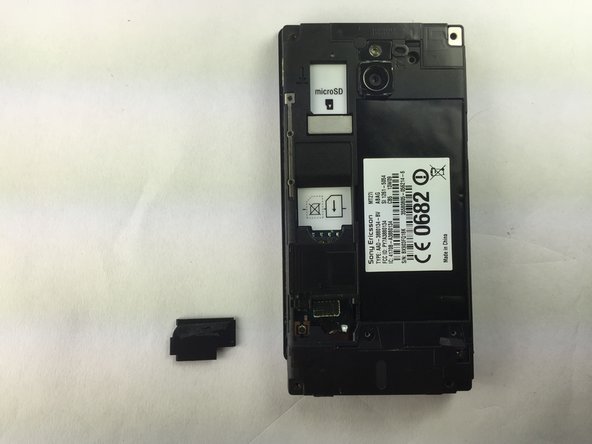
    • Using plastic opening tool, lift to remove the small black cover on the bottom left of phone as shown.

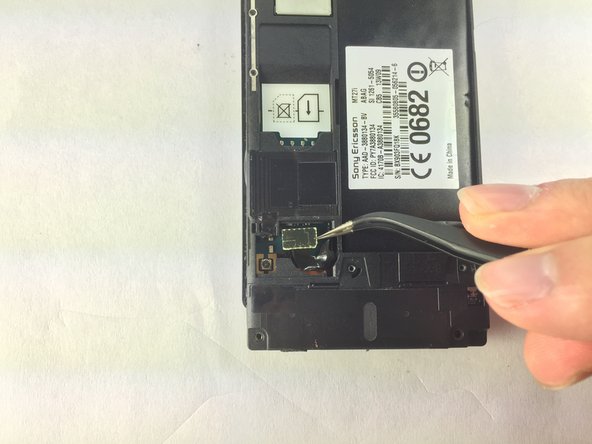
    • Then, using tweezers to lift the connector straight up to disconnect the battery's circuit as shown.

  7. Sony Xperia Sola Speaker Replacement: шаг 7, изображение 1 из 3 Sony Xperia Sola Speaker Replacement: шаг 7, изображение 2 из 3 Sony Xperia Sola Speaker Replacement: шаг 7, изображение 3 из 3
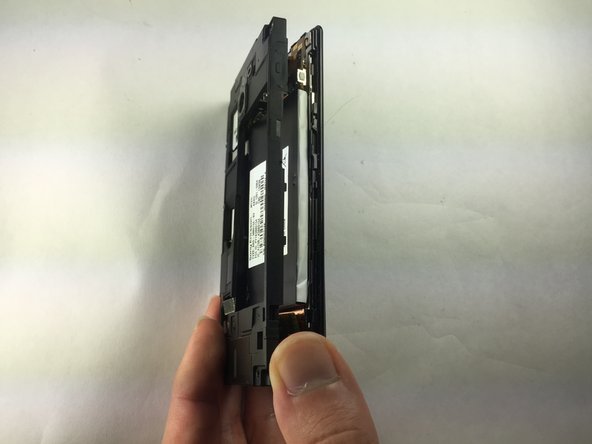
    • Turn the phone onto its side and insert a flat object and gently remove cover, using plastic opening tool as shown.

  8. Sony Xperia Sola Speaker Replacement: шаг 8, изображение 1 из 3 Sony Xperia Sola Speaker Replacement: шаг 8, изображение 2 из 3 Sony Xperia Sola Speaker Replacement: шаг 8, изображение 3 из 3
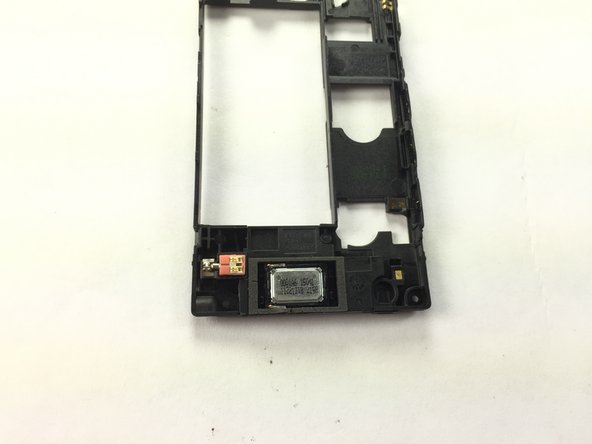
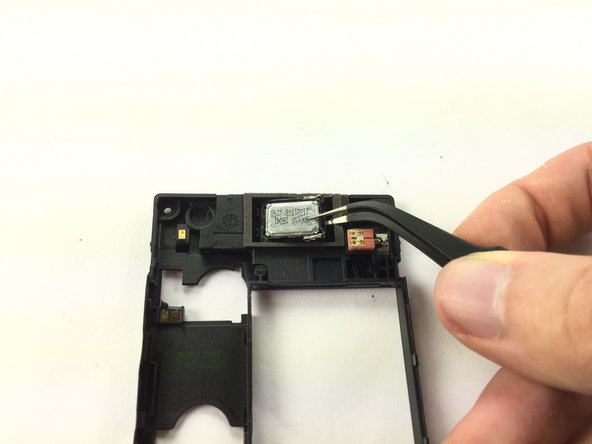
    • Flip over the black back cover and locate the speaker phone at the bottom, then use the tweezers to remove the speaker. It is glued to the back cover so a little force will be needed.

Заключение

To reassemble your device, follow these instructions in reverse order.

3 участников успешно повторили данное руководство.

Bo Wu

Участник с: 02/15/17

292 Репутация

Автор 2 руководств

Команда

USF Tampa, Team S5-G3, Lacy Spring 2017 Участник USF Tampa, Team S5-G3, Lacy Spring 2017

USFT-LACY-S17S5G3

3 членов

Автор 2 руководств

0 Комментариев

Добавить комментарий

Просмотр статистики:

За последние 24часов: 0

За последние 7 дней: 3

За последние 30 дней: 3

За всё время: 328