Введение
A faulty charging port may lead to faulty charging misreads or your Sony Xperia Z1 not powering on. Replacing the charging port will aid in providing the phone with charging capabilities and will contribute to the overall better functioning of the phone.
Выберете то, что вам нужно
-
-
With caution to hot temperatures, glide a heat gun over the outer edges of the phone bezel to soften the adhesive securing the back panel to the phone.
-
-
-
Apply a suction cup tool to the center of the back panel and gently pull the panel off the back of the phone.
-
If you are experiencing difficulty, use an opening pick to slide into the crack in between the panel and the rest of the phone body to pry off the back.
-
-
-
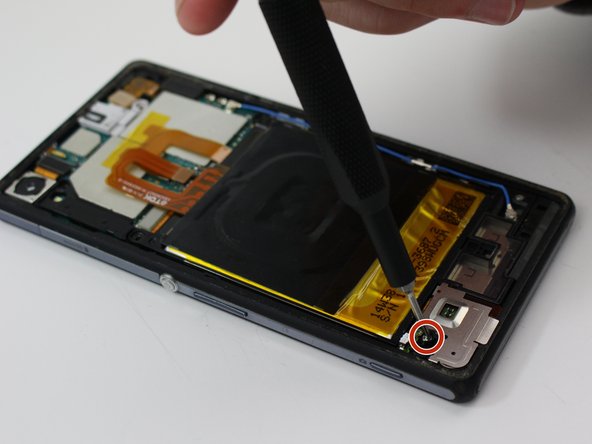
Use the Torx T5 screwdriver to remove the two 3.81mm screws from the corners of the battery.
-
-
-
Use the plastic opening tool to gently pry off the two flex connectors from the motherboard. Getting access to one of the connectors requires prying off the other first, so be sure to remove the top connector first.
-
-
-
Slowly slip the halberd spudger underneath the rest of the orange flex cable to carefully peel the adhesive portion away from the rest of the phone.
-
-
-
-
Use the tweezers to grab the top right corner of battery and carefully lift it up and away from the phone.
-
-
-
Once the battery is at a safe enough height, grip the corner of the battery and slowly pull it out of the phone.
-
-
-
Use a T5 Torx screwdriver to remove the two screws on the long metal bracket along the left side of the phone.
-
Remove the metal cover with a pair of tweezers.
-
-
-
Use a plastic opening tool to remove the coaxial cable from the bottom of the motherboard by prying it upward.
-
-
-
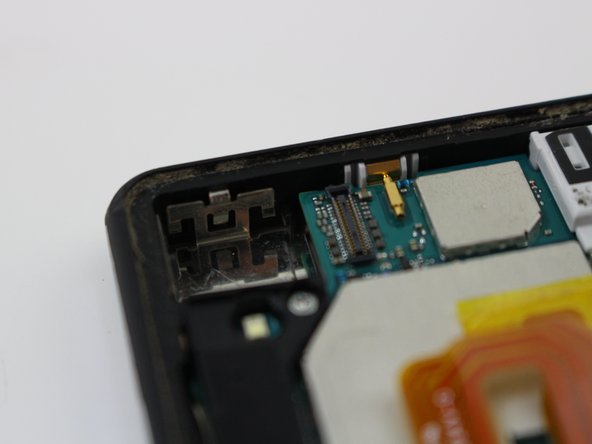
Using the plastic opening tool, remove the press fit connector attached to the motherboard.
-
-
-
Using the plastic opening tool, remove the press fit connector attached to the motherboard in the upper righthand corner.
-
-
-
Using the plastic opening tool, remove the press fit camera connector from the motherboard.
-
Lift the camera out from the motherboard.
-
-
-
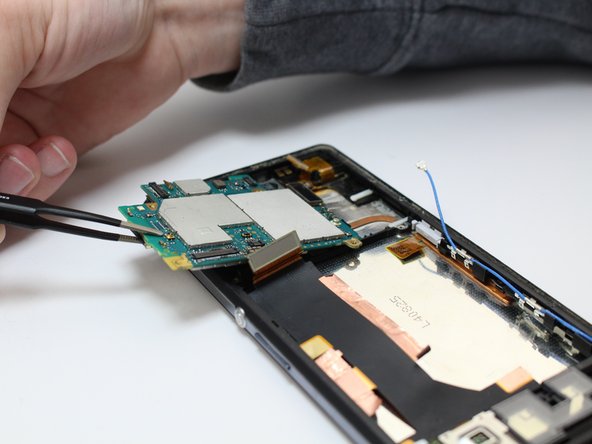
Using a plastic spudger, lift the motherboard upwards in order to separate it from the phone.
-
As the motherboard is lifted up, grab it with a pair of tweezers and lift it out of the phone.
-
-
-
Grab your Soldering Iron and heat it up. Once it is at around 200° F, apply pressure to the soldering pads on the left and right side of the connector. In order to replace the charging port, grab your connector and solder it back onto the same soldering pads.
-


To reassemble your device, follow these instructions in reverse order.
To reassemble your device, follow these instructions in reverse order.
Отменить: Я не выполнил это руководство.
Еще один человек закончил это руководство.
Команда

Embry-Riddle Aeronautical University, Team S17-G12, Lamothe Spring 2020 Участник Embry-Riddle Aeronautical University, Team S17-G12, Lamothe Spring 2020
ERAU-LAMOTHE-S20S17G12
4 членов
Автор 7 руководств