Введение
Remove the main flex cable from the Sony Xperia Z3 Compact motherboard. This includes the button cable.
Выберете то, что вам нужно
-
-
First, heat up.
-
And then place the suction cup and pull to open a gap. Insert into the guitar pick to cut the adhesive sticker under the back cover.
-
Finally, remove the back cover.
-
-
-
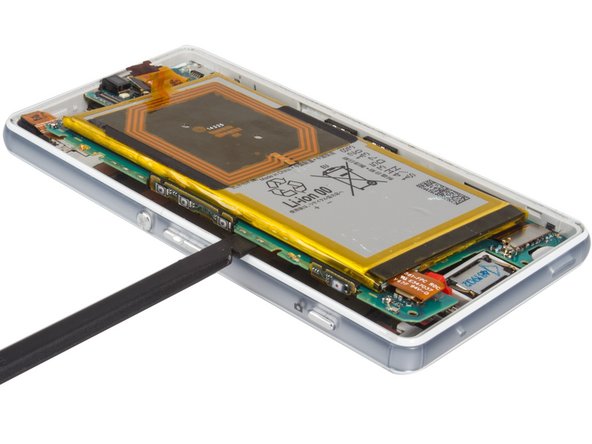
Disconnect the NFC antenna.
-
Unscrew the screws holding the black midframe in place.
-
Remove back frame.
-
-
-
-
Remove rear camera bracket.
-
Release connector, but take care not to damage the electronic components next to the connector. It is best to access the connector from the bottom (battery side), and not from the side as the picture shows.
-
Remove rear camera.
-


To reassemble your device, follow these instructions in reverse order.
To reassemble your device, follow these instructions in reverse order.
Отменить: Я не выполнил это руководство.
5 участников успешно повторили данное руководство.
6 Комментариев
hi dear
my mobile (sony xperia z3 mini ) it problem in screen, i changed screen but still not work always black how can i do to fixed my mobile ???? plz help me
BR
Swren
Sony's TFT LCD IPS Fuse exploded on Logic Board. Just solder it out. Use a Good Solder + Microscope.
Compact Z3: https://youtu.be/B3GHVfFs2hU?t=263
Logic BoardCHF 23.04 | 32GB Original Motherboard Für Sony Xperia Z3 MINI D5803 D5833 100% Entsperrt Mainboard Android OS Logic board Mit Chips ersetzen++https://a.aliexpress.com/_BUGwJ5++
TFT LCD IPSCHF 17.92 | Original 4.6 ''Für Sony Xperia Z3 compact z3 mini D5803 D5833 LCD Display Touchscreen Digitizer Montage mit rahmen ohne F++https://a.aliexpress.com/_B0hkDt++
Normal Big Z3: ++https://youtu.be/ZUm7n0tCZVM?t=45++
5803 = EU + USA
5833 = Australia + Asia
I can not loosen a screw, what can I do?
Hey Fixit, I will repair my Wifi, but I can not find the component parts on the mainboard on the Z3c
Have a description where is the wifi component similar to these video because on the Z3Compact?
is there label imei or meid in it ???