Введение
In the scenario that your Spigen Kuel TS36 Car Mount is experiencing difficulty gripping your phone, or if the device is refusing to extend its wings, this guide will prove beneficial in replacing the internal coils. Driving with a faulty car mount is dangerous because it has the potential to fall and cause a distraction to the driver, perhaps endangering others in the process as well. Prior to beginning this guide, be mindful of the tension within the two individual springs. Step 3 of this guide cautions the opening of the car mount due to the potential launch of these coils; therefore it’s advised to perform this step carefully. To reduce the possibility of these springs launching from the device, make sure to press the button within the middle of mount to release any tension built up within the coils before beginning this guide.
Выберете то, что вам нужно
-
-
Pull the phone holder off the mount by applying force; the parts will not actually break from the pressure. Temporarily remove the two round half-socket covers on the ball socket, as they are prone to slipping off.
-
-
-
Remove four 5.0 mm screws from the backing panel of the phone holder using the Oval shape screwhead. Push out wing panels to release the mechanism, and remove the screws and holder from the backing panel.
-
-
-
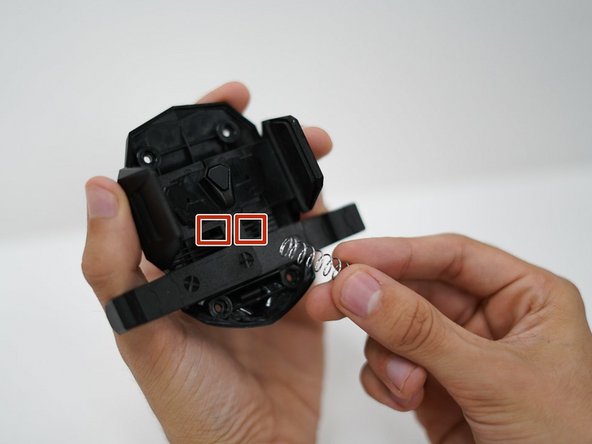
If either of the springs have not ejected from their slots, proceed to pull them out gently so that the chassis the wing panels are connected to remain undisturbed.
-
-
-
-
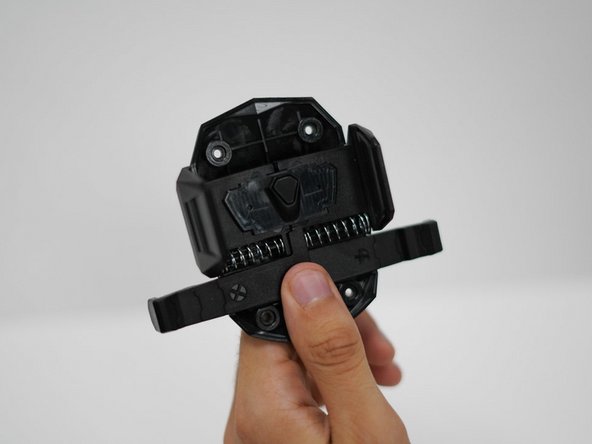
Insert two new 2.6 cm springs as you would batteries to a tv remote. Be cautious as to keep the chassis in place during this process.
-
-
-
Pull out of the wing panels to re-engage the mechanism, holding the center of panels down.
-
The backing panel will not be able to properly be reattached unless the mechanism is is engaged, and the springs are bunched.
-
-
-
Slide the backing panel over the frame of the holder, aligning the sides. Press the button on the center of the holder to once again disengage the mechanism. This will allow the panel to fully slide back into place.
-
-
-
Rescrew backing with oval head screwdriver to reassemble the phone holder’s backing.
-


To reassemble your device, follow these instructions in reverse order.
To reassemble your device, follow these instructions in reverse order.
Отменить: Я не выполнил это руководство.
Еще один человек закончил это руководство.
Команда

CSU Fullerton, Team S1-G1, Bruce Fall 2019 Участник CSU Fullerton, Team S1-G1, Bruce Fall 2019
CSUF-BRUCE-F19S1G1
4 членов
Автор 1 руководств