Перейти к основному содержанию

Sprinkler Head Replacement

Выберете то, что вам нужно

  1. Sprinkler Head Replacement, Sprinkler Head: шаг 1, изображение 1 из 1
    • Turn off the water supply to the sprinklers.

    • This process will vary depending on your sprinkler controller.

  2. Sprinkler Head Replacement: шаг 2, изображение 1 из 1
    • Find where the water supply feeds the sprinkler system and close the valve in the event of emergency or unforeseen circumstances.

  3. Sprinkler Head Replacement: шаг 3, изображение 1 из 1
    • Dig a hole down to the base of the sprinkler head.

    • Be careful to avoid puncturing the sprinkler line.

  4. Sprinkler Head Replacement: шаг 4, изображение 1 из 1
    • Using your hand or a gardening trowel, finish digging so that the sprinkler head is fully visible and is clear of dirt and debris.

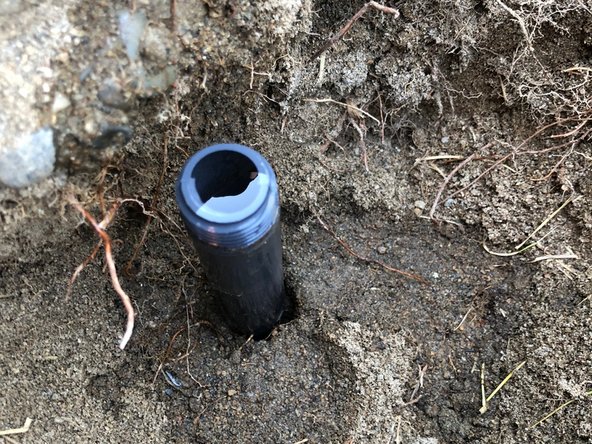
  5. Sprinkler Head Replacement: шаг 5, изображение 1 из 2 Sprinkler Head Replacement: шаг 5, изображение 2 из 2
    • Unscrew the sprinkler head from the line it is attached to.

    • If is loose enough you may not need pliers.

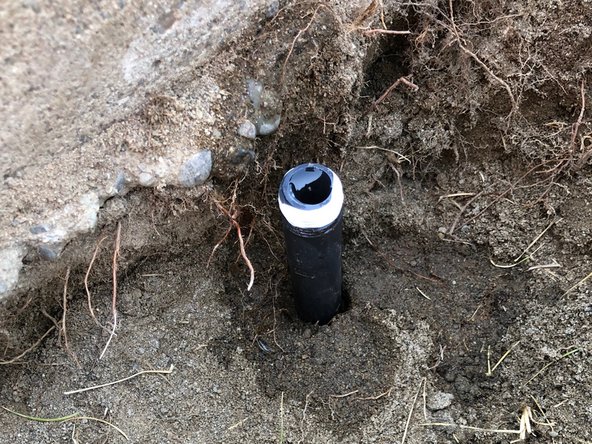
  6. Sprinkler Head Replacement: шаг 6, изображение 1 из 2 Sprinkler Head Replacement: шаг 6, изображение 2 из 2
    • Coat the threads of the water line with teflon tape to avoid leaking.

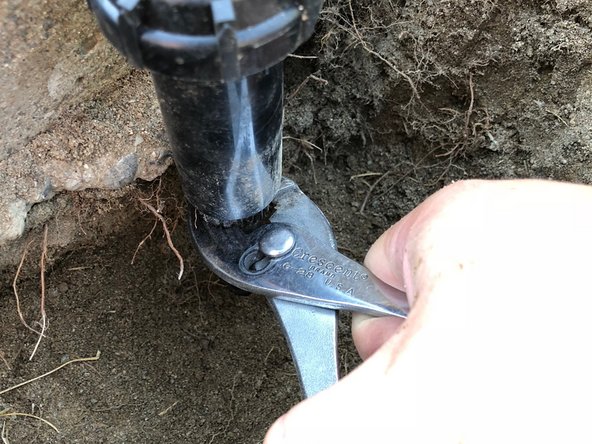
  7. Sprinkler Head Replacement: шаг 7, изображение 1 из 2 Sprinkler Head Replacement: шаг 7, изображение 2 из 2
    • Using your hand, screw the new sprinkler head on over the teflon tape.

    • Once the sprinkler head is hand tight, use pliers to tighten it by another half turn.

  8. Sprinkler Head Replacement: шаг 8, изображение 1 из 1
    • Fill the hole in and pack it down to avoid unwanted movement of the new sprinkler head.

  9. Sprinkler Head Replacement: шаг 9, изображение 1 из 1
    • Turn the sprinkler system on.

  10. Sprinkler Head Replacement: шаг 10, изображение 1 из 1
    • Twist the top of the sprinkler until it is aimed where you want it.

  11. Sprinkler Head Replacement: шаг 11, изображение 1 из 1
    • Use a flat head screwdriver to adjust the flow of water if needed.

    • Turning right decreases the water flow. Turning left increases the water flow.

Заключение

Enjoy your green lawn and water savings.

Еще один человек закончил это руководство.

Adam Sylvia

Участник с: 07/03/18

251 Репутация

1 руководство автора

Команда

Eastern Washington University, Team S2-G4, Crane Summer 2018 Участник Eastern Washington University, Team S2-G4, Crane Summer 2018

EWU-CRANE-SU18S2G4

4 членов

Автор 5 руководств

0 Комментариев

Добавить комментарий

Просмотр статистики:

За последние 24часов: 0

За последние 7 дней: 8

За последние 30 дней: 20

За всё время: 369