Введение
When the life or strength of your battery starts to diminish, you may want to look into a battery replacement. Here is all steps needed to change the battery in your Sungale CyberUs.
Выберете то, что вам нужно
-
-
Hold the device so the left side is facing towards you (like in the picture shown) so the two 4mm PH001 screws are exposed and easier to access.
-
-
-
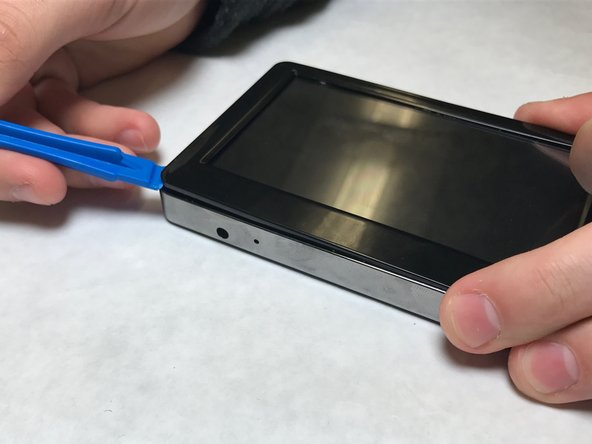
Carefully pry up one of the top corners of the screen with a plastic spudger (prying tool). Slide the tool along the edges to release it from the housing.
-
The screen is still connected to the motherboard. Use force with caution.
-
-
-
-
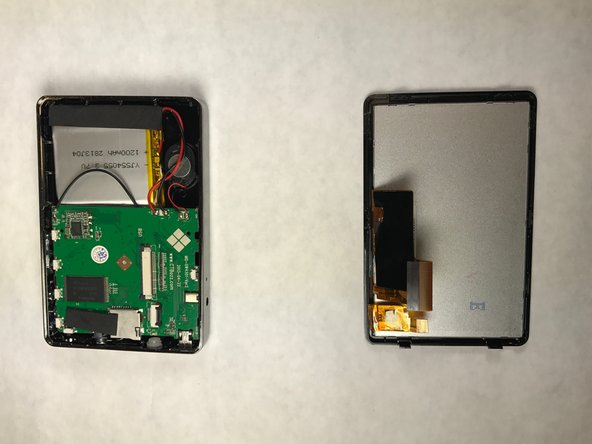
Gently turn screen over, to the side, to reveal the ZIF connector attached to the motherboard.
-
-
-
Using the prying tool, slide the black clip out. Pull the ZIF connector out and to the left, the screen is now detached from the motherboard.
-
-
-
Now, carefully we will remove the battery. Find the leads, or the red and black wires going to the battery from the motherboard. To free the wires you must cut the wire near the battery leads. Make sure both ends are clean and have enough exposed wire.
-


To reassemble your device, follow these instructions in reverse order.
To reassemble your device, follow these instructions in reverse order.
Команда

IUPUI, Team 1-4, Harley Fall 2016 Участник IUPUI, Team 1-4, Harley Fall 2016
IUPUI-HARLEY-F16S1G4
3 членов
Автор 8 руководств