Выберете то, что вам нужно
-
-
-
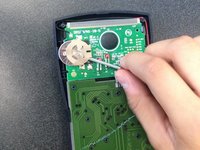
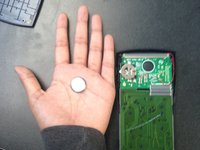
now take out the battery after lifting up the small guard (if needed use something small but easy to hold to push it out )
-


To reassemble your device, follow these instructions in reverse order.
To reassemble your device, follow these instructions in reverse order.
Отменить: Я не выполнил это руководство.
2 человек успешно провели ремонт по этому руководству.
Один комментарий
This is a nightmare to do! When trying to push out the old battery, you forget that there is a ‘catch’ on the side from which the battery should exit. When you life up this ‘catch,’ you bend the overlying metal cover, which in turn, distorts the entire battery ‘cage.’ And after you re-assemble the back to the front of the calculator, the end result is that the calculator is now completely non-functional!!! A very bad engineering job!!! Truly pathetic.
Doug Shearer (dshearer2001us@yahoo.com)