Введение
The hard drive is the component capable of storing recordings. This information is vital in case the TiVo does not record the desired shows.
Выберете то, что вам нужно
-
-
Power down the TiVo Premiere XL4 by detaching the power cable from the unit and power source.
-
-
-
Remove the four 80 mm T10 screws from the back of the TiVo box using theTorx screwdriver.
-
-
-
Take the outer casing by sliding the top of the box off of the component carefully, making sure not to damage the surrounding components inside.
-
-
-
-
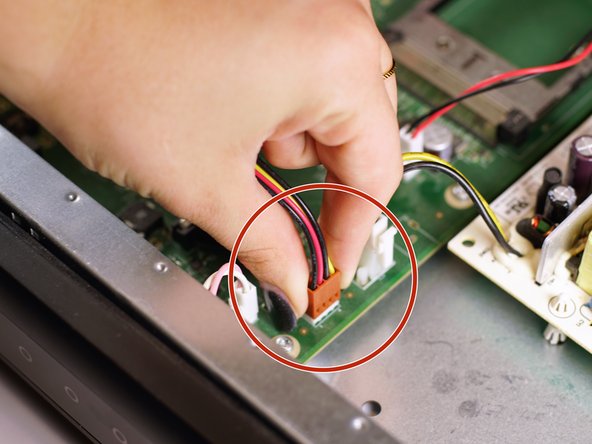
Pinch the connector of the bundle of wires (the bundle having black, red, black and yellow wires) and gently remove from the motherboard.
-
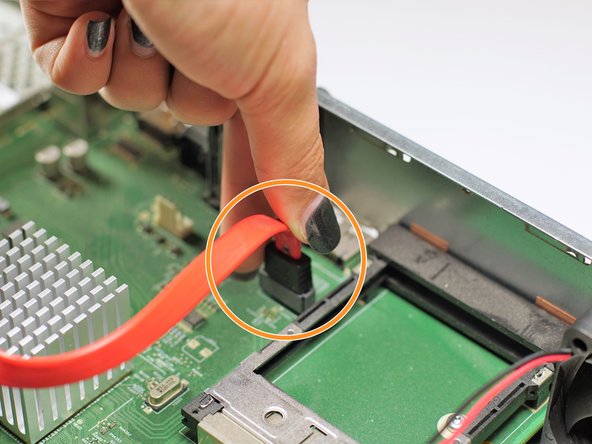
Pinch the connector of the single flat wire and gently remove from motherboard.
-
-
-
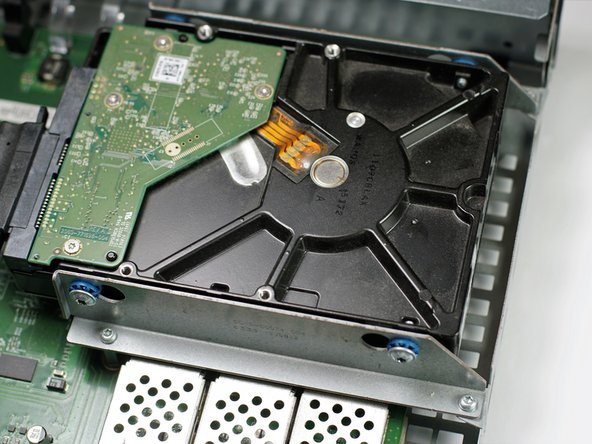
Unscrew the following two 80 mm T10 screws connecting the hard drive to the bottom of the box using the Torx screwdriver.
-
Repeat on the other side of the hard drive.
-
There will be a total of four 80 mm T10 screws removed.
-
-
-
Remove the marked (2) T10 screws and washers using a Torx Screwdriver.
-
Repeat on the opposite side for (2) T10 screws.
-
Remove the connecting cable.
-


To reassemble your device, follow these instructions in reverse order.
To reassemble your device, follow these instructions in reverse order.

Команда

Baylor, Team S1-G1, Williams Fall 2018 Участник Baylor, Team S1-G1, Williams Fall 2018
BU-WILLIAMS-F18S1G1
3 членов
Автор 6 руководств