Введение
The Motherboard contains all the 'brains' of the device. In case this component needs to be replaced, this guide will walk you through the installation of the motherboard.
Выберете то, что вам нужно
-
-
Unscrew the 0.31 inch T-9 size screw on the back panel
-
Unscrew the two 0.59 inch T-8 size screws on the back panel
-
-
-
-
Unplug the ribbon attaching the front panel sensor by pulling it upwards gently.
-
-
-
Unplug the ribbon connecting the hard drive to the motherboard by pulling straight up on the ribbon. This may require some gentle wiggling.
-
-
-
Unplug the ribbon connecting the power supply to the motherboard by pulling upwards on this ribbon.
-
-
-
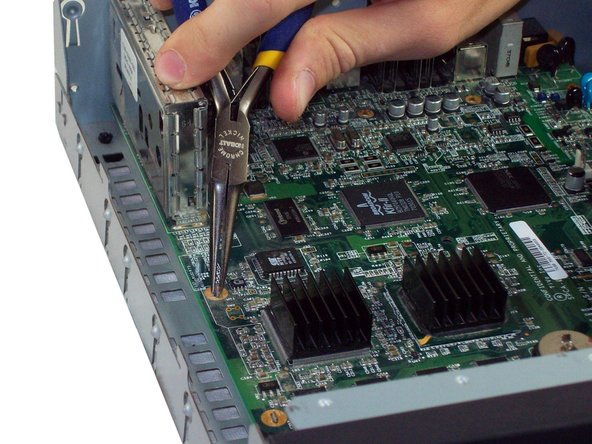
Locate the four metal tabs on the motherboard.
-
Using Pliers, bend each of the tabs until they align straight with the holes underneath them.
-
-
-
Locate and remove the four 0.31 inch T-9 size screws at the front of the motherboard.
-
-
-
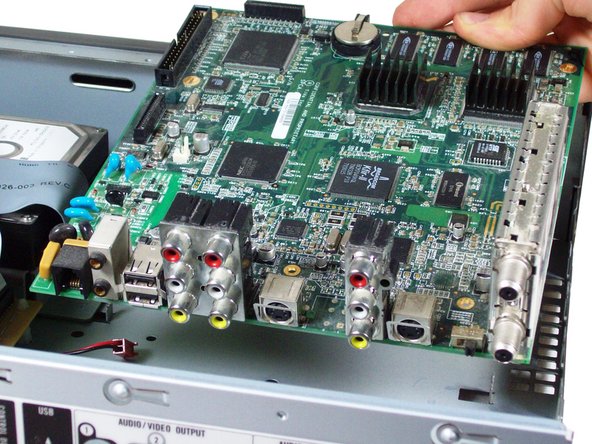
Pull directly up on the motherboard so that it slips over the four golden metal tabs.
-
Pull up and away from the back panel so all of the cable inputs slip through the casing.
-


To reassemble your device, follow these instructions in reverse order.
To reassemble your device, follow these instructions in reverse order.
Команда

Cal Poly, Team 5-33, Amido Fall 2011 Участник Cal Poly, Team 5-33, Amido Fall 2011
CPSU-AMIDO-F11S5G33
4 членов
Автор 7 руководств