Перейти к основному содержанию

TomTom GO 500 Display or Digitizer Replacement

Выберете то, что вам нужно

  1. TomTom GO 500 Display or Digitizer Replacement, TomTom GO 500 Opening the Device: шаг 1, изображение 1 из 1
    • Unscrew the two 3mm screws at the base of the device using the Torx T5 screwdriver.

  2. TomTom GO 500 Display or Digitizer Replacement: шаг 2, изображение 1 из 2 TomTom GO 500 Display or Digitizer Replacement: шаг 2, изображение 2 из 2
    • Using the plastic opening tools, insert one opening tool into the gap between the screen casing and the motherboard casing. Then insert the other tool into one of the adjacent sides and slide it around the top.

    • There are 14 latches that need to be undone.

    • The latches break easily during the opening process so we recommend purchasing a new screen casing if they break.

  3. TomTom GO 500 Display or Digitizer Replacement: шаг 3, изображение 1 из 1
    • With the screen casing unlatched, locate the right side where the two connectors are.

  4. TomTom GO 500 Display or Digitizer Replacement: шаг 4, изображение 1 из 3 TomTom GO 500 Display or Digitizer Replacement: шаг 4, изображение 2 из 3 TomTom GO 500 Display or Digitizer Replacement: шаг 4, изображение 3 из 3
    • Unlatch the connectors using the plastic opening tool.

    • The orange rectangular connector may have come off in the process of removing the screen casing.

  5. TomTom GO 500 Display or Digitizer Replacement: шаг 5, изображение 1 из 2 TomTom GO 500 Display or Digitizer Replacement: шаг 5, изображение 2 из 2
    • Separate the screen casing from the motherboard casing.

  6. TomTom GO 500 Display or Digitizer Replacement, Display or Digitizer: шаг 6, изображение 1 из 2 TomTom GO 500 Display or Digitizer Replacement, Display or Digitizer: шаг 6, изображение 2 из 2
    Инструмент, используемый на этом этапе:
    Tweezers
    $4.99
    Купить
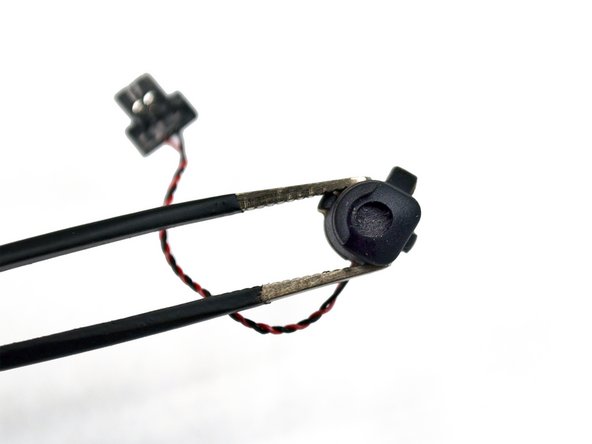
    • Remove the microphone on the left side of the screen casing using tweezers.

    • Use tweezers with rounded tips to avoid damaging the microphone.

  7. TomTom GO 500 Display or Digitizer Replacement: шаг 7, изображение 1 из 2 TomTom GO 500 Display or Digitizer Replacement: шаг 7, изображение 2 из 2
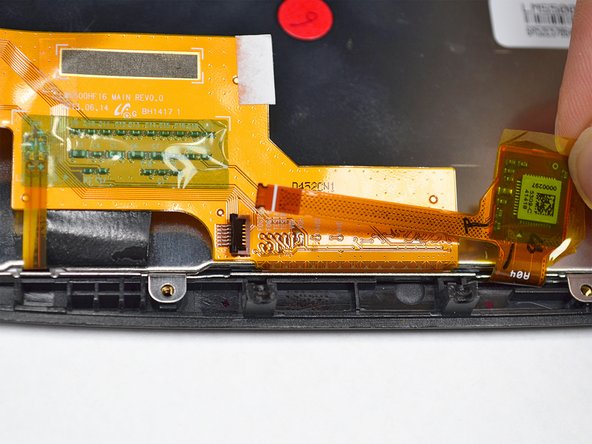
    • Lift up the small black tab on the orange connector using a plastic opening tool. This releases the strip connecting the display to the digitizer.

  8. TomTom GO 500 Display or Digitizer Replacement: шаг 8, изображение 1 из 2 TomTom GO 500 Display or Digitizer Replacement: шаг 8, изображение 2 из 2
    • Slide the connector strip out from the tab.

  9. TomTom GO 500 Display or Digitizer Replacement: шаг 9, изображение 1 из 2 TomTom GO 500 Display or Digitizer Replacement: шаг 9, изображение 2 из 2
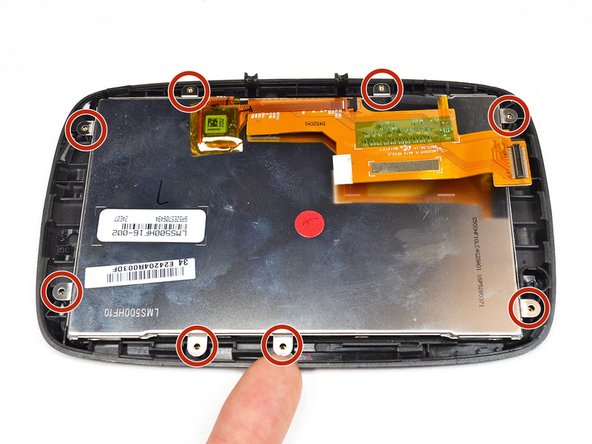
    • Unscrew the eight 2.5mm screws along the perimeter of the display using the Phillips #000 screwdriver.

  10. TomTom GO 500 Display or Digitizer Replacement: шаг 10, изображение 1 из 3 TomTom GO 500 Display or Digitizer Replacement: шаг 10, изображение 2 из 3 TomTom GO 500 Display or Digitizer Replacement: шаг 10, изображение 3 из 3
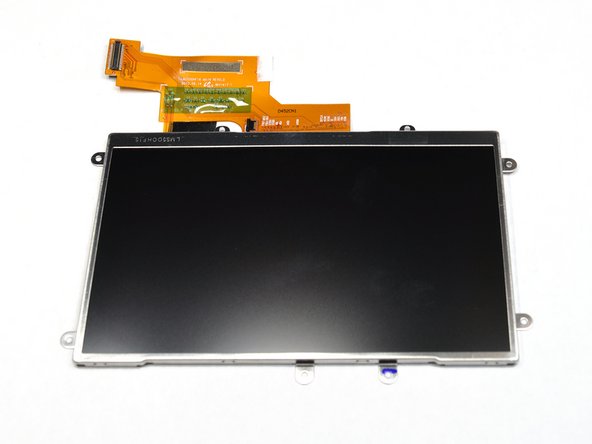
    • Separate the display from the digitizer. The display is now fully removed from the device.

Заключение

To reassemble your device, follow these instructions in reverse order.

6 участников успешно повторили данное руководство.

Jennie Chang

Участник с: 09/22/16

173 Репутация

1 руководство автора

Команда

UC Davis, Team 2-5, Oliver Fall 2016 Участник UC Davis, Team 2-5, Oliver Fall 2016

UCD-OLIVER-F16S2G5

5 членов

Автор 9 руководств

3 Комментариев

If you keep the bezel and replace the glass, ensure the glass has adhesive before you buy.

Aaron - Ответить

Do you have branch in Istanbul?

if yes please provide me the address. thaxs

Bsssam Kabeir - Ответить

pertituire schermo e display cosa devo fare e comprare grazie

Cesare - Ответить

Добавить комментарий

Просмотр статистики:

За последние 24часов: 3

За последние 7 дней: 16

За последние 30 дней: 85

За всё время: 5,813