Перейти к основному содержанию

TomTom VIA 1605TM Battery Replacement

Выберете то, что вам нужно

  1. TomTom VIA 1605TM Battery Replacement, Front Screen: шаг 1, изображение 1 из 3 TomTom VIA 1605TM Battery Replacement, Front Screen: шаг 1, изображение 2 из 3 TomTom VIA 1605TM Battery Replacement, Front Screen: шаг 1, изображение 3 из 3
    • Locate the round suction cup on the back of the device.

    • Twist the suction cup clockwise or counterclockwise while pulling back away from the device closer to your body until removed.

    • When reassembling twist the suction cup but, push in as oppose to pulling out.

  2. TomTom VIA 1605TM Battery Replacement: шаг 2, изображение 1 из 1
    • Location of screw is where the suction cup was.

    • Insert 8mm Hex #T6 screw driver into screw.

    • Unscrew in counter clockwise direction.

    • When reassembling screw in the clockwise direction.

  3. TomTom VIA 1605TM Battery Replacement: шаг 3, изображение 1 из 2 TomTom VIA 1605TM Battery Replacement: шаг 3, изображение 2 из 2
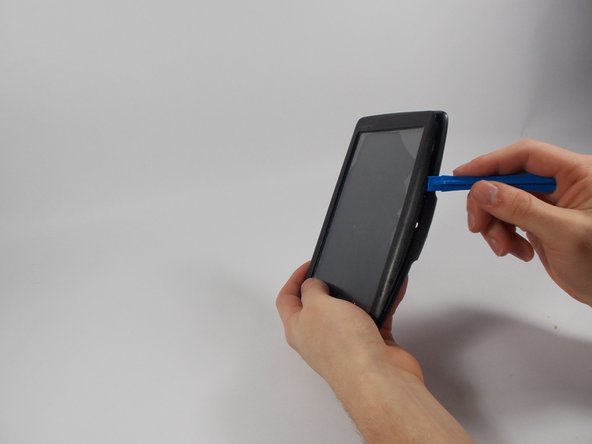
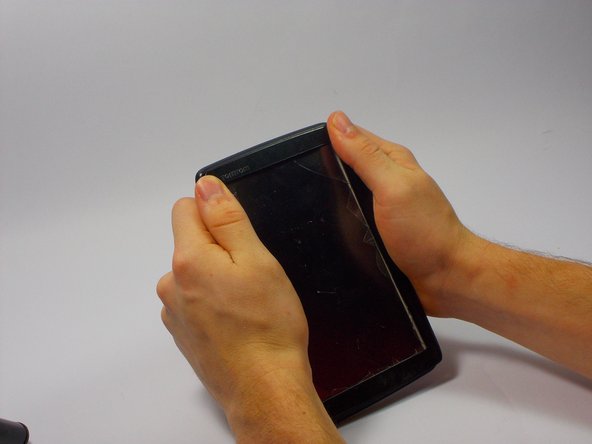
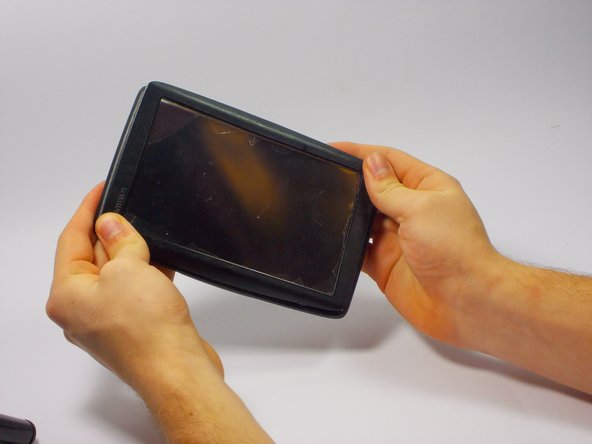
    • Pry along the edges with the plastic opening tool to separate the back and front panel.

    • Try not to tear the screen open as you may break the part. Go about this gently but with enough force to remove the screen.

  4. TomTom VIA 1605TM Battery Replacement: шаг 4, изображение 1 из 3 TomTom VIA 1605TM Battery Replacement: шаг 4, изображение 2 из 3 TomTom VIA 1605TM Battery Replacement: шаг 4, изображение 3 из 3
    • Place the new front panel (with new screen) on to the back panel. Press firmly along the edges to attach.

    • Only do this step of placing the front panel on if you are completed. If there are still components needed replacing postpone this step until the end.

  5. TomTom VIA 1605TM Battery Replacement, Battery: шаг 5, изображение 1 из 3 TomTom VIA 1605TM Battery Replacement, Battery: шаг 5, изображение 2 из 3 TomTom VIA 1605TM Battery Replacement, Battery: шаг 5, изображение 3 из 3
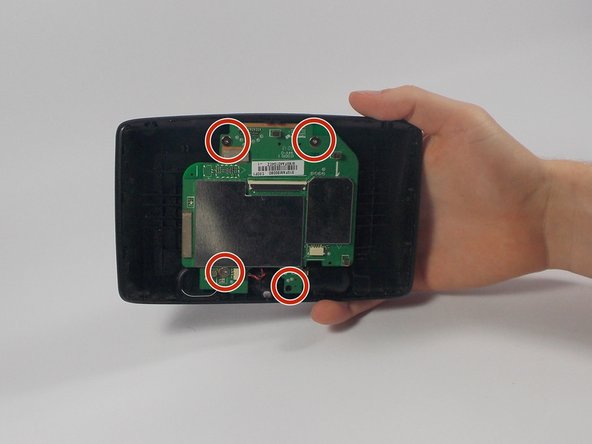
    • Keep the TOMTOM oriented so the curve is on the bottom. Locate the four 1mm Philips #J1 head screws attached to the motherboard.

    • Unscrew each of these in a counter clockwise direction.

    • When reassembling screw back in a clockwise direction.

    • The second picture is to represent where the four screws are located. The LCD screen does not disconnect from the motherboard until the next step

  6. TomTom VIA 1605TM Battery Replacement: шаг 6, изображение 1 из 3 TomTom VIA 1605TM Battery Replacement: шаг 6, изображение 2 из 3 TomTom VIA 1605TM Battery Replacement: шаг 6, изображение 3 из 3
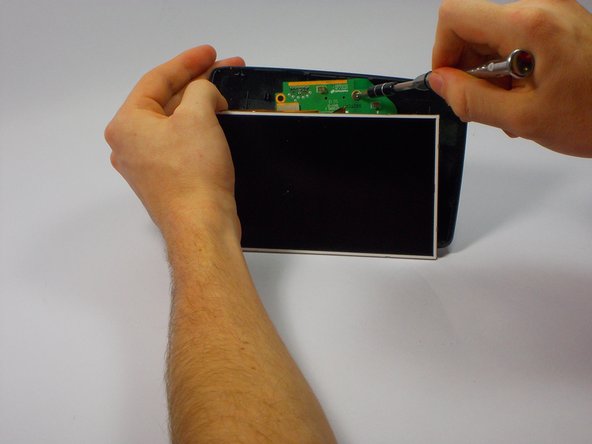
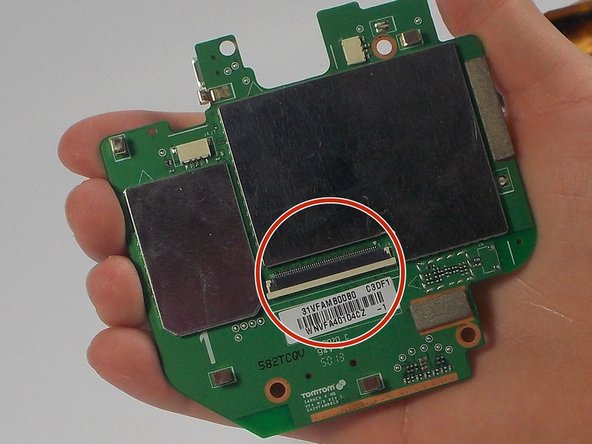
    • Remove the Blue Ribbon Cable by pushing each side of the plastic holder with the nylon spudger.

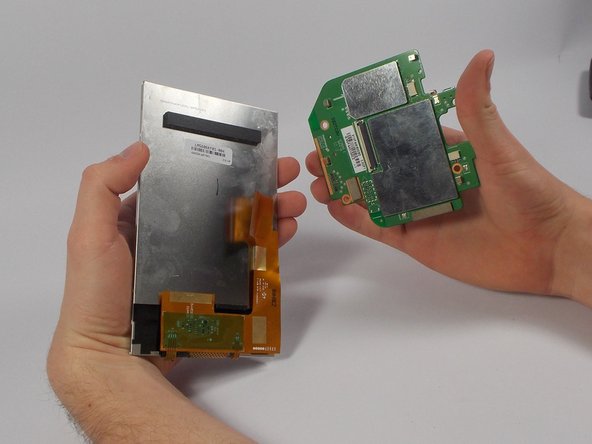
    • This will remove the LCD screen from the motherboard.

  7. TomTom VIA 1605TM Battery Replacement: шаг 7, изображение 1 из 2 TomTom VIA 1605TM Battery Replacement: шаг 7, изображение 2 из 2
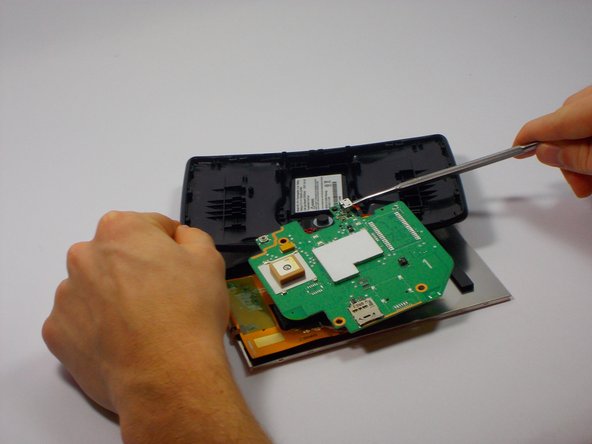
    • Unplug the wire connecting to the battery by pinching the sides connected to the front screen.

    • Pull back away (in the opposite direction) from the connector.

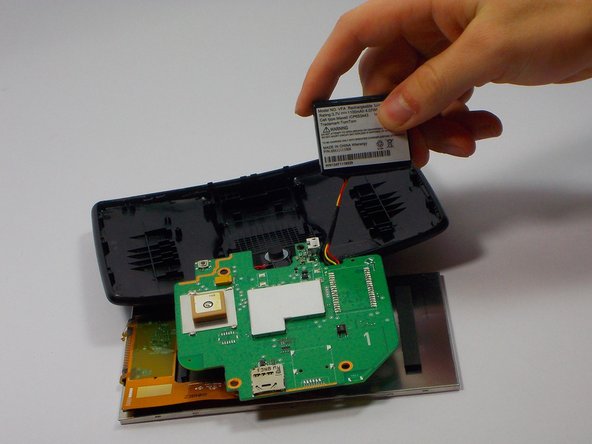
    • Lift the circuit board to reveal the battery beneath.

    • When reassembling push back into connector. Do not need to pinch anything. The "click" sound insures solid connection.

  8. TomTom VIA 1605TM Battery Replacement: шаг 8, изображение 1 из 2 TomTom VIA 1605TM Battery Replacement: шаг 8, изображение 2 из 2
    • Carefully pry loose using the plastic opening tool and remove the original battery.

    • Place the new battery where the old battery was located.

Заключение

To reassemble your device, follow these instructions in reverse order.

Mathew Fleurent

Участник с: 10/19/15

125 Репутация

1 руководство автора

Команда

UMass Dartmouth, Team 4-4, Catania Fall 2015 Участник UMass Dartmouth, Team 4-4, Catania Fall 2015

UMASSD-CATANIA-F15S4G4

4 членов

Автор 5 руководств

0 Комментариев

Добавить комментарий

Просмотр статистики:

За последние 24часов: 0

За последние 7 дней: 1

За последние 30 дней: 1

За всё время: 1,017