Перейти к основному содержанию

Toshiba Dynabook AX 53D Touchpad Replacement

Выберете то, что вам нужно

  1. Toshiba Dynabook AX 53D Touchpad Replacement, Battery: шаг 1, изображение 1 из 1
    • Push apart the two spring loaded plastic tabs labeled #1 and #2.

    • Make sure to unplug any external power sources before working on the computer.

  2. Toshiba Dynabook AX 53D Touchpad Replacement: шаг 2, изображение 1 из 1
    • The battery is now easily removed by pulling up from the notched tab on the inside edge.

  3. Toshiba Dynabook AX 53D Touchpad Replacement, Keyboard: шаг 3, изображение 1 из 1
    • Using the #J1 bit, remove the 17 recessed 7.3 mm B6 screws from the underside of laptop and the 3.1 mm #J0 F3 screw inside the battery compartment.

  4. Toshiba Dynabook AX 53D Touchpad Replacement: шаг 4, изображение 1 из 2 Toshiba Dynabook AX 53D Touchpad Replacement: шаг 4, изображение 2 из 2
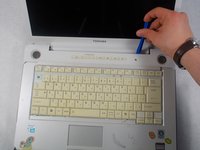
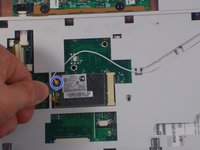
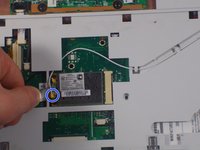
    • Run the blue plastic opening tool underneath the media bezel and gently pry from the front panel.

  5. Toshiba Dynabook AX 53D Touchpad Replacement: шаг 5, изображение 1 из 1
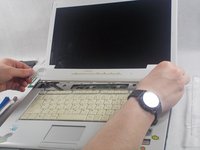
    • Using the #J0 bit, remove the two 3.1 mm screws securing the top of the keyboard.

  6. Toshiba Dynabook AX 53D Touchpad Replacement: шаг 6, изображение 1 из 2 Toshiba Dynabook AX 53D Touchpad Replacement: шаг 6, изображение 2 из 2
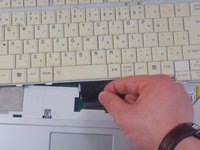
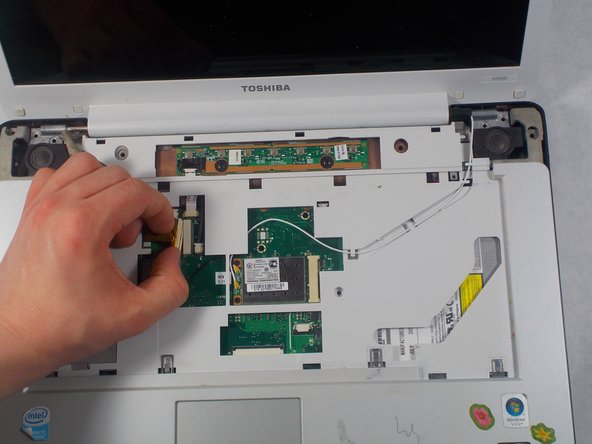
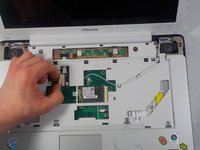
    • Pop out the black plastic tab on either side of the ribbon cable. Holding the cable on each side, detach from laptop.

  7. Toshiba Dynabook AX 53D Touchpad Replacement, Touchpad: шаг 7, изображение 1 из 2 Toshiba Dynabook AX 53D Touchpad Replacement, Touchpad: шаг 7, изображение 2 из 2
    • Detach the white plastic end of the braided LCD cable.

  8. Toshiba Dynabook AX 53D Touchpad Replacement: шаг 8, изображение 1 из 2 Toshiba Dynabook AX 53D Touchpad Replacement: шаг 8, изображение 2 из 2
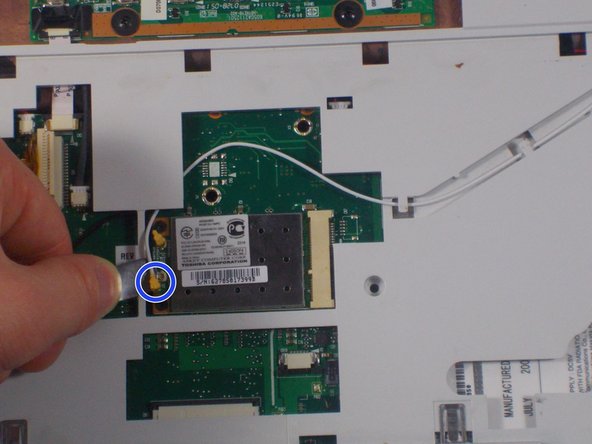
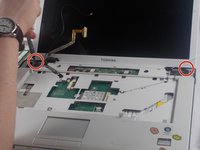
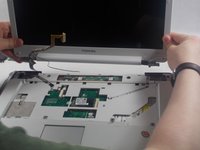
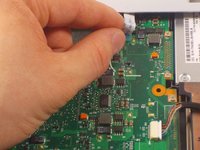
    • Using the flat metal spatula tool, detach the thin white and black wires from their pop connectors.

  9. Toshiba Dynabook AX 53D Touchpad Replacement: шаг 9, изображение 1 из 3 Toshiba Dynabook AX 53D Touchpad Replacement: шаг 9, изображение 2 из 3 Toshiba Dynabook AX 53D Touchpad Replacement: шаг 9, изображение 3 из 3
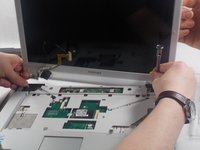
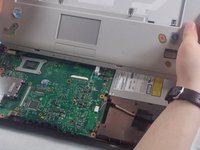
    • Using the #J1 Phillips Screwdriver, remove the four 7.6 mm screws that secure the monitor to rest of laptop.

    • The monitor can now be gently removed by lifting upwards.

  10. Toshiba Dynabook AX 53D Touchpad Replacement: шаг 10, изображение 1 из 1
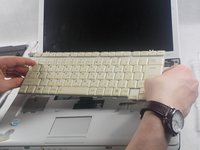
    • Run the plastic opening tool along the crease between the top touchpad bezel and bottom section of laptop.

  11. Toshiba Dynabook AX 53D Touchpad Replacement: шаг 11, изображение 1 из 2 Toshiba Dynabook AX 53D Touchpad Replacement: шаг 11, изображение 2 из 2
    • Gently detach the touchpad bezel.

    • The ribbon cable may break if removed roughly.

    • Gently remove the white ribbon cable.

  12. Toshiba Dynabook AX 53D Touchpad Replacement: шаг 12, изображение 1 из 1
    • Remove the six 3.7 mm #J1 screws holding the touchpad in place.

  13. Toshiba Dynabook AX 53D Touchpad Replacement: шаг 13, изображение 1 из 1
    • Gently pull the ribbon cable to disconnect it from the touchpad.

  14. Toshiba Dynabook AX 53D Touchpad Replacement: шаг 14, изображение 1 из 1
    • Carefully pry up the touchpad with a plastic opening tool.

  15. Toshiba Dynabook AX 53D Touchpad Replacement: шаг 15, изображение 1 из 1
    • The touchpad has been removed.

Заключение

To reassemble your device, follow these instructions in reverse order.

Christopher

Участник с: 03/20/17

510 Репутация

Автор 5 руководств

Команда

UMass Dartmouth, Team S2-G7, Isaacson Spring 2017 Участник UMass Dartmouth, Team S2-G7, Isaacson Spring 2017

UMASSD-ISAACSON-S17S2G7

3 членов

Автор 15 руководств

0 Комментариев

Добавить комментарий

Просмотр статистики:

За последние 24часов: 0

За последние 7 дней: 2

За последние 30 дней: 8

За всё время: 370