Введение
Toshiba Satellite 2430-S255 Hard Drive Replacement. Uses Toshiba Satellite 2430-S255 Optical Disc Drive Replacement as a prerequisite guide.
To make sure the hard drive is not properly working and is in need of replacement, refer to bethis troubleshooting guide
Выберете то, что вам нужно
-
-
Locate the battery locking mechanism on the back side of the laptop. It is labeled with a lock and unlock symbol to indicate its function. The mechanism also has a serrated texture to increase grip.
-
-
-
Place your left hand on the locking mechanism and slide it all the way to the left. This will move it into the unlocked position. While holding the mechanism in the unlocked position place another finger in the cavity to the right of the locking mechanism.
-
-
-
Pulling up with your right hand while the locking mechanism in in the unlocked position will release the battery from its socket.
-
-
-
-
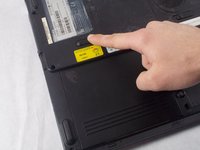
Flip your device on its backside.
-
Slide the latch on the bottom left of the backside all the way to the left
-
Keep holding the latch in that position and move to the next step.
-
-
-
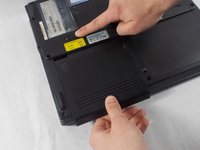
While holding the latch in place, pull out the Optical Disc Drive towards your body, away from the latch with another hand.
-
-
-
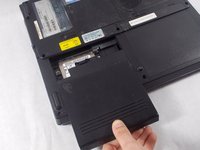
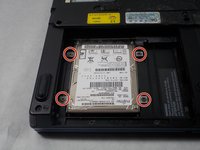
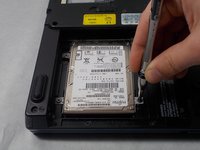
Locate and unscrew the 4 6mm Phillips Head Screws using a PH 0 Screwdriver bit.
-
-
-
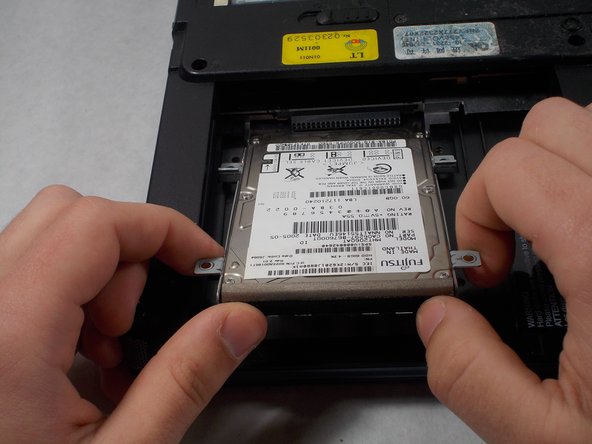
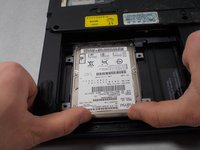
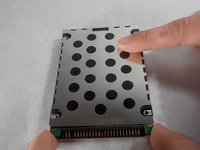
Place both thumbs on the bottom end of the hard drive and push it up.
-
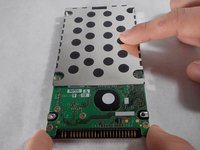
Then use both index fingers to grasp the two metal side prongs that were held in place by the screws.
-
Pull out the drive towards your body using your index fingers.
-
-
-
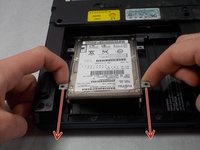
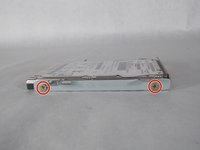
After removing the hard drive from the laptop, locate and unscrew the 4 5mm screws (2 on each side) from the rails using a PH 0 screwdriver bit.
-
-
-
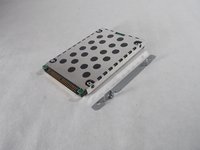
Holding the hard drive in place with the connection facing towards your body, put a finger on the cover and slide it away from your body to reveal the hard drive.
-


To reassemble your device, follow these instructions in reverse order.
To reassemble your device, follow these instructions in reverse order.
Отменить: Я не выполнил это руководство.
2 человек успешно провели ремонт по этому руководству.
Команду

UMass Dartmouth, Team S6-G5, Bernier Spring 2018 Участник UMass Dartmouth, Team S6-G5, Bernier Spring 2018
UMASSD-BERNIER-S18S6G5
3 членов
Автор 12 руководств
Один комментарий
que capacidad de disco duro soporta, ya que le intente instalar uno de 120 pero no me deja formatearla ni ponerle windows