Выберете то, что вам нужно
-
-
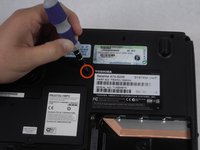
Make sure battery-lock is in the unlock position.
-
Slide button to the left.
-
-
-
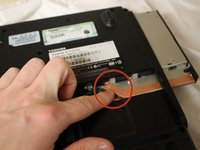
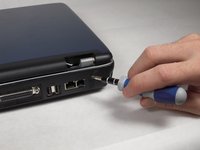
Remove the optical drive cover.
-
A plastic opening tool or a fingernail may be helpful in lifting it from its groove.
-
-
-
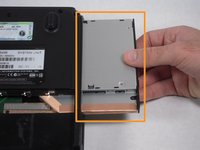
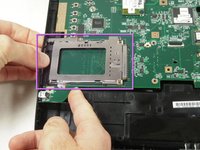
Push the bottom left corner of the CD Drive until the drive protrudes from the case.
-
When a good amount of the CD Drive is showing on the right side, gently pull it out completely.
-
-
-
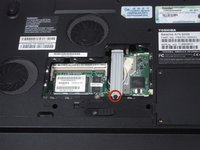
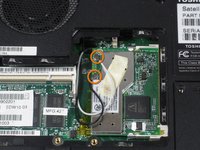
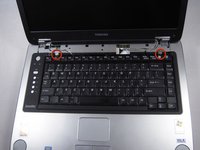
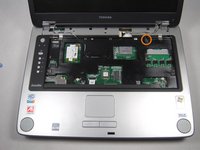
Remove the 5.64 mm screw from the bottom of the crossing bar.
-
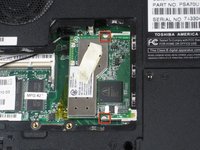
Remove the crossing bar.
-
-
-
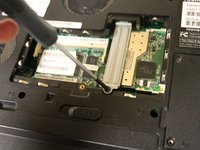
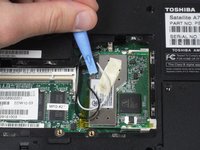
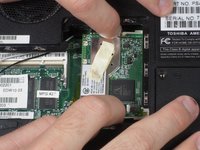
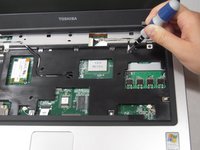
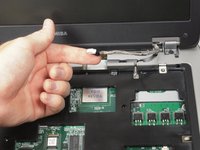
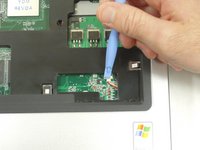
Use a plastic opening tool to disconnect the black and white antenna cable's connectors from the Wi-Fi card.
-
-
-
-
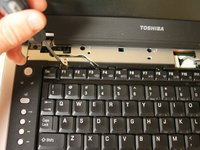
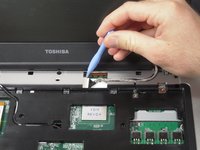
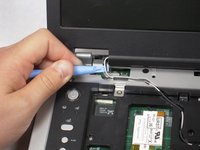
Use the plastic opening tool to lift up the top panel all the way along the keyboard until it loosens.
-
-
-
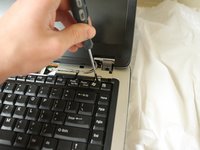
Remove the top panel by popping the panel out the top left socket, then do the same with the right side.
-
-
-
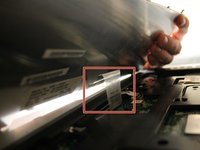
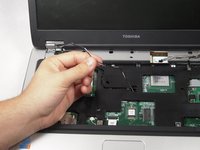
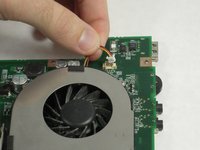
Remove the cable connecting the keyboard with the motherboard.
-
Lift up and remove the keyboard.
-
-
-
Lift up the display assembly to remove it.
-
-
-
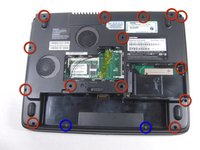
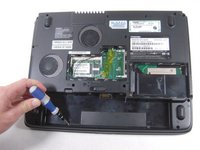
Use the Phillips screwdriver to remove the two 3.7 mm screws from the battery compartment.
-
Then remove the fourteen 8.6 mm screws from the bottom of the case.
There is one more not circled on the top left of this photo, left of the rubber foot.
-
-
-
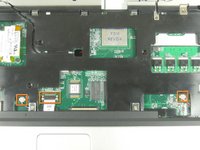
Use the screwdriver to remove six 8.6 mm screws from the top of the case.
-
-
-
Use the plastic opening tool to remove the two speaker wire connectors and the trackpad connector from the motherboard.
-
-
-
With the plastic opening tool, pry around the entire laptop to separate the upper case.
-
-
-
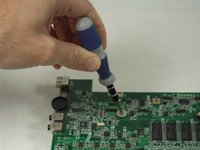
Using the Phillips Screwdriver, remove the two 8.6 mm screws from the front edge of the motherboard.
-
-
-
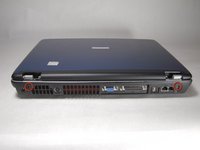
Remove the four screws holding the ports to the rear panel using the 3/16" Wrench.
-
-
-
Lift up on the front edge of the motherboard while gently prying the case away from the ports on the right side of the computer.
-
Repeat with the left side.
-
-
-
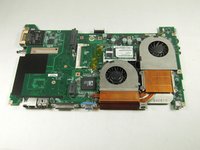
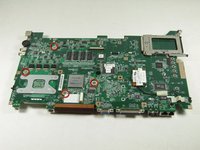
Turn over the motherboard.
-
Remove the four silver screws with a Phillips screwdriver.
-
-
-
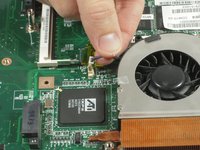
Turn over the motherboard.
-
Lift the fans up to remove them from the motherboard.
-


To reassemble your device, follow these instructions in reverse order.
To reassemble your device, follow these instructions in reverse order.
Отменить: Я не выполнил это руководство.
5 человек успешно провели ремонт по этому руководству.
Команду

Cal Poly, Team 4-43, Amido Fall 2010 Участник Cal Poly, Team 4-43, Amido Fall 2010
CPSU-AMIDO-F10S4G43
5 членов
Автор 39 руководств
2 Комментариев
Thanks Garrett...
Your time and effort in putting this guide together is much appreciated (and helpful!)
Rick