Введение
This guide will show you how to remove or replace the optical disc drive of the Toshiba Satellite C55-A5286 laptop. A Phillips screwdriver of head size PH0 is required for this guide.
Выберете то, что вам нужно
-
-
Unscrew the only screw (5 mm) that is holding on the removable back panel and remove the back panel.
-
-
-
-
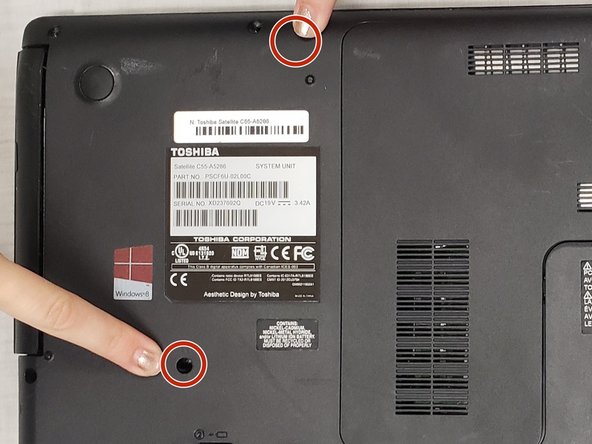
Remove the two 5-mm screws near the disk drive on the back panel. These two screws are above and below the manufacturer’s sticker.
-


To reassemble your device, follow these instructions in reverse order.
To reassemble your device, follow these instructions in reverse order.
Отменить: Я не выполнил это руководство.
2 участников успешно повторили данное руководство.
Команда

IUPUI, Team S1-G5, Hovde Fall 2018 Участник IUPUI, Team S1-G5, Hovde Fall 2018
IUPUI-HOVDE-F18S1G5
2 членов
Автор 9 руководств
Один комментарий
Not a medium effort at all - very easy.
…although, I did have to use an iFixt It needle-nose tweezer to pull the middle 5mm screw out after it was unscrewed - it would not fall out nor did it cling to the screwdriver.