Введение
This guide will show you how to replace your disc drive. This repair requires only a small Phillips Head Screwdriver and your hands.
Выберете то, что вам нужно
-
-
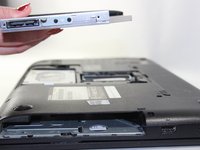
To begin, locate the middle L-shaped panel on the back of the device. Remove the one 7mm long screw (5mm head) located on that panel.
-
Once the screw is removed, lift the panel by grabbing the indentation by the screw and pulling upwards.
-
-
-
-
Locate the screw to the right of the RAM inside the panel. This screw is 6mm long (5mm head); remove it with a small Phillips head screwdriver.
-
-
-
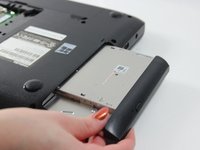
Now that the single screw is removed, you should be able to smoothly slide out the disc drive.
-
Do this by grabbing the tray located on the right edge of your device and pulling out.
-


To reassemble your device, follow these instructions in reverse order.
To reassemble your device, follow these instructions in reverse order.
Отменить: Я не выполнил это руководство.
Еще один человек закончил это руководство.
Команду

UMass Dartmouth, Team 2-5, Isaacson Fall 2016 Участник UMass Dartmouth, Team 2-5, Isaacson Fall 2016
UMASSD-ISAACSON-F16S2G5
3 членов
Автор 10 руководств