Введение
This guide will show you how to remove your laptops hard drive. This process requires a small Phillips Head screwdriver and your hands. There will be several small screws removed, so be sure you have a place to store them as you work to keep from losing any.
Выберете то, что вам нужно
-
-
Using a small Phillip's head screwdriver, unscrew the single 7 mm screw (5 mm head) on the L-shaped panel on the backside of the laptop.
-
-
-
-
Once the screw is removed, pry the panel upwards by gripping the groove pictured.
-
-
-
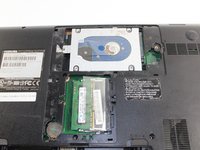
Locate the hard drive. It is in a metal casing as pictured.
-
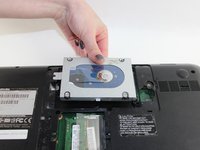
To remove, grab the right side of the piece and slide leftwards.
-
Lift up and out.
-


To reassemble your device, follow these instructions in reverse order.
To reassemble your device, follow these instructions in reverse order.
Отменить: Я не выполнил это руководство.
5 человек успешно провели ремонт по этому руководству.
Команду

UMass Dartmouth, Team 2-5, Isaacson Fall 2016 Участник UMass Dartmouth, Team 2-5, Isaacson Fall 2016
UMASSD-ISAACSON-F16S2G5
3 членов
Автор 10 руководств