Эта версия возможно содержит некорректные исправления. Переключить на последнюю проверенную версию.
Выберете то, что вам нужно
-
Этот шаг не переведен. Помогите перевести
-
Using a plastic opening tool, remove the four plastic stickers located on the four corners of the LCD screen assembly. These plastic stickers are covering screws.
-
Use a Phillips #1 screwdriver to remove the now uncovered 5.75mm screws and place them to the side.
-
-
Этот шаг не переведен. Помогите перевести
-
With a plastic soft pry tool, open up the laptop display assembly by methodically prying from left to right. Be careful to not damage any internal circuitry.
-
-
-
Этот шаг не переведен. Помогите перевести
-
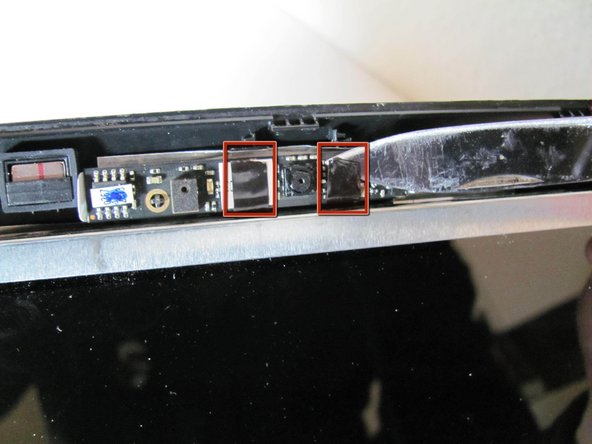
Remove the 2 pieces of black tape using a sharp tool to free the camera board, note that the camera board is still connected to a cable.
-
-
Этот шаг не переведен. Помогите перевести
-
Carefully disconnect the camera board from the laptop. We used tweezers.
-


Отменить: Я не выполнил это руководство.
Еще один человек закончил это руководство.
Команда

Cal Poly, Team 7-7, Maness Winter 2013 Участник Cal Poly, Team 7-7, Maness Winter 2013
CPSU-MANESS-W13S7G7
5 членов
Автор 6 руководств