Перейти к основному содержанию

Toshiba Satellite L655D-S5095 Touchpad Button Replacement

Выберете то, что вам нужно

  1. Toshiba Satellite L655D-S5095 Touchpad Button Replacement, Battery: шаг 1, изображение 1 из 3 Toshiba Satellite L655D-S5095 Touchpad Button Replacement, Battery: шаг 1, изображение 2 из 3 Toshiba Satellite L655D-S5095 Touchpad Button Replacement, Battery: шаг 1, изображение 3 из 3
    • Locate the battery locks on the bottom of the laptop.

    • Slide the right lock outwards, until it locks into place.

    • Slide and hold the left lock outwards and hold it in place.

  2. Toshiba Satellite L655D-S5095 Touchpad Button Replacement: шаг 2, изображение 1 из 1
    • While holding the lock in place, slide the battery out towards you.

  3. Toshiba Satellite L655D-S5095 Touchpad Button Replacement, Touchpad Button: шаг 3, изображение 1 из 2 Toshiba Satellite L655D-S5095 Touchpad Button Replacement, Touchpad Button: шаг 3, изображение 2 из 2
    • Place device down so the bottom of it is facing you.

    • Unscrew each screw located in the deep holes found around the bottom of the device as shown.

    always remove the battery before commencing any work on electrical components!

    Harley Greaves - Ответить

  4. Toshiba Satellite L655D-S5095 Touchpad Button Replacement: шаг 4, изображение 1 из 2 Toshiba Satellite L655D-S5095 Touchpad Button Replacement: шаг 4, изображение 2 из 2
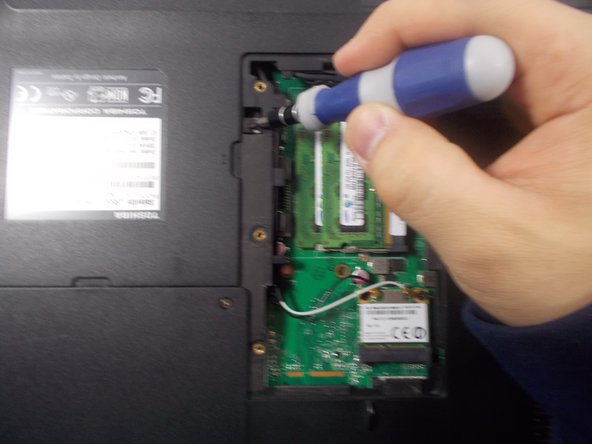
    • Unscrew the panel located over the RAM as shown

    • Rotate the computer so the battery is now located on the top of the device. Now unscrew the single screw located at the top left of the RAM's housing as shown

  5. Toshiba Satellite L655D-S5095 Touchpad Button Replacement: шаг 5, изображение 1 из 3 Toshiba Satellite L655D-S5095 Touchpad Button Replacement: шаг 5, изображение 2 из 3 Toshiba Satellite L655D-S5095 Touchpad Button Replacement: шаг 5, изображение 3 из 3
    • Remove the battery.

    • Unscrew the single screw closest to the center of the device, as shown in picture two.

    • Remove the four screws that were previously hidden by the battery.

  6. Toshiba Satellite L655D-S5095 Touchpad Button Replacement: шаг 6, изображение 1 из 2 Toshiba Satellite L655D-S5095 Touchpad Button Replacement: шаг 6, изображение 2 из 2
    • Remove the disk drive located at the left of the device.

    • Remove two screws that were hidden by the disk drive, as shown in picture two.

  7. Toshiba Satellite L655D-S5095 Touchpad Button Replacement: шаг 7, изображение 1 из 2 Toshiba Satellite L655D-S5095 Touchpad Button Replacement: шаг 7, изображение 2 из 2
    • Now turn the device over so you can see the keyboard. Find the plastic bar located at the top of the keyboard.

    • Pry this plastic cover off with the use of the plastic opening tools.

    • Now unscrew the screws that are located under the plastic cover previously removed. After these are gone, remove the keyboard.

  8. Toshiba Satellite L655D-S5095 Touchpad Button Replacement: шаг 8, изображение 1 из 3 Toshiba Satellite L655D-S5095 Touchpad Button Replacement: шаг 8, изображение 2 из 3 Toshiba Satellite L655D-S5095 Touchpad Button Replacement: шаг 8, изображение 3 из 3
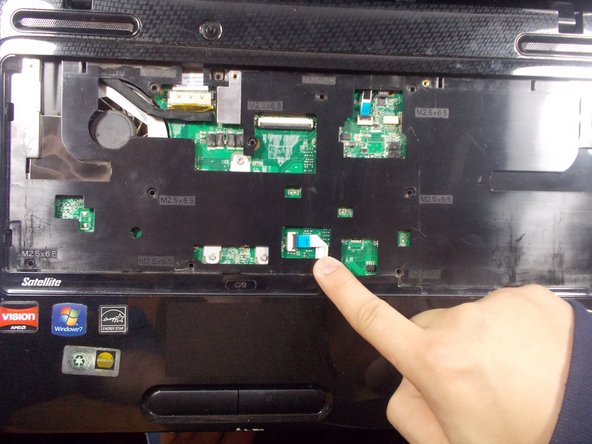
    • Remove the screws located around the area the keyboard had previously covered, as shown in the red circles.

    • Before removing this cover, locate the connection indicated in the photo and disconnect it.
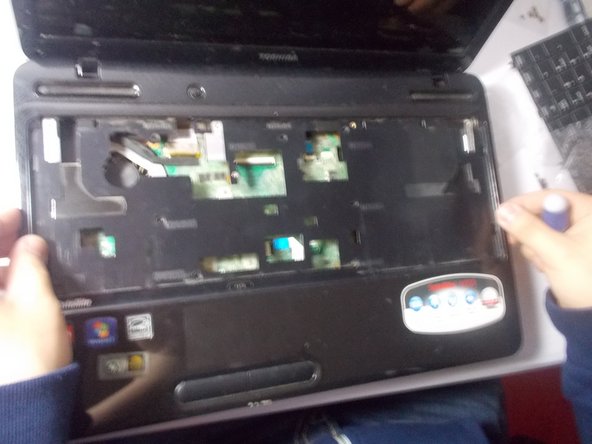
    • Remove the cover.

    • remove all screws on bottom marked F65

  9. Toshiba Satellite L655D-S5095 Touchpad Button Replacement: шаг 10, изображение 1 из 1
    • Turn the cover over and remove the back panel.

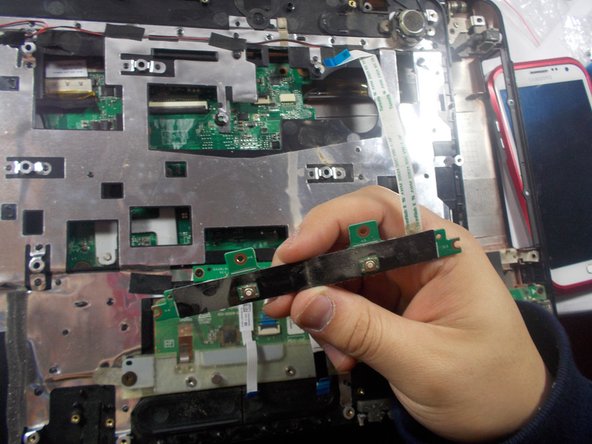
    • Locate the button found at the lower end of the cover. Once found, remove the four screws keeping it in place.

  10. Toshiba Satellite L655D-S5095 Touchpad Button Replacement: шаг 11, изображение 1 из 3 Toshiba Satellite L655D-S5095 Touchpad Button Replacement: шаг 11, изображение 2 из 3 Toshiba Satellite L655D-S5095 Touchpad Button Replacement: шаг 11, изображение 3 из 3
    • Remove the two buses from the button by the blue tab as shown in the pictures.

    • Remove the last bus from the motherboard by pulling the blue tab.

    • Remove the disfunctional button from the device.

Заключение

To reassemble your device, follow these instructions in reverse order.

Еще один человек закончил это руководство.

Alejandro

Участник с: 03/11/14

121 Репутация

1 руководство автора

Команда

UMass Dartmouth, Team 4-4, Calaway Spring 2014 Участник UMass Dartmouth, Team 4-4, Calaway Spring 2014

UMASSD-CALAWAY-S14S4G4

4 членов

Автор 2 руководств

0 Комментариев

Добавить комментарий

Просмотр статистики:

За последние 24часов: 1

За последние 7 дней: 5

За последние 30 дней: 8

За всё время: 2,969