Перейти к основному содержанию

Toshiba Satellite L670 HDD replacement

Выберете то, что вам нужно

  1. Toshiba Satellite L670 HDD replacement, Turn off the computer: шаг 1, изображение 1 из 1
    • Turn off the computer and unplug the power from the computer.

  2. Toshiba Satellite L670 HDD replacement, Flip Laptop: шаг 2, изображение 1 из 1
    • Turn the laptop upside down. Locate the two latches on either side of the battery.

    • Now the battery comes off.

  3. Toshiba Satellite L670 HDD replacement, Remove battery: шаг 3, изображение 1 из 2 Toshiba Satellite L670 HDD replacement, Remove battery: шаг 3, изображение 2 из 2
    • Remove the battery

  4. Toshiba Satellite L670 HDD replacement, Remove rear panel: шаг 4, изображение 1 из 2 Toshiba Satellite L670 HDD replacement, Remove rear panel: шаг 4, изображение 2 из 2
    • Remove the back plate

  5. Toshiba Satellite L670 HDD replacement, Remove the HDD: шаг 5, изображение 1 из 2 Toshiba Satellite L670 HDD replacement, Remove the HDD: шаг 5, изображение 2 из 2
    • Pull the HDD to the left using the silver tab.

    • Pull up on the silver tab and remove the hard drive from the slot.

  6. Toshiba Satellite L670 HDD replacement, Unscrew the HDD cover: шаг 6, изображение 1 из 2 Toshiba Satellite L670 HDD replacement, Unscrew the HDD cover: шаг 6, изображение 2 из 2
    • Remove the 4 screws from the hard drive.

  7. Toshiba Satellite L670 HDD replacement, Insert your new SSD in the case: шаг 7, изображение 1 из 3 Toshiba Satellite L670 HDD replacement, Insert your new SSD in the case: шаг 7, изображение 2 из 3 Toshiba Satellite L670 HDD replacement, Insert your new SSD in the case: шаг 7, изображение 3 из 3
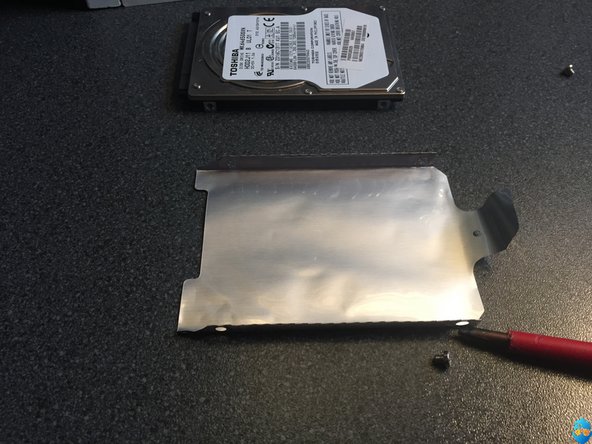
    • Take your new SSD hard drive.

    • Place the SSD in the silver case.

    • Place back the 4 screws you just removed.

  8. Toshiba Satellite L670 HDD replacement, Insert SSD: шаг 8, изображение 1 из 2 Toshiba Satellite L670 HDD replacement, Insert SSD: шаг 8, изображение 2 из 2
    • Insert the SSD into the laptop.

    • Slide the SSD to the right into the socket.

  9. Toshiba Satellite L670 HDD replacement, Place back panel + battery: шаг 9, изображение 1 из 1
    • Replace the back panel and screw it in place.

    • Put the battery back in, you will hear a click once it falls into place.

Заключение

To reassemble the device, follow these instructions in reverse order.

Особая благодарность этим переводчикам:

nl en

100%

Эти переводчики помогают нам починить мир! Хотите внести свой вклад?
Начните переводить ›

levi lenaers

Участник с: 09/24/16

169 Репутация

1 руководство автора

0 Комментариев

Добавить комментарий

Просмотр статистики:

За последние 24часов: 2

За последние 7 дней: 10

За последние 30 дней: 40

За всё время: 1,103