Введение
This guide will show you how to replace the screen of your laptop. Be sure to have an iFixit toolkit handy, or at the very least, a Phillips #0 screwdriver.
Выберете то, что вам нужно
-
-
Remove the four rubber coverings at the corners of the screen frame to access the screws behind them.
-
Using a Phillips #0 screwdriver, remove the four screws at the corners of the screen frame.
-
-
-
-
Now you need to remove the bezel. This is the plastic frame around the screen. Gently pull it forward, and then upward to unsnap it from where it is connected at the hinges.
-
-
-
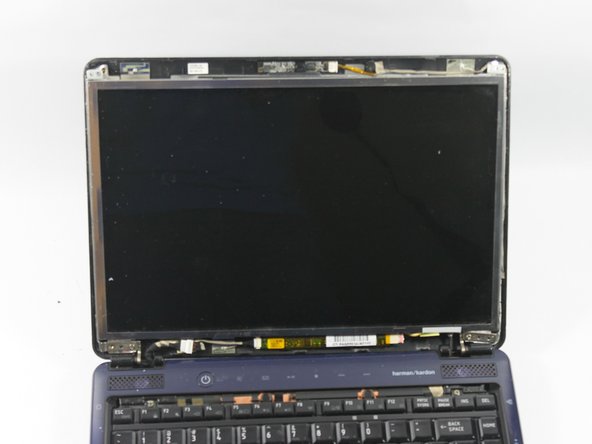
Turn the laptop around so that you can view the lid. Gently pull the lid away from the screen so that you can view the white clips near the base of the screen, as shown in the picture.
-
Un-clip the three connections to disconnect the wiring.
-
-
-
Remove the tape at the spots shown in the picture to detach the screen from the ribbon.
-
-
-
Turn the laptop so the screen faces you again. Remove this screw, and the corresponding screw on the left hand side.
-
Remove the four screws on the sides of the metal frame, located at the upper right and left, as well as the lower right and left.
-


To reassemble your device, follow these instructions in reverse order.
To reassemble your device, follow these instructions in reverse order.
Команда

UMass Dartmouth, Team 2-4, Vijaybhaskar Spring 2014 Участник UMass Dartmouth, Team 2-4, Vijaybhaskar Spring 2014
UMASSD-VIJAYBHASKAR-S14S2G4
4 членов
Автор 1 руководств