Введение
If your hard drive is malfunctioning or if you want to replace it, this guide will show you how to take it out.
Выберете то, что вам нужно
-
-
Flip the laptop over so the bottom is facing upward and the battery is on top.
-
Slide the tab below the battery to the left.
-
-
-
Slide and hold the tab on the right side of the battery to the right.
-
While holding the right tab, slide the battery upward and out its socket.
-
-
-
-
Use a #1 Phillips screwdriver to take out the 8mm Phillips #1 screw holding the hard drive panel on.
-
-
-
Place one finger under the tab of the hard drive panel and lift up with medium force.
-
-
-
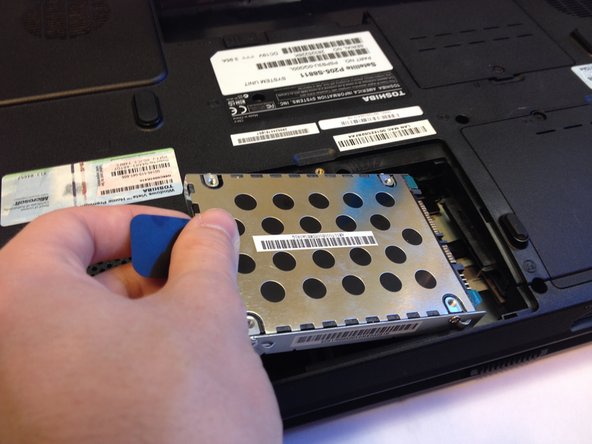
Hold the black tab attached to the hard drive and pull with medium force to the side that the tab is on. This will pull the hard drive out of it's socket.
-
-
-
Use a #1 Phillips screwdriver to unscrew the four 4mm Phillips #1 screws (2 on each side) holding the brackets to the hard drive.
-
With the screws undone, the brackets should come right off. Next, pull on the black tab again to pull the cover off of the hard drive.
-


To reassemble your device, follow these instructions in reverse order.
To reassemble your device, follow these instructions in reverse order.
Отменить: Я не выполнил это руководство.
Еще один человек закончил это руководство.
Команда

Cal Poly, Team 2-8, Amido Winter 2014 Участник Cal Poly, Team 2-8, Amido Winter 2014
CPSU-AMIDO-W14S2G8
4 членов
Автор 7 руководств
Один комментарий
There is a missing step between 4 and 5.
- Remove the screw(s) that hold the HDD assembly in its compartment.
...only then can you move on to step 5.