Перейти к основному содержанию

Toshiba Satellite S55t-C5225 Optical Disk Drive Replacement

Выберете то, что вам нужно

  1. Toshiba Satellite S55t-C5225 Optical Disk Drive Replacement, Battery: шаг 1, изображение 1 из 1
    • Shut down the computer and disconnect all cables

    • Flip the computer over so the bottom is facing up.

  2. Toshiba Satellite S55t-C5225 Optical Disk Drive Replacement: шаг 2, изображение 1 из 2 Toshiba Satellite S55t-C5225 Optical Disk Drive Replacement: шаг 2, изображение 2 из 2
    • Remove the two 7.0 mm Phillips #0 screws that hold the battery in place.

  3. Toshiba Satellite S55t-C5225 Optical Disk Drive Replacement: шаг 3, изображение 1 из 2 Toshiba Satellite S55t-C5225 Optical Disk Drive Replacement: шаг 3, изображение 2 из 2
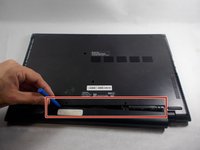
    • Carefully remove the battery by wedging a plastic opening tool in-between the battery and back cover.

  4. Toshiba Satellite S55t-C5225 Optical Disk Drive Replacement, Back Panel: шаг 4, изображение 1 из 2 Toshiba Satellite S55t-C5225 Optical Disk Drive Replacement, Back Panel: шаг 4, изображение 2 из 2
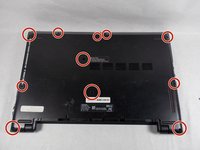
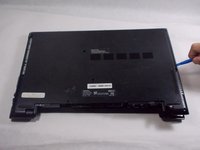
    • Remove the eleven 7.0 mm Phillips #0 screws that secure the back cover.

  5. Toshiba Satellite S55t-C5225 Optical Disk Drive Replacement: шаг 5, изображение 1 из 2 Toshiba Satellite S55t-C5225 Optical Disk Drive Replacement: шаг 5, изображение 2 из 2
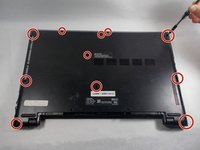
    • Wedge the tip of a plastic opening tool between the back cover and metal frame.

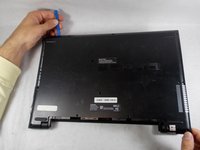
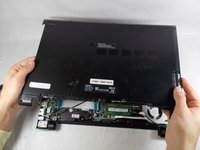
    • Twist the plastic tool, while wedged, to release the retaining tabs from the frame.

    • Repeat these steps around the laptop to release all retaining tabs.

  6. Toshiba Satellite S55t-C5225 Optical Disk Drive Replacement: шаг 6, изображение 1 из 2 Toshiba Satellite S55t-C5225 Optical Disk Drive Replacement: шаг 6, изображение 2 из 2
    • Once all retaining tabs are released, pull up on the cover to remove.

  7. Toshiba Satellite S55t-C5225 Optical Disk Drive Replacement, Optical Disk Drive: шаг 7, изображение 1 из 2 Toshiba Satellite S55t-C5225 Optical Disk Drive Replacement, Optical Disk Drive: шаг 7, изображение 2 из 2
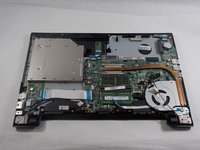
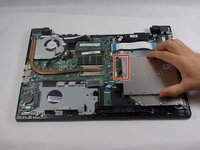
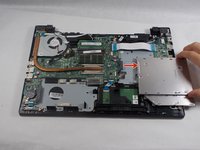
    • Carefully slide the optical disk drive to the right to remove from the motherboard.

Заключение

To reassemble your device, follow these instructions in reverse order.

Еще один человек закончил это руководство.

Nicholas Costa

Участник с: 10/21/19

321 Репутация

1 руководство автора

Команда

UMass Dartmouth, Team S1-G5, Botvin Fall 2019 Участник UMass Dartmouth, Team S1-G5, Botvin Fall 2019

UMASSD-BOTVIN-F19S1G5

3 членов

Автор 15 руководств

0 Комментариев

Добавить комментарий

Просмотр статистики:

За последние 24часов: 0

За последние 7 дней: 2

За последние 30 дней: 8

За всё время: 316