Введение
This guide will demonstrate how to replace the battery in your Trio Stealth-G4X tablet. You may be experiencing problems with your battery, such as your tablet refusing to power on or losing charge quickly. These problems may be caused by a malfunctioning battery. However, make sure that the battery is damaged before attempting replacement. You can check the Trio Stealth-G4X troubleshooting page to see if your battery needs replaced or it can be fixed otherwise.
Выберете то, что вам нужно
-
-
Starting near the middle edge of the Trio Stealth-G4X tablet, gently work the pry tool in between the seams of one side of the tablet.
-
-
-
Work your way around all four corners of the tablet, unlocking all of the retaining tabs that hold the two halves of the tablet together.
-
-
-
You should now be able to separate the two halves of the tablet. Set the back cover aside since you will not be needing it until reassembly.
-
-
-
-
With the motherboard facing upwards, locate the green wiring band at the bottom of the battery. The green wiring band has adhesive holding it to the battery pack.
-
Take the pry tool and gently wedge it in between the battery and the green wiring band. This will allow you to easily lift the wiring band separating it from the battery.
-
-
-
Use tweezers to slowly lift the black adhesive strip off of the battery's soldering points.
-
-
-
Take note of which soldering points are positive and negative (black and red) so that you can accurately install the replacement battery.
-
Once noted, peel back the yellow protective film. Then take your soldering iron and carefully desolder the two wires that connect the battery to the motherboard. Once desoldered the battery is ready for removal.
-
-
-
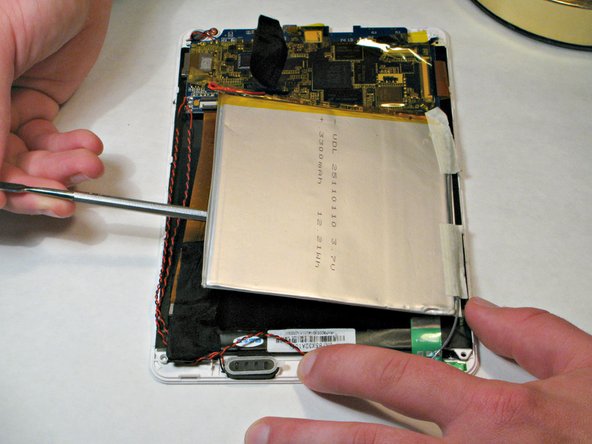
There is a large amount of adhesive retaining the battery to the tablet. To remove the adhesive, gently work the pry tool under the battery pack.
-
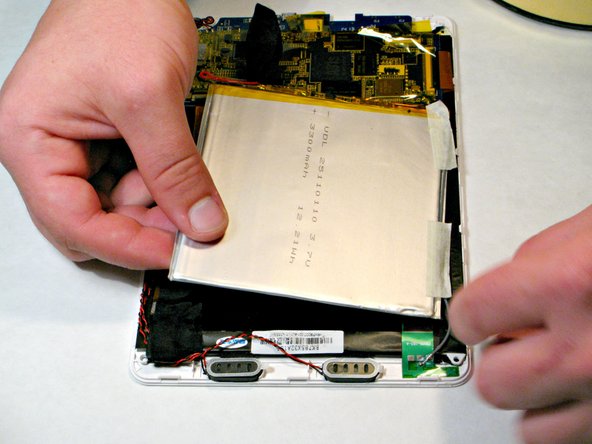
Slowly continue this process until the battery is loose enough for you to grab with your hand.
-
-
-
The battery is now disconnected from the tablet and can replaced. Re-installation of the new battery and tablet assembly can be completed by following the same steps in reverse.
-


To reassemble your device, follow these instructions in reverse order.
To reassemble your device, follow these instructions in reverse order.
Отменить: Я не выполнил это руководство.
Еще один человек закончил это руководство.
Команда

Western Carolina University, Team 1-3, Virtue Fall 2015 Участник Western Carolina University, Team 1-3, Virtue Fall 2015
WCU-VIRTUE-F15S1G3
4 членов
Автор 8 руководств