Введение
If your Audio-Technica AT-LP120XUSB-SV Manual Turntable needs the needle replaced due to it being bent, use this guide to replace the turntable needle and repair the calibration, to ensure that your needle plays your records without damaging them.
If your turntable needle is bent, this can worsen the sound quality of the vinyl record, and damage the actual vinyl record itself, and can damage the needle used to play the vinyl record . When the turntable needle calibration is disrupted, this can damage the needle itself.
Before using this guide, inspect the turntable needle to ensure that there is not debris that is interfering with the turntable needle. If there is any dust that is collected on the needle, this can be removed simply by using your fingers, or by using a small vinyl record brush.
Before beginning this guide, make sure to remove any vinyl records that are on the turntable, and make sure that the power is off.
Выберете то, что вам нужно
-
-
Begin with an Audio-Technica AT-LP120XUSB-SV Manual Turntable, with the tonearm placed in the tonearm holder off to the side.
-
Twist the metal ring at the end of stylus (needle) cartridge counterclockwise.
-
-
-
Pull the stylus cartridge away from the tonearm.
-
Flip the cartridge on its back, so the underside is exposed.
-
-
-
-
Once the stylus has either been straightened or replaced, place the green cover back onto the cartridge and push down until it "clicks" in place.
-
-
-
Download the Audio Technica Cartridge/Headshell Adjustment Protractor.
-
Print the protractor, and place it on the turntable.
-
-
-
Place the stylus on the dot in the center of the "A lines", furthest away from the center of the record.
-
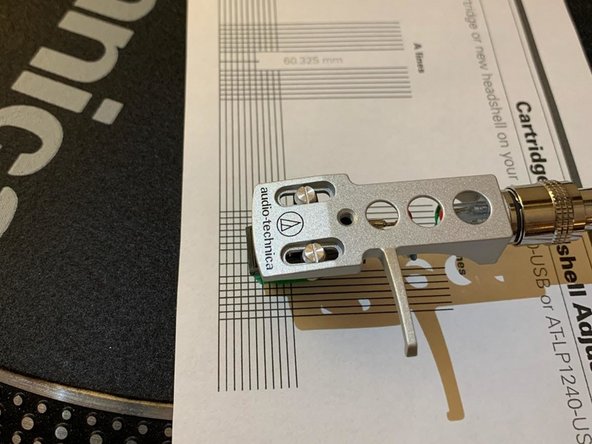
Check to see if the edge of stylus cartridge is aligned with the "B lines" on the protractor.
-
When the edge of the stylus cartridge is not aligned with the "B lines" on the protractor, this means it is out of alignment and needs to be calibrated. To begin, make sure that the tonearm is in the lifted position, by lifting the tonearm lever.
-
-
-
Hold the cartridge in place, and use the screwdriver to unscrew the screws on top of the cartridge.
-
Once the cartridge is loose, slide the screws and check alignment to see if the stylus box lines up with the "B lines".
-
Once the cartridge lines up with the "B lines", use the screwdriver to secure the screws in place.
-
To reassemble your device, follow these instructions in reverse order.
To reassemble your device, follow these instructions in reverse order.


