Перейти к основному содержанию

Uniden D1685 front panel and keypad replacement

Выберете то, что вам нужно

  1. Uniden D1685 front panel and keypad replacement, Front Panel and Keypad: шаг 1, изображение 1 из 1
    • Turn the phone over with the back facing upwards.

  2. Uniden D1685 front panel and keypad replacement: шаг 2, изображение 1 из 1
    • Press your thumb down on the top of the cover and push downwards.

  3. Uniden D1685 front panel and keypad replacement: шаг 3, изображение 1 из 1
    • Once removed the battery will be connected by 2 wires.

    • Do not pull the red and black wires.

  4. Uniden D1685 front panel and keypad replacement: шаг 4, изображение 1 из 1
    • Pull the small, grey connector that is connected to the phone to disconnect the battery pack.

  5. Uniden D1685 front panel and keypad replacement: шаг 5, изображение 1 из 2 Uniden D1685 front panel and keypad replacement: шаг 5, изображение 2 из 2
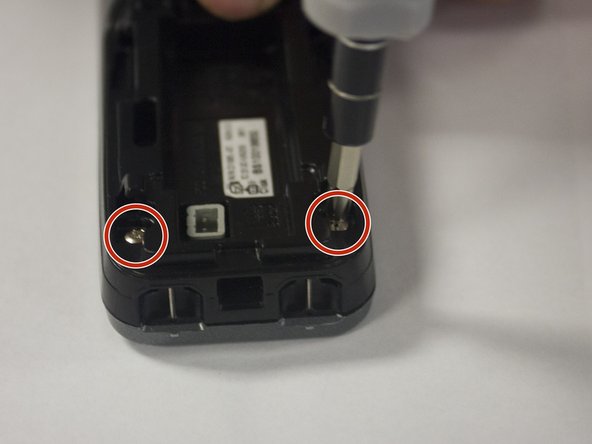
    • Remove the two 3.175 mm screws with the small Phillips head (PH1) screwdriver on the bottom of the phone next to where the battery was removed.

  6. Uniden D1685 front panel and keypad replacement: шаг 6, изображение 1 из 2 Uniden D1685 front panel and keypad replacement: шаг 6, изображение 2 из 2
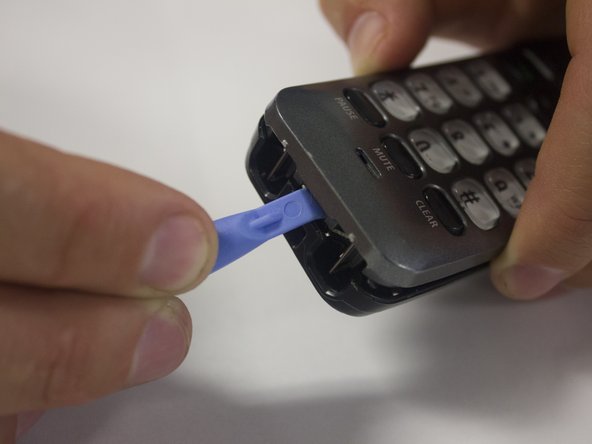
    • Once removed, use plastic opening tool to pull the back and front apart in 3 different locations; the bottom and both sides.

  7. Uniden D1685 front panel and keypad replacement: шаг 7, изображение 1 из 1
    • After splitting the phone there will be 2 wires that connect the phone's circuit board with the speaker on the back.

    • Do not pull the red and black wires.

  8. Uniden D1685 front panel and keypad replacement: шаг 8, изображение 1 из 1
    • The circuit board (Large Green) is attached by 1 3.175mm screw in the top, left corner.

    • Remove this screw using a small Phillips head screwdriver (PH!) from the iFixit toolkit.

  9. Uniden D1685 front panel and keypad replacement: шаг 9, изображение 1 из 1
    • Once the screw has been removed, the circuit board will be removable.

    • Gently remove the circuit board and place it on the back of the phone.

  10. Uniden D1685 front panel and keypad replacement: шаг 10, изображение 1 из 2 Uniden D1685 front panel and keypad replacement: шаг 10, изображение 2 из 2
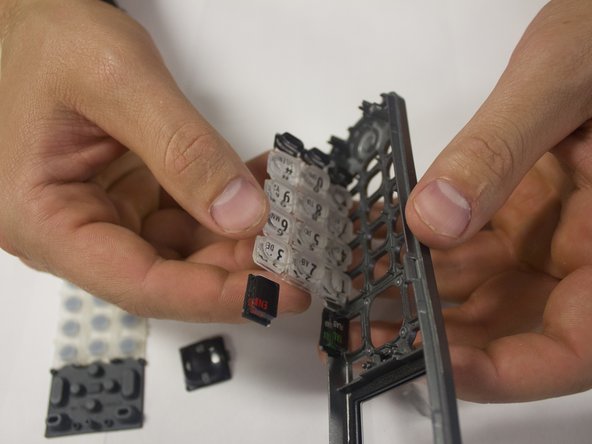
    • The keyboard will now be accessible. Remove the Bumper Pad (rubber pad behind actual keypad).

    • Remove the keypad.

  11. Uniden D1685 front panel and keypad replacement: шаг 11, изображение 1 из 2 Uniden D1685 front panel and keypad replacement: шаг 11, изображение 2 из 2
    • Clean the pad with cleaning spray and/or a brush.

  12. Uniden D1685 front panel and keypad replacement: шаг 12, изображение 1 из 1
    • Once cleaned, make sure to dry off all of the components entirely.

Заключение

To reassemble your device, follow these instructions in reverse order.

Еще один человек закончил это руководство.

William Mullens

Участник с: 03/27/15

215 Репутация

Автор 2 руководств

Команда

University of Alabama, Team 1-4, Naidoo Spring 2015 Участник University of Alabama, Team 1-4, Naidoo Spring 2015

UA-NAIDOO-S15S1G4

5 членов

Автор 6 руководств

Один комментарий

Did all of the above but I can’t get the center piece to work! I have no volume control and I can’t access anything like phone numbers, etc.

Honda Dude - Ответить

Добавить комментарий

Просмотр статистики:

За последние 24часов: 0

За последние 7 дней: 1

За последние 30 дней: 1

За всё время: 307