Введение
Use this guide if buttons are damaged or if button inputs are unresponsive. Button replacement may require replacement of motherboard. While working on this device, make sure that the device is powered off and not plugged into the wall, as this may cause electrostatic shock.
Выберете то, что вам нужно
-
-
Expose the battery compartment by removing the lower back cover of the device.
-
Do this by holding the back side of the device upside down in your hands and applying pressure to the indented portion with both thumbs.
-
-
-
Once the batteries are exposed, use your index finger to push the battery against the spring and pull up to dislodge the battery.
-
-
-
-
Remove the two 11.2 mm Philips #00 screws located on either side of the battery slots.
-
-
-
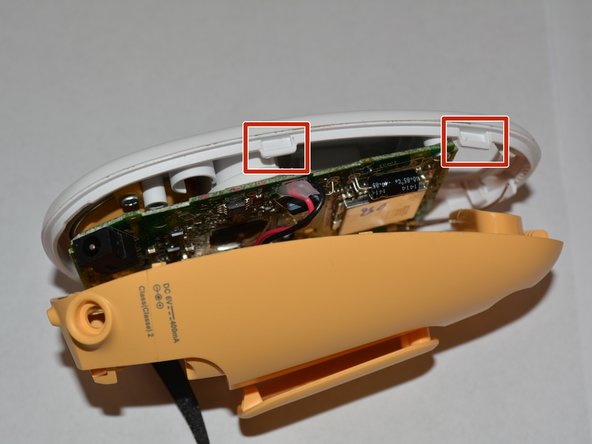
Insert the plastic opening tool into the seam between the front and back coverings to create a gap. The tools edge should point toward the front covering. Start from the bottom of the device and slide the tool around the seam until all clips have been separated from the tabs.
-
-
-
Remove the two 6.8 mm Philips #00 screws located on the top left and right corners of the motherboard.
-
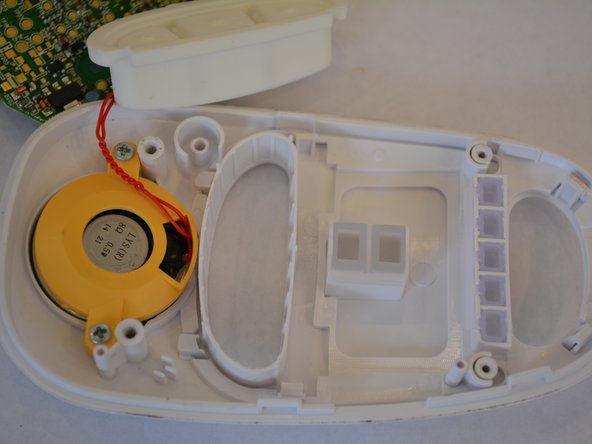
Gently lift the motherboard away from the speaker case.
-
Remove old buttons and place new buttons into the button slot.
-


To reassemble your device, follow these instructions in reverse order.
To reassemble your device, follow these instructions in reverse order.
Команда

USF Tampa, Team 6-3, Remmell Fall 2015 Участник USF Tampa, Team 6-3, Remmell Fall 2015
USFT-REMMELL-F15S6G3
4 членов
Автор 7 руководств