Введение
If you notice that the power is on but no sound will come through your device, this could mean that the speaker needs to be replaced. make sure you are careful while taking the device apart to avoid damaging the wires and soldered pieces.
For more information regarding soldering visit: Soldering Skills
Выберете то, что вам нужно
-
-
Expose the battery compartment by removing the lower back cover of the device.
-
Do this by holding the back side of the device upside down in your hands and applying pressure to the indented portion with both thumbs.
-
-
-
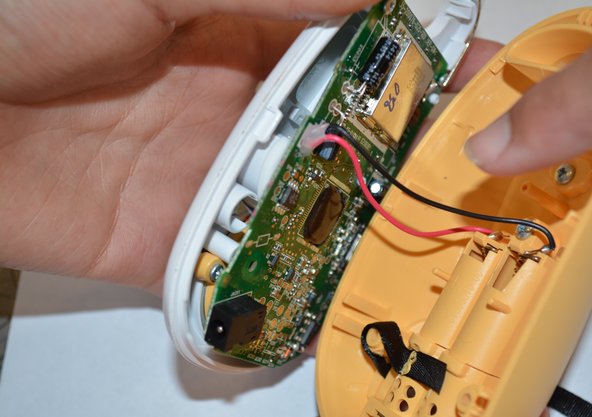
Once the batteries are exposed, use your index finger to push the battery against the spring and pull up to dislodge the battery.
-
-
-
Use the Philips #0 Screwdriver to remove the two 11.2 mm screws located on either side of the battery slots.
-
-
-
-
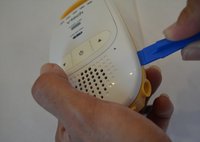
Use a plastic opening tool to gently disconnect the clips holding the case together.
-
-
-
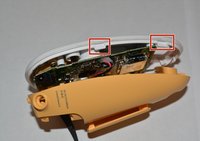
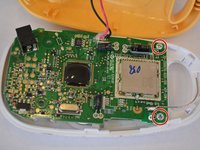
Carefully unscrew the two 6.8 mm Philips head screws near the top of the device using the Philips#0 screw driver.
-
-
-
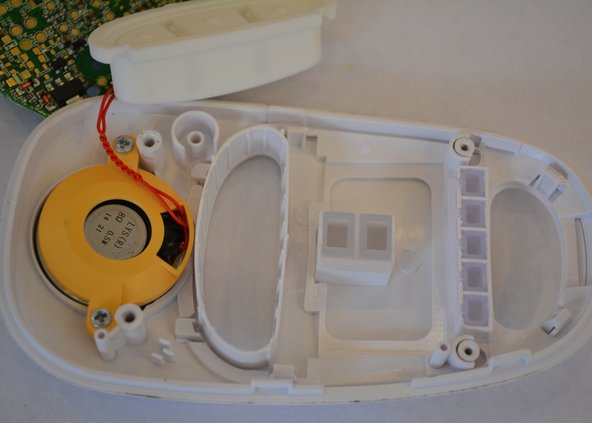
Use a Philips#0 screwdriver and unscrew the two 6.8mm Philips screws holding the speaker in place.
-
-
-
Remove the solder from the bottom left corner of the motherboard to completely detach the speaker from the device.
-


To reassemble your device, follow these instructions in reverse order.
Отменить: Я не выполнил это руководство.
Еще один человек закончил это руководство.
Команда

USF Tampa, Team 6-3, Remmell Fall 2015 Участник USF Tampa, Team 6-3, Remmell Fall 2015
USFT-REMMELL-F15S6G3
4 членов
Автор 7 руководств