Перейти к основному содержанию

Vinotemp VT-12TEDi Power Cord Replacement

Выберете то, что вам нужно

  1. Vinotemp VT-12TEDi Power Cord Replacement, Power Cord: шаг 1, изображение 1 из 2 Vinotemp VT-12TEDi Power Cord Replacement, Power Cord: шаг 1, изображение 2 из 2
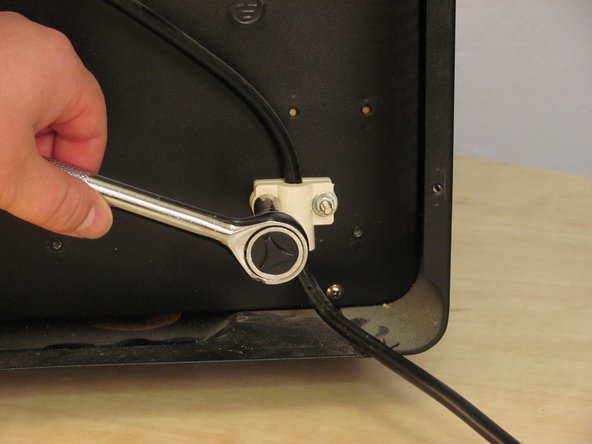
    • Remove nine 12mm Phillips screws from the upper back panel.

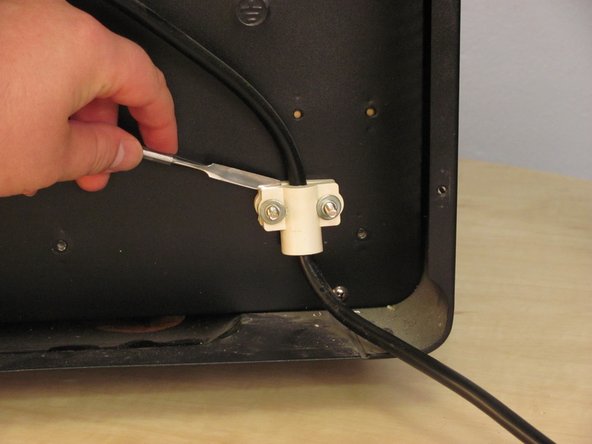
    • Remove three 12mm Phillips screws inset under the back panel.

    • As soon as the screws are removed, the panel will fall freely.

    • When replacing the twelve 12mm Phillips screws, do not tighten the fasteners until all twelve screws have been loosely fitted back onto the cooler. This will ensure the flimsy metal casing will not warp.

  2. Vinotemp VT-12TEDi Power Cord Replacement: шаг 2, изображение 1 из 1
    • Power Cord Fastener

    • Ground

    • Motherboard

    • Heat Sink Fan

    • Heat Sink

  3. Vinotemp VT-12TEDi Power Cord Replacement: шаг 3, изображение 1 из 3 Vinotemp VT-12TEDi Power Cord Replacement: шаг 3, изображение 2 из 3 Vinotemp VT-12TEDi Power Cord Replacement: шаг 3, изображение 3 из 3
    • Remove two 7mm Hex Nuts.

    • Clearance is minimal and these screws are very tight. You will likely need a socket wrench to avoid stripping.

    • If the white plastic components stick, pry them apart with a metal spudger. Don't pull on the power cord to get plastic pieces to separate.

  4. Vinotemp VT-12TEDi Power Cord Replacement: шаг 4, изображение 1 из 2 Vinotemp VT-12TEDi Power Cord Replacement: шаг 4, изображение 2 из 2
    • Remove one 12mm Phillips screw securing ground.

  5. Vinotemp VT-12TEDi Power Cord Replacement: шаг 5, изображение 1 из 3 Vinotemp VT-12TEDi Power Cord Replacement: шаг 5, изображение 2 из 3 Vinotemp VT-12TEDi Power Cord Replacement: шаг 5, изображение 3 из 3
    • Remove power cable from motherboard.

    • Pinch cable connector to release it from the motherboard, then pull.

  6. Vinotemp VT-12TEDi Power Cord Replacement: шаг 6, изображение 1 из 1
    • Your power cord is removed.

Заключение

To reassemble your device, follow these instructions in reverse order.

Еще один человек закончил это руководство.

Jeff Snyder

Участник с: 02/07/13

8 799 Репутация

Автор 4 руководств

Команда

iFixit Участник iFixit

Staff

135 членов

Автор 16 732 руководств

0 Комментариев

Добавить комментарий

Просмотр статистики:

За последние 24часов: 0

За последние 7 дней: 1

За последние 30 дней: 1

За всё время: 845