Перейти к основному содержанию

Visual Land Prestige 10 Motherboard Replacement

Выберете то, что вам нужно

  1. Visual Land Prestige 10 Motherboard Replacement, Back Case: шаг 1, изображение 1 из 3 Visual Land Prestige 10 Motherboard Replacement, Back Case: шаг 1, изображение 2 из 3 Visual Land Prestige 10 Motherboard Replacement, Back Case: шаг 1, изображение 3 из 3
    Инструмент, используемый на этом этапе:
    Magnetic Project Mat
    $19.95
    Купить
    • Remove the 3mm screws from bottom of tablet with the precision screwdriver and place on magnetic mat. label where they came from.

    • All screws throughout this guide are the same 3mm size.

  2. Visual Land Prestige 10 Motherboard Replacement: шаг 2, изображение 1 из 3 Visual Land Prestige 10 Motherboard Replacement: шаг 2, изображение 2 из 3 Visual Land Prestige 10 Motherboard Replacement: шаг 2, изображение 3 из 3
    • Using the spudger, create a small opening to be used to open the back case.

    • While holding the case open, insert the plastic opening tool to get a larger opening.

    • Once you have a slight opening, insert the spudger and work around the edges, separating the back plate from the front.

  3. Visual Land Prestige 10 Motherboard Replacement: шаг 3, изображение 1 из 3 Visual Land Prestige 10 Motherboard Replacement: шаг 3, изображение 2 из 3 Visual Land Prestige 10 Motherboard Replacement: шаг 3, изображение 3 из 3
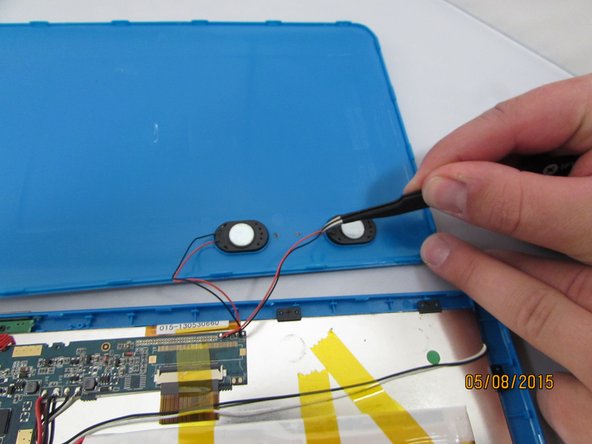
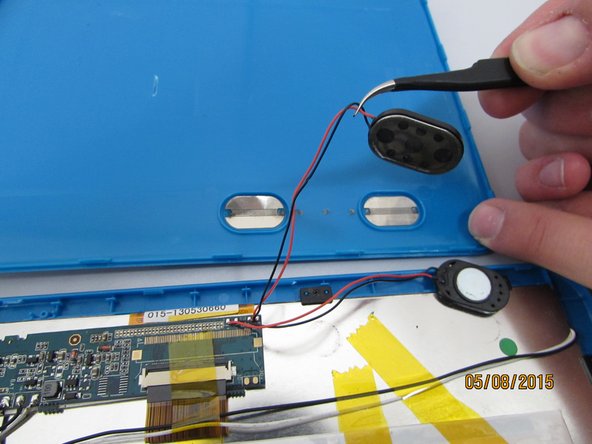
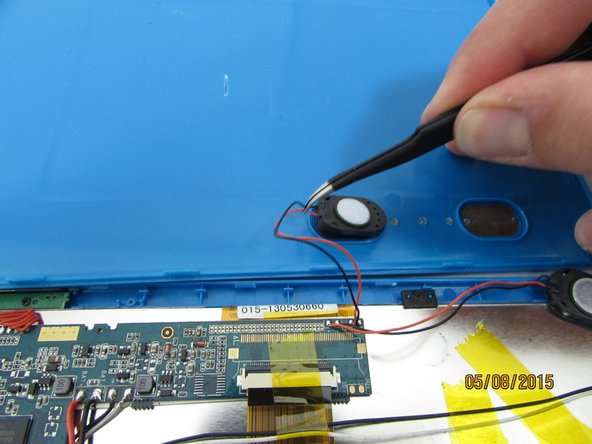
    • now that the case is open, carefully remove the speakers and set aside.

  4. Visual Land Prestige 10 Motherboard Replacement: шаг 4, изображение 1 из 2 Visual Land Prestige 10 Motherboard Replacement: шаг 4, изображение 2 из 2
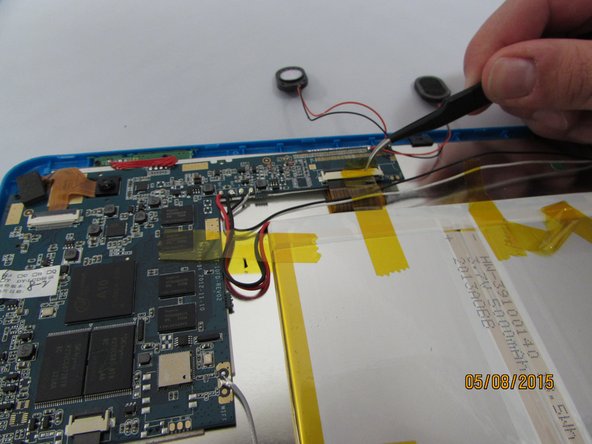
    • Gently remove the speakers from the back case with tweezers and set the case aside.

  5. Visual Land Prestige 10 Motherboard Replacement, Battery: шаг 5, изображение 1 из 3 Visual Land Prestige 10 Motherboard Replacement, Battery: шаг 5, изображение 2 из 3 Visual Land Prestige 10 Motherboard Replacement, Battery: шаг 5, изображение 3 из 3
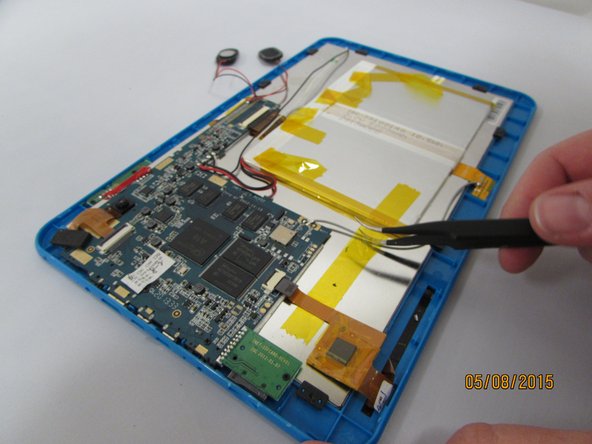
    • Remove yellow tape from surrounding components.

  6. Visual Land Prestige 10 Motherboard Replacement: шаг 6, изображение 1 из 3 Visual Land Prestige 10 Motherboard Replacement: шаг 6, изображение 2 из 3 Visual Land Prestige 10 Motherboard Replacement: шаг 6, изображение 3 из 3
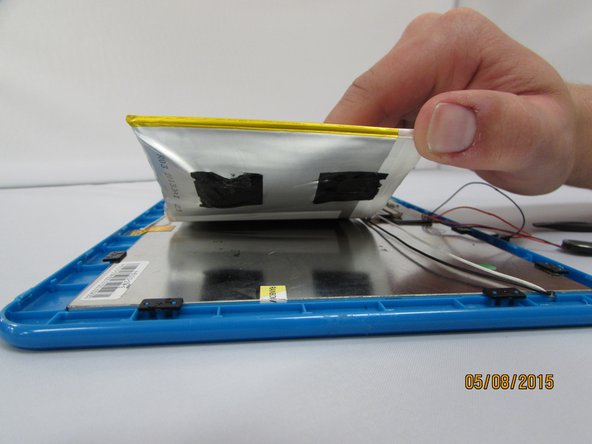
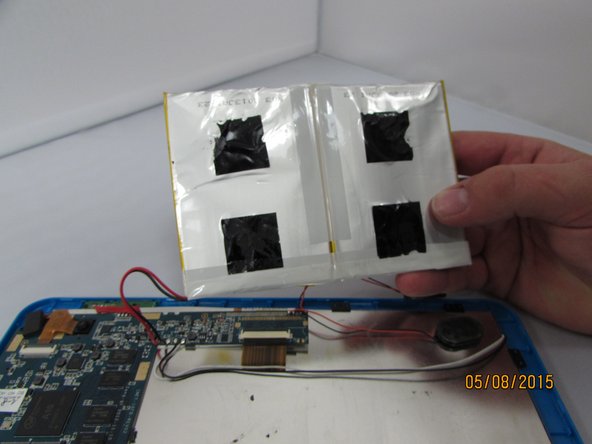
    • insert the spudger and gently work around and underneath the battery.

    • With the battery separated from the LCD Display, set it aside.

    • The battery is held down by very strong adhesive.

  7. Visual Land Prestige 10 Motherboard Replacement: шаг 7, изображение 1 из 1
    • Desolder and remove the 2 wires from the motherboard.

    • Use caution when desoldering to avoid damage to yourself or to the components.

  8. Visual Land Prestige 10 Motherboard Replacement, Front Facing Camera: шаг 8, изображение 1 из 3 Visual Land Prestige 10 Motherboard Replacement, Front Facing Camera: шаг 8, изображение 2 из 3 Visual Land Prestige 10 Motherboard Replacement, Front Facing Camera: шаг 8, изображение 3 из 3
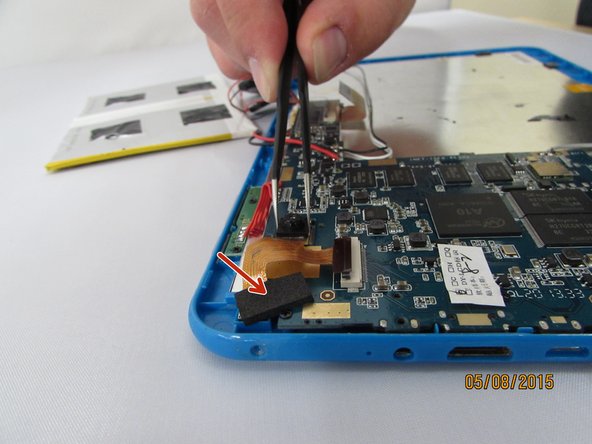
    • Locate the Camera Housing. Gently grip and lift the small black tab until you feel an audible click.

    • Gently remove the connector by pulling straight out, gripping the black connector head or as close as possible.

    • Gently grip and pull up the front camera, covered by protective adhesive foam.

    • Set aside the Camera housing.

  9. Visual Land Prestige 10 Motherboard Replacement, Motherboard: шаг 9, изображение 1 из 3 Visual Land Prestige 10 Motherboard Replacement, Motherboard: шаг 9, изображение 2 из 3 Visual Land Prestige 10 Motherboard Replacement, Motherboard: шаг 9, изображение 3 из 3
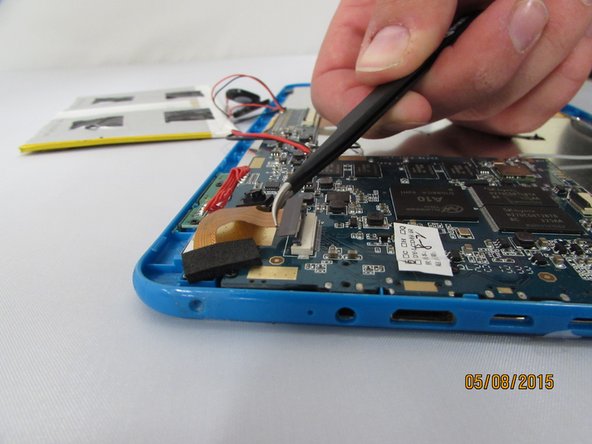
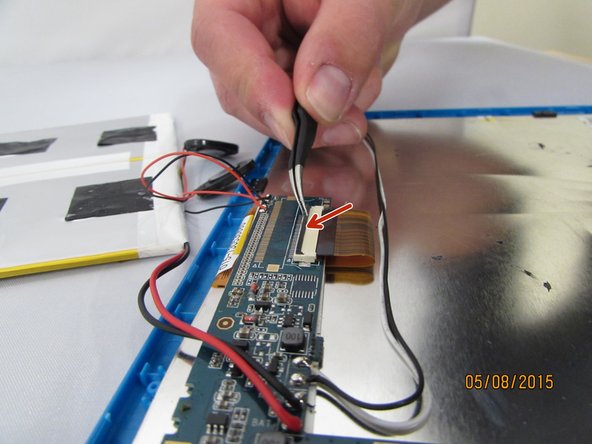
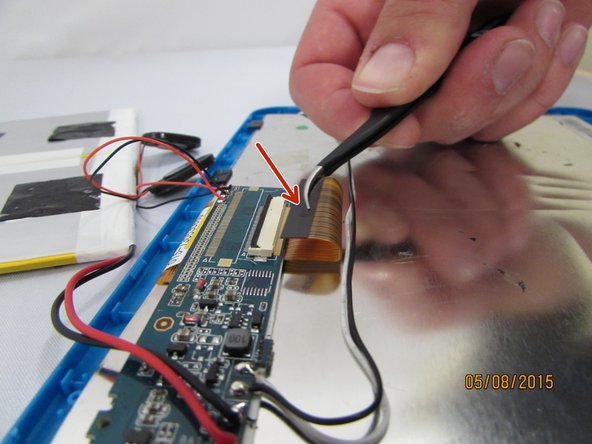
    • Locate the LCD Connector.

    • Using tweezers, grip the small black tab connected to the white plastic.

    • Gently lift the tab towards you until it clicks.

    • Remove the connector by pulling straight out, gripping the black connector head.

  10. Visual Land Prestige 10 Motherboard Replacement: шаг 10, изображение 1 из 3 Visual Land Prestige 10 Motherboard Replacement: шаг 10, изображение 2 из 3 Visual Land Prestige 10 Motherboard Replacement: шаг 10, изображение 3 из 3
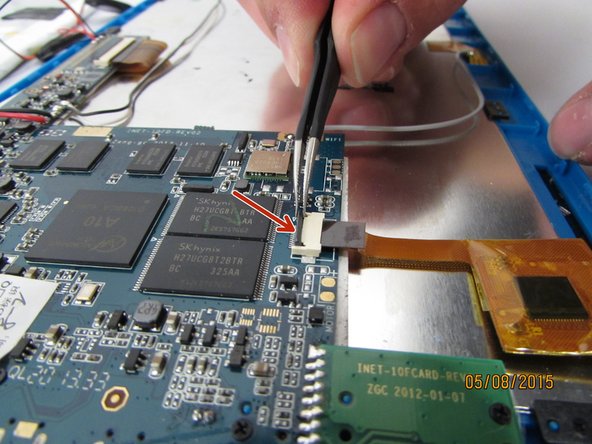
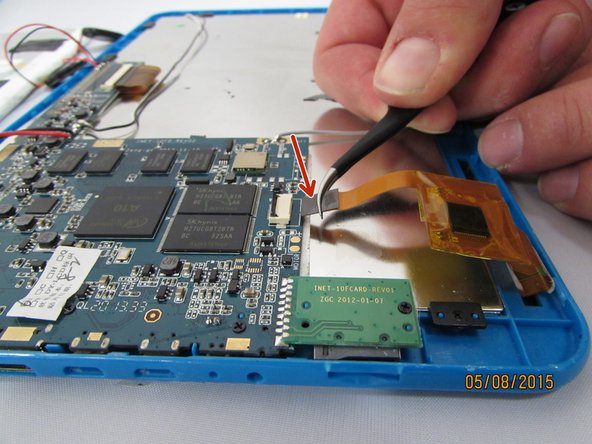
    • Locate the Touchscreen connector and grip the forward-most black tab with the tweezers.

    • Lift the tab towards you until you feel an audible click.

    • Gently remove the connector by pulling straight out, gripping the black connector head.

  11. Visual Land Prestige 10 Motherboard Replacement: шаг 11, изображение 1 из 2 Visual Land Prestige 10 Motherboard Replacement: шаг 11, изображение 2 из 2
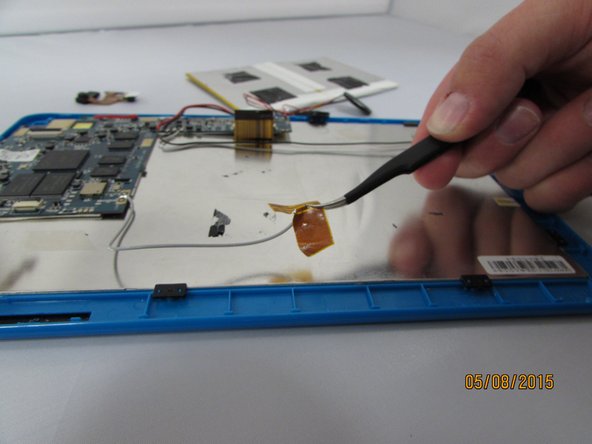
    • Gently lift up the WiFi antenna and set aside.

  12. Visual Land Prestige 10 Motherboard Replacement: шаг 12, изображение 1 из 2 Visual Land Prestige 10 Motherboard Replacement: шаг 12, изображение 2 из 2
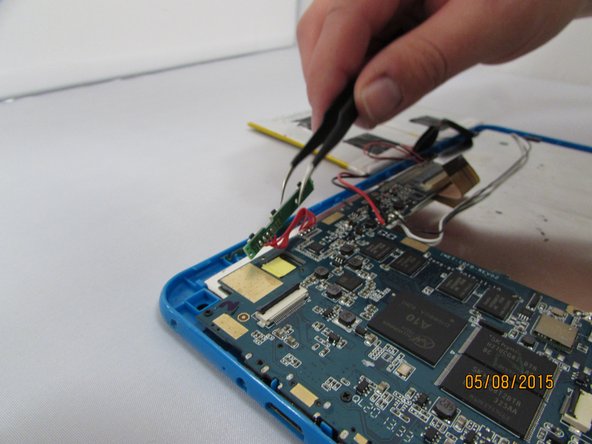
    • Locate and remove the screws holding the volume and hold button controller. Set screws aside on magnetic mat and label them.

    • Gently lift up on the controller and leave it hanging loose.

  13. Visual Land Prestige 10 Motherboard Replacement: шаг 13, изображение 1 из 2 Visual Land Prestige 10 Motherboard Replacement: шаг 13, изображение 2 из 2
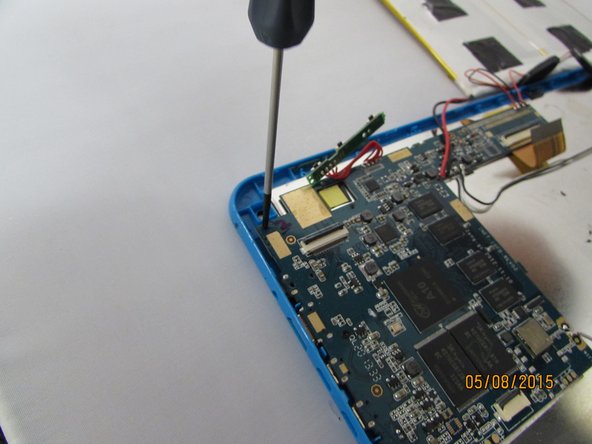
    • Remove screws located on motherboard.

    • Place on magnetic mat and label them

    • Gently remove the Motherboard and any wires connected to it and set it aside on a static free surface.

Заключение

To reassemble your device, follow these instructions in reverse order.

6 участников успешно повторили данное руководство.

Connor Reese

Участник с: 04/08/15

1 298 Репутация

Автор 6 руководств

Команда

Eastern Washington University, Team 2-1, Matresse Spring 2015 Участник Eastern Washington University, Team 2-1, Matresse Spring 2015

EWU-MATRESSE-S15S2G1

3 членов

Автор 12 руководств

Один комментарий

I just received my tablet. and it will not allow me to set up a password. It keeps asking for previous password. I have done a hard reset but have not been able to set up my tablet.

John Jefferson - Ответить

Добавить комментарий

Просмотр статистики:

За последние 24часов: 0

За последние 7 дней: 0

За последние 30 дней: 6

За всё время: 1,584