Перейти к основному содержанию

Vtech InnoTab 3S Microphone Replacement

Выберете то, что вам нужно

  1. Vtech InnoTab 3S Microphone Replacement, Rear Panel: шаг 1, изображение 1 из 3 Vtech InnoTab 3S Microphone Replacement, Rear Panel: шаг 1, изображение 2 из 3 Vtech InnoTab 3S Microphone Replacement, Rear Panel: шаг 1, изображение 3 из 3
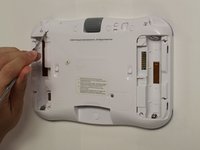
    • While holding the battery compartment locks down, slide the two battery doors outwards from the sides of the device.

    • Remove the batteries from the device.

  2. Vtech InnoTab 3S Microphone Replacement: шаг 2, изображение 1 из 2 Vtech InnoTab 3S Microphone Replacement: шаг 2, изображение 2 из 2
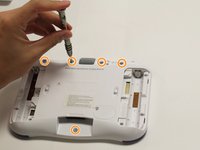
    • Remove six 7 mm screws from the interior of the battery compartment using a Phillips #1 screwdriver.

  3. Vtech InnoTab 3S Microphone Replacement: шаг 3, изображение 1 из 3 Vtech InnoTab 3S Microphone Replacement: шаг 3, изображение 2 из 3 Vtech InnoTab 3S Microphone Replacement: шаг 3, изображение 3 из 3
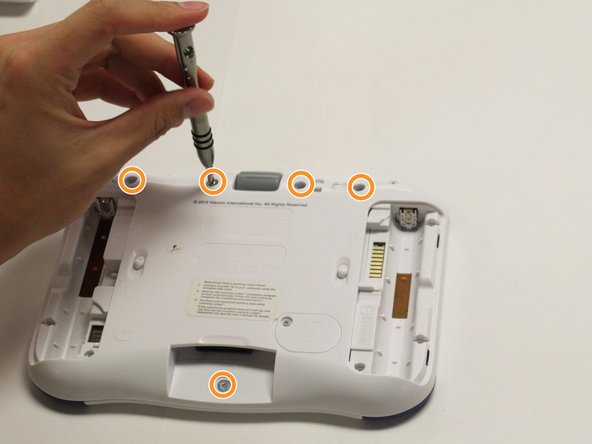
    • Using a nylon spudger, remove the five caps that hide the screws.

    • Potential for device damage: Be careful not to scrape the plastic from the device using the spudger.

    • When removing the caps, hold the spudger vertical to the board to make removal easier. Also try to push in with your spudger pointing towards the bottom of the device.

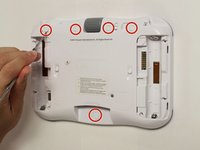
    • Remove the five 5 mm Phillips #1 screws from the rear panel of the device.

  4. Vtech InnoTab 3S Microphone Replacement: шаг 4, изображение 1 из 1
    • Carefully remove the rear panel from the front panel of the device.

    • Once the rear panel is removed, you'll be able to see the motherboard and other components within the Vtech InnoTab 3s.

  5. Vtech InnoTab 3S Microphone Replacement, Motherboard: шаг 5, изображение 1 из 2 Vtech InnoTab 3S Microphone Replacement, Motherboard: шаг 5, изображение 2 из 2
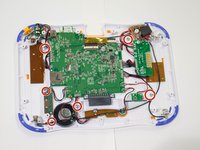
    • Remove the six screws that secure the motherboard to the front panel of the device using a Phillips #1 screwdriver.

    • Remove the other 5mm screws that secure the charger port and the buttons to the inside of the front panel.

    • Remove the six 3 mm screws securing the battery clip.

  6. Vtech InnoTab 3S Microphone Replacement: шаг 6, изображение 1 из 1
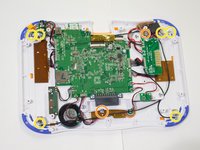
    • Using the tweezers, remove one battery clip from each corner (four total) of the Vtech InnoTab 3s.

    • With the tweezers, unsecure the charging port, headphone port, and the light switch button from the front panel of the device.

    • Potential for device damage: Avoid forceful movements when removing the motherboard to prevent damage of device components.

  7. Vtech InnoTab 3S Microphone Replacement, Microphone: шаг 7, изображение 1 из 2 Vtech InnoTab 3S Microphone Replacement, Microphone: шаг 7, изображение 2 из 2
    • The microphone is on the bottom right of the device, and shaped like a small white circle. There are two prongs securing the microphone to the device.

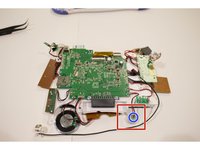
    • Solder the prongs to unsecure the microphone from the device.

    • Avoid forceful movements when soldering to prevent damage to device components and personal injury.

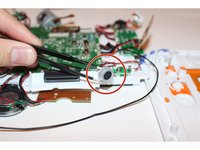
    • Using the tweezers carefully remove the microphone from the device.

Заключение

To reassemble your device, follow these instructions in reverse order.

taweewatchulikavit

Участник с: 08/27/15

341 Репутация

Автор 3 руководств

Команда

USF Tampa, Team 8-2, Eyestone Fall 2015 Участник USF Tampa, Team 8-2, Eyestone Fall 2015

USFT-EYESTONE-F15S8G2

4 членов

Автор 9 руководств

0 Комментариев

Добавить комментарий

Просмотр статистики:

За последние 24часов: 0

За последние 7 дней: 4

За последние 30 дней: 4

За всё время: 200