Перейти к основному содержанию

Wacker Pump PST2 400 2008 Power Cable Replacement

Выберете то, что вам нужно

  1. Wacker Pump PST2 400 2008 Power Cable Replacement, Remove the cotter pins: шаг 1, изображение 1 из 3 Wacker Pump PST2 400 2008 Power Cable Replacement, Remove the cotter pins: шаг 1, изображение 2 из 3 Wacker Pump PST2 400 2008 Power Cable Replacement, Remove the cotter pins: шаг 1, изображение 3 из 3
    • Before starting, ensure the device is unplugged from power.

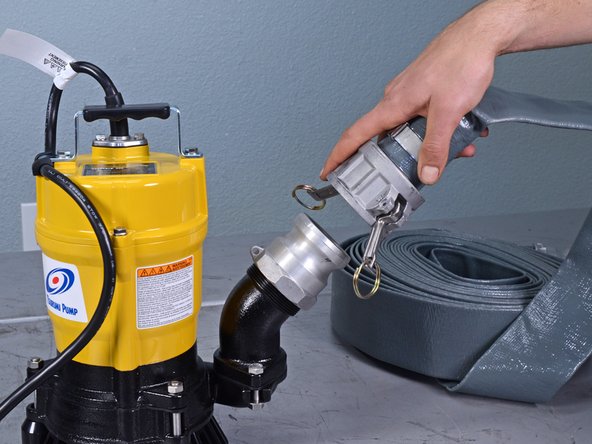
    • Pull to remove the two cotter pins securing the hose's locking arms, one on either side.

  2. Wacker Pump PST2 400 2008 Power Cable Replacement, Unlock the collar arms: шаг 2, изображение 1 из 3 Wacker Pump PST2 400 2008 Power Cable Replacement, Unlock the collar arms: шаг 2, изображение 2 из 3 Wacker Pump PST2 400 2008 Power Cable Replacement, Unlock the collar arms: шаг 2, изображение 3 из 3
    • Flip the two locking arms down to unlock the hose collar.

  3. Wacker Pump PST2 400 2008 Power Cable Replacement, Remove the hose: шаг 3, изображение 1 из 2 Wacker Pump PST2 400 2008 Power Cable Replacement, Remove the hose: шаг 3, изображение 2 из 2
    • Lift the hose away from the collar on the pump body to remove it.

  4. Wacker Pump PST2 400 2008 Power Cable Replacement, Remove the handle bolts: шаг 4, изображение 1 из 1
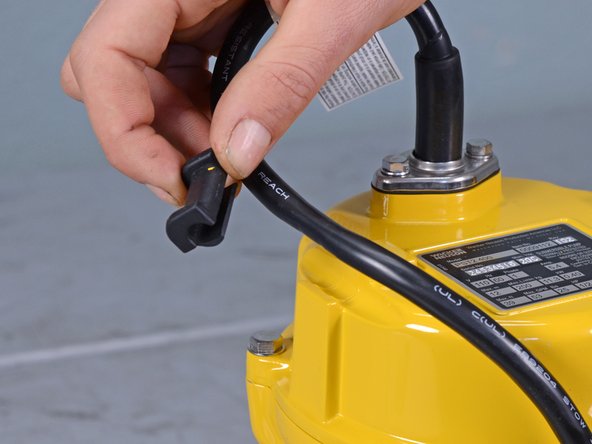
    • Use a 10 mm socket to remove the two bolts securing the handle to the housing cover.

  5. Wacker Pump PST2 400 2008 Power Cable Replacement, Remove the handle: шаг 5, изображение 1 из 2 Wacker Pump PST2 400 2008 Power Cable Replacement, Remove the handle: шаг 5, изображение 2 из 2
    • Remove the handle.

  6. Wacker Pump PST2 400 2008 Power Cable Replacement, Remove the cable guide: шаг 6, изображение 1 из 2 Wacker Pump PST2 400 2008 Power Cable Replacement, Remove the cable guide: шаг 6, изображение 2 из 2
    • Remove the plastic cable guide from the power cord.

    • During reassembly, ensure that the cable has enough slack and is not kinked at its flex joint before securing the cable guide with the handle bolt.

  7. Wacker Pump PST2 400 2008 Power Cable Replacement, Remove the housing cover: шаг 7, изображение 1 из 2 Wacker Pump PST2 400 2008 Power Cable Replacement, Remove the housing cover: шаг 7, изображение 2 из 2
    • Use an 8 mm socket to remove the two bolts securing the power cable to the housing cover.

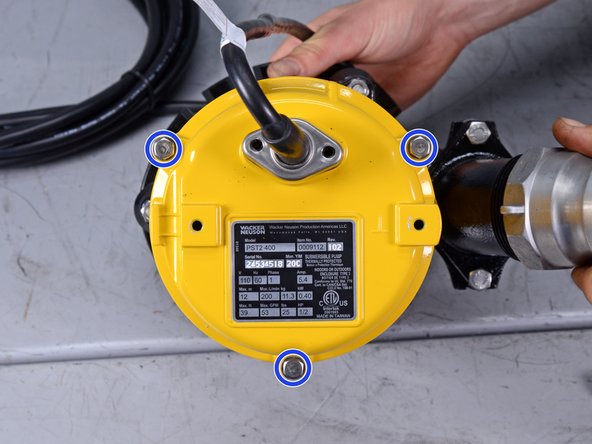
    • Use a 10 mm socket to remove the three bolts securing the housing cover to the main body.

  8. Wacker Pump PST2 400 2008 Power Cable Replacement: шаг 8, изображение 1 из 3 Wacker Pump PST2 400 2008 Power Cable Replacement: шаг 8, изображение 2 из 3 Wacker Pump PST2 400 2008 Power Cable Replacement: шаг 8, изображение 3 из 3
    • Lift the housing cover up and off of the main body.

    • The housing cover is still attached at the power cord, so don't attempt to completely remove it just yet.

  9. Wacker Pump PST2 400 2008 Power Cable Replacement, Disconnect the ground wire: шаг 9, изображение 1 из 2 Wacker Pump PST2 400 2008 Power Cable Replacement, Disconnect the ground wire: шаг 9, изображение 2 из 2
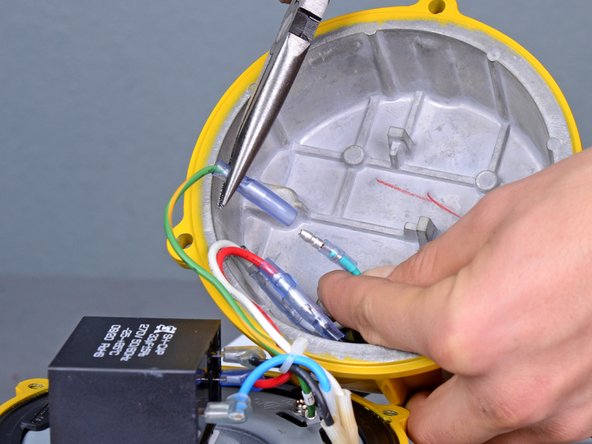
    • Use a pair of needle nose pliers to disconnect the ground wire's bullet connector.

  10. Wacker Pump PST2 400 2008 Power Cable Replacement, Disconnect the power wires: шаг 10, изображение 1 из 3 Wacker Pump PST2 400 2008 Power Cable Replacement, Disconnect the power wires: шаг 10, изображение 2 из 3 Wacker Pump PST2 400 2008 Power Cable Replacement, Disconnect the power wires: шаг 10, изображение 3 из 3
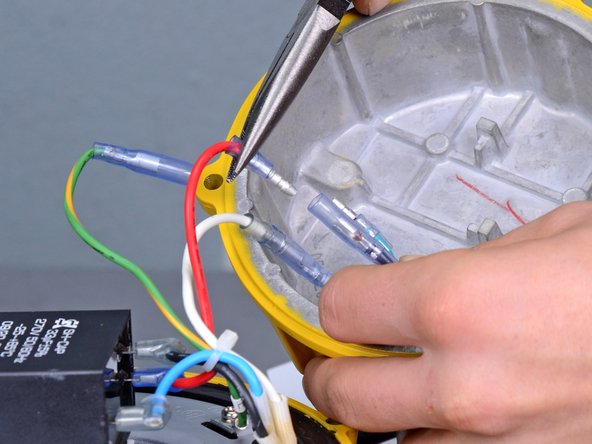
    • Use a pair of needle nose pliers to disconnect the red and white power wires' bullet connectors.

    • During reassembly:

    • Connect the power cord's black wire to the device's red wire

    • Connect the green ground wires together

    • Connect the white wires together

  11. Wacker Pump PST2 400 2008 Power Cable Replacement, Remove the power cable: шаг 11, изображение 1 из 2 Wacker Pump PST2 400 2008 Power Cable Replacement, Remove the power cable: шаг 11, изображение 2 из 2
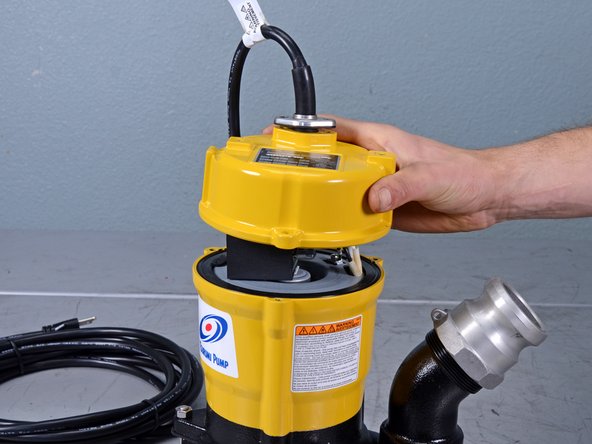
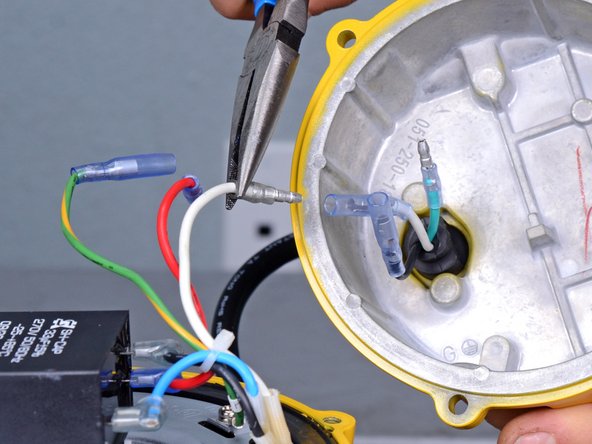
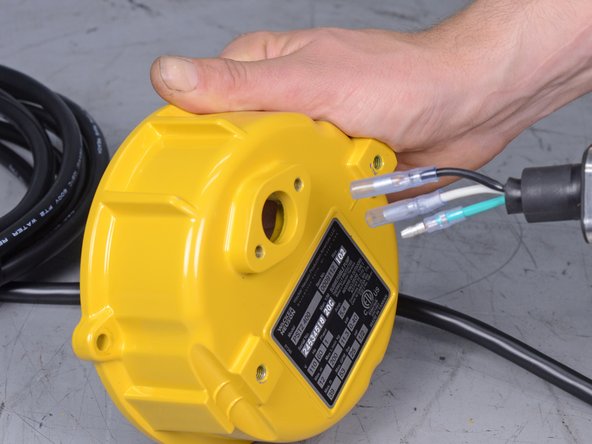
    • Pull the loose power cable out through its hole on the housing cover to remove it.

Заключение

To reassemble your device, follow these instructions in reverse order.

2 участников успешно повторили данное руководство.

Carsten Frauenheim

Участник с: 03/10/20

115 343 Репутация

Автор 339 руководств

Команда

iFixit Участник iFixit

Staff

136 членов

Автор 17 430 руководств

Один комментарий

Make it easier to order parts.

ALLAN - Ответить

Добавить комментарий

Просмотр статистики:

За последние 24часов: 2

За последние 7 дней: 13

За последние 30 дней: 48

За всё время: 855