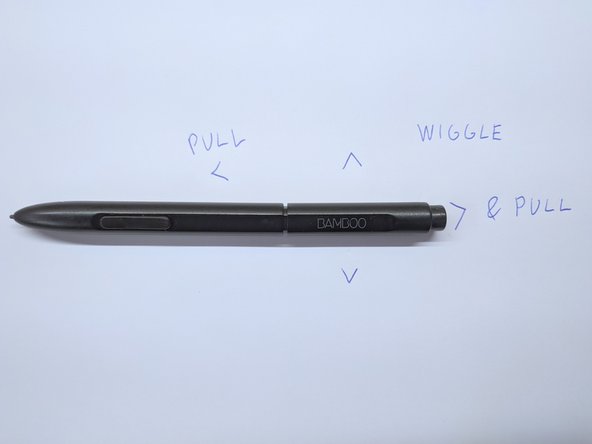
Перейти к основному содержанию

Wacom Bamboo Pen LP160E Disassembly

Выберете то, что вам нужно

  1. Wacom Bamboo Pen LP160E Disassembly, Wacom Bamboo Pen LP160E Disassembly: шаг 1, изображение 1 из 1
    • Place the pen on the working area

    • Make sure the pen is clean and free of any slippery substances, as disassembly requires a lot of friction

    • Nib does not have to be removed.

  2. Wacom Bamboo Pen LP160E Disassembly: шаг 2, изображение 1 из 2 Wacom Bamboo Pen LP160E Disassembly: шаг 2, изображение 2 из 2
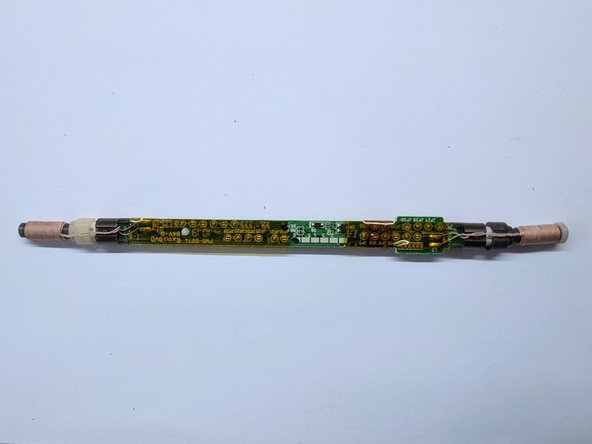
    • The pen buttons are firmly clipped in to the lower part of the pen body.

    • Press the lower button to make the insertion of a tool easier

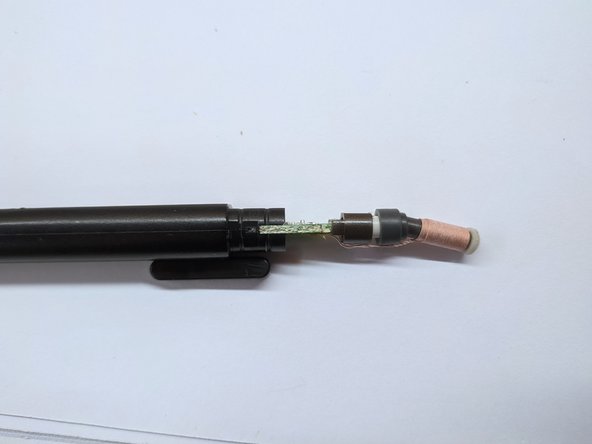
    • Insert a thin piece of plastic underneath the button and pull it

    • The pen buttons are not required to be removed to take out the PCB board of the pen.

  3. Wacom Bamboo Pen LP160E Disassembly: шаг 3, изображение 1 из 3 Wacom Bamboo Pen LP160E Disassembly: шаг 3, изображение 2 из 3 Wacom Bamboo Pen LP160E Disassembly: шаг 3, изображение 3 из 3
    • Two main elements of the body are held together with friction. No glue is present

    • Pull the body parts in opposite direction while wiggling the upper part up and down

    • SIlent creaking sounds might be emitted

    • Reduce the power of pulling if the plastic part is almost loose. Check the third image in the gallery to estimate how much of the plastic body part is still inside.

  4. Wacom Bamboo Pen LP160E Disassembly: шаг 4, изображение 1 из 2 Wacom Bamboo Pen LP160E Disassembly: шаг 4, изображение 2 из 2
    • Slide out the PCB board of the pen

    • The eraser and pen tip coils are loose and only held by two thin copper cables. Watch out not to break them!

    • All parts of the pen should now be loose.

  5. Wacom Bamboo Pen LP160E Disassembly: шаг 5, изображение 1 из 2 Wacom Bamboo Pen LP160E Disassembly: шаг 5, изображение 2 из 2
    • Upon reassembly, align the hole inside of the eraser coil to the plastic element inside of the upper part of the pen body.

Заключение

To reassemble your device, follow these instructions in reverse order.

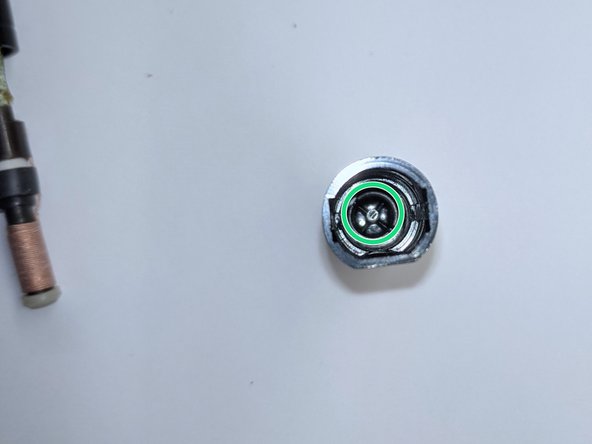
The eraser sensor contains a hole that needs to align with plastic element inside of the upper part of the pen.

00004707

Участник с: 07/23/20

1 055 Репутация

Автор 5 руководств

2 Комментариев

there is a common fault with the pro pen 2 from wacom, the pcb wobles around inside the pen, that only occured after the pen was dropped , so they must be something that used to hold the pcb steady, if you could help me knowing what it is, it would be helpful, i could mimic it to fix my pen, thanks alot (the woble interfere with the pen pressure so its really an issue, drawing is very precise).

nour el din Abu khalifa - Ответить

Sorry, no clue. I have a pro pen 2 that I might take it apart someday if I find out how to do it without destroying it.

00004707 -

Добавить комментарий

Просмотр статистики:

За последние 24часов: 0

За последние 7 дней: 4

За последние 30 дней: 31

За всё время: 374