Введение
Prerequisite guide.
Выберете то, что вам нужно
-
-
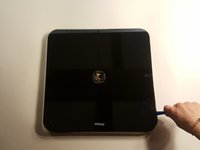
Push the battery door
-
Open the compartment
-
Gently remove the batteries from their designated positions
-
Place them aside, away from the reach of children
-
-
-
-
With caution, insert the plastic opening tools in between the disk and the glass face
-
It's a tight fit, so don't be afraid to apply a little bit of force
-
As soon as you hear a faint crackling sound, that means that the adhesive is budging out of place
-
Gently rotate the plastic spudger around the disk to get around the adhesive
-
Gently lift the metal disk
-
After the disk has been lifted, a wire and a small copper plate can be seen attached to the back of the disk
-
Carefully remove the wire and plate by peeling back the adhesive sticker that has been positioned around them
-
-
-
After all the above steps have been completed, proceed by removing the glass face
-
Carefully insert a plasic spudger in the small gap that exist in between the glass face and the plastic back
-
Run the plastic spudger all around the scale to increase the gap size
-
Place a plastic spudger in every corner, since the feet of the scale are also attached to the glass face using adhesive
-
Carefully insert the metal spudger underneath the adhesive that is located underneath the feet of the scale, and gently keep pushing until the adhesive is out of place
-
Repeat the above steps four times
-
After all the adhesives has been removed, gently lift the glass face off
-


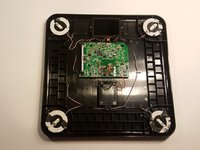
To reassemble your device, follow these instructions in reverse order.
Отменить: Я не выполнил это руководство.
Еще один человек закончил это руководство.
Команда

UMass Dartmouth, Team S4-G1, Julie Spring 2017 Участник UMass Dartmouth, Team S4-G1, Julie Spring 2017
UMASSD-JULIE-S17S4G1
4 членов
Автор 5 руководств