Введение
If simple sensor maintenance fails to solve the problem with your dryer, replacement may be necessary. This guide details steps taken for replacement of the sensor board for the World Dryer Airforce J4-973A3.
Выберете то, что вам нужно
-
-
In order to change the air filter, start with the removal of the outer metal casing.
-
Using the special bit, remove the large screws at the bottom of the casing.
-
To remove the case, lift the indicated spot with your hands.
-
-
-
Remove the 1/2" Ph1 screws at the bottom of the red fan cap.
-
Turn over the unit.
-
Push the red tabs on the back of the unit with medium to heavy pressure, using a plastic opening tool.
-
Carefully remove the cap, to prevent damage to the sensor.
-
-
-
-
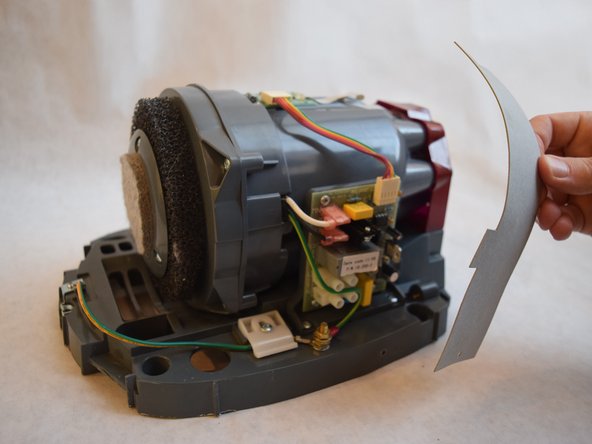
Remove both 3/8" Ph2 screws attached to the grey belt at the top and bottom.
-
Lift the grey belt away. This gives access to the server board.
-
-
-
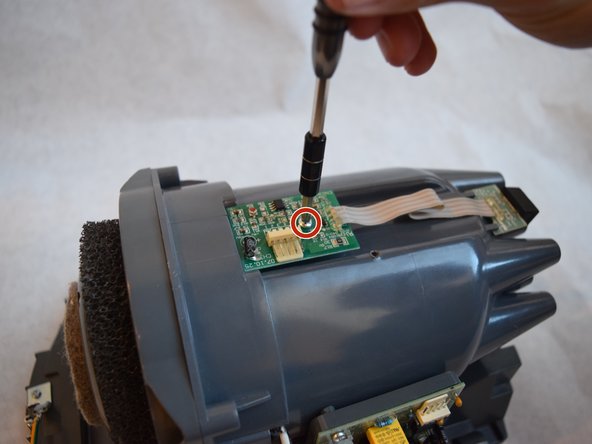
Remove the rainbow ribbon cable from the middle circuit board, using a plastic opening tool.
-
Remove the 1/2" Ph1 screw from the center of the circuit board.
-


To reassemble your device, follow these instructions in reverse order.
To reassemble your device, follow these instructions in reverse order.
Команда

Washington State, Team S1-G6, Hope Fall 2018 Участник Washington State, Team S1-G6, Hope Fall 2018
WSU-HOPE-F18S1G6
4 членов
Автор 4 руководств