Перейти к основному содержанию

XMAX V3 Pro Disassembly

Выберете то, что вам нужно

  1. XMAX V3 Pro Disassembly, Battery Door: шаг 1, изображение 1 из 3 XMAX V3 Pro Disassembly, Battery Door: шаг 1, изображение 2 из 3 XMAX V3 Pro Disassembly, Battery Door: шаг 1, изображение 3 из 3
    • Remove battery door

  2. XMAX V3 Pro Disassembly, Battery Removal: шаг 2, изображение 1 из 2 XMAX V3 Pro Disassembly, Battery Removal: шаг 2, изображение 2 из 2
    • Remove the battery from the device

  3. XMAX V3 Pro Disassembly, Bottom Cover: шаг 3, изображение 1 из 3 XMAX V3 Pro Disassembly, Bottom Cover: шаг 3, изображение 2 из 3 XMAX V3 Pro Disassembly, Bottom Cover: шаг 3, изображение 3 из 3
    • Apply heat from a hair dryer to help soften the glue

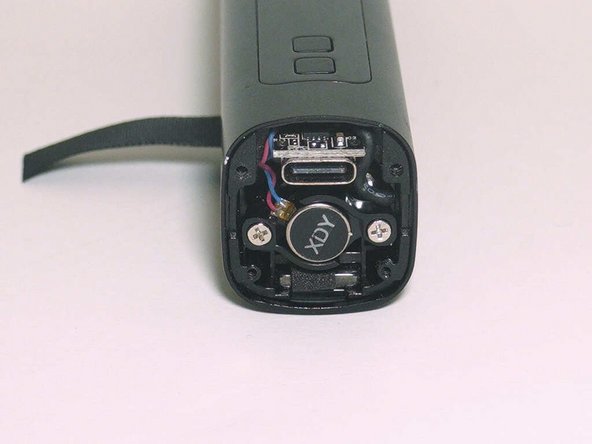
    • Use a spudger to pry off bottom cover

    • This might result in physical damage of the plastic bottom and cover by deforming the material

  4. XMAX V3 Pro Disassembly, Bottom Screws: шаг 4, изображение 1 из 2 XMAX V3 Pro Disassembly, Bottom Screws: шаг 4, изображение 2 из 2
    • Remove four PH000 screws

    • Remove plastic cover

  5. XMAX V3 Pro Disassembly, Assembly Removal: шаг 5, изображение 1 из 3 XMAX V3 Pro Disassembly, Assembly Removal: шаг 5, изображение 2 из 3 XMAX V3 Pro Disassembly, Assembly Removal: шаг 5, изображение 3 из 3
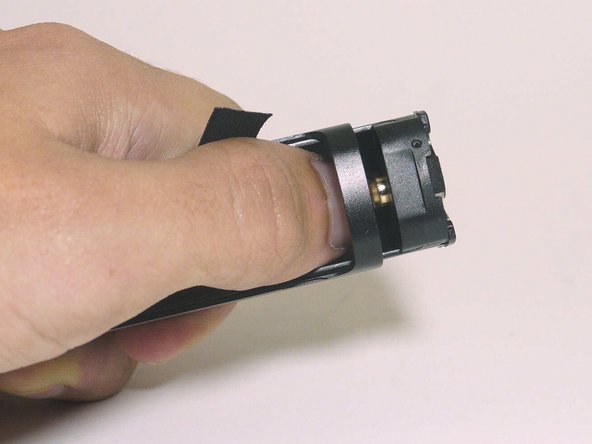
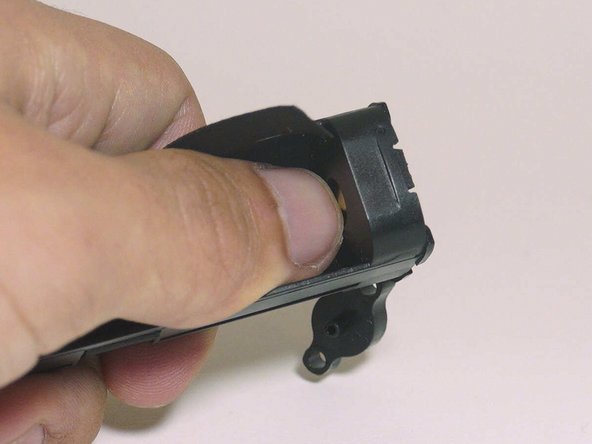
    • Use your thumb to apple pressure in the direction of the arrow

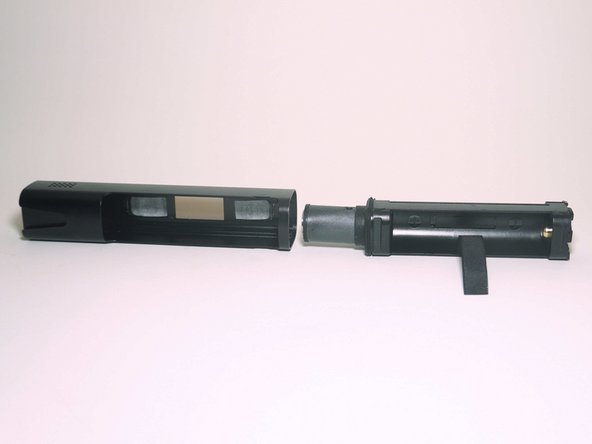
    • The entire assembly should slide out of the metal case

  6. XMAX V3 Pro Disassembly, Vibration Motor Screws: шаг 6, изображение 1 из 1
    • Remove both P00 Screws

  7. XMAX V3 Pro Disassembly, Vibration Motor Removal: шаг 7, изображение 1 из 3 XMAX V3 Pro Disassembly, Vibration Motor Removal: шаг 7, изображение 2 из 3 XMAX V3 Pro Disassembly, Vibration Motor Removal: шаг 7, изображение 3 из 3
    • Use a spudger to remove the vibration motor and spring

  8. XMAX V3 Pro Disassembly, Airflow Overview: шаг 8, изображение 1 из 2 XMAX V3 Pro Disassembly, Airflow Overview: шаг 8, изображение 2 из 2
    • Here is an overview of the internal assembly on top of the metal case so you can see the airpath

    • The rubber gasket that can be seen better in step 11 stops air from entering the heating assembly from the motherboard area and only allows it to be drawn in the the side perforations.

    • Air enters though the area within the red square and then goes though the hole within the red circle

  9. XMAX V3 Pro Disassembly, Negative Battery Contact Removal: шаг 9, изображение 1 из 2 XMAX V3 Pro Disassembly, Negative Battery Contact Removal: шаг 9, изображение 2 из 2
    • Use your thumb to push in the gold contact

  10. XMAX V3 Pro Disassembly, Continued Removal of Negative Terminal: шаг 10, изображение 1 из 3 XMAX V3 Pro Disassembly, Continued Removal of Negative Terminal: шаг 10, изображение 2 из 3 XMAX V3 Pro Disassembly, Continued Removal of Negative Terminal: шаг 10, изображение 3 из 3
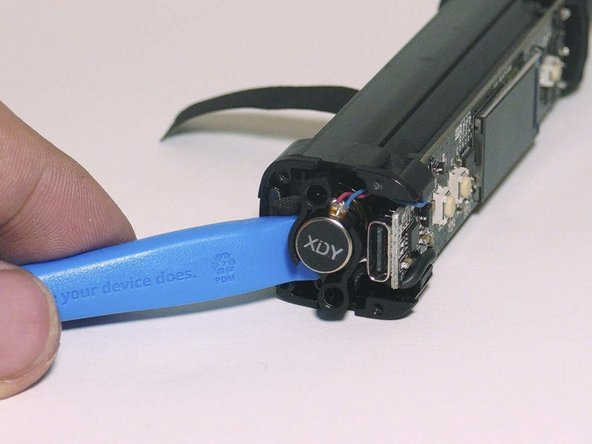
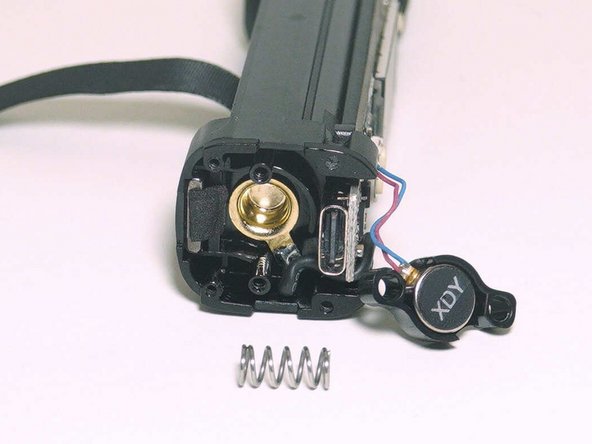
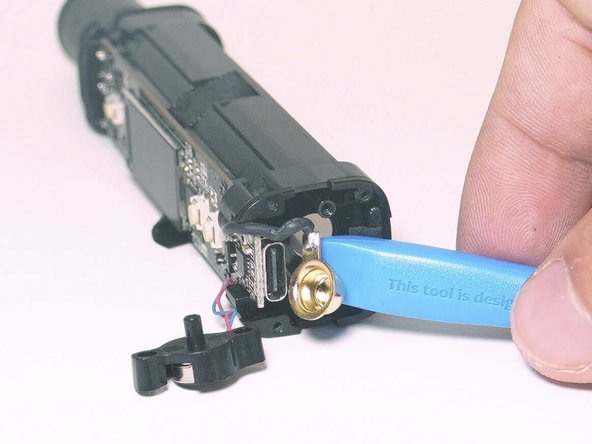
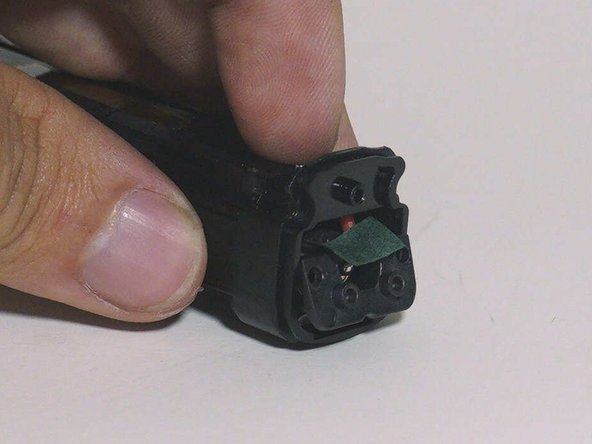
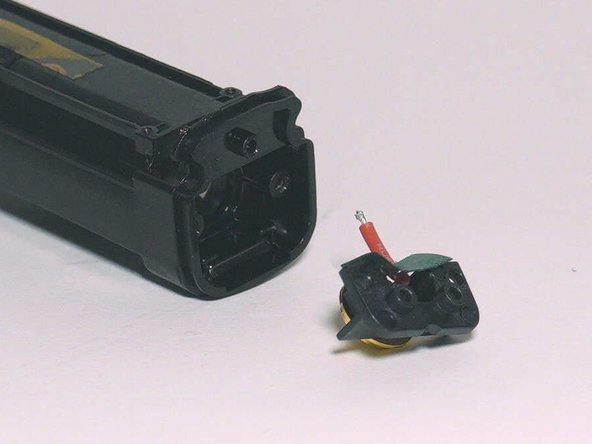
    • Use a spudger to completely remove the gold battery contact from case

  11. XMAX V3 Pro Disassembly, Airflow Gasket Removal: шаг 11, изображение 1 из 2 XMAX V3 Pro Disassembly, Airflow Gasket Removal: шаг 11, изображение 2 из 2
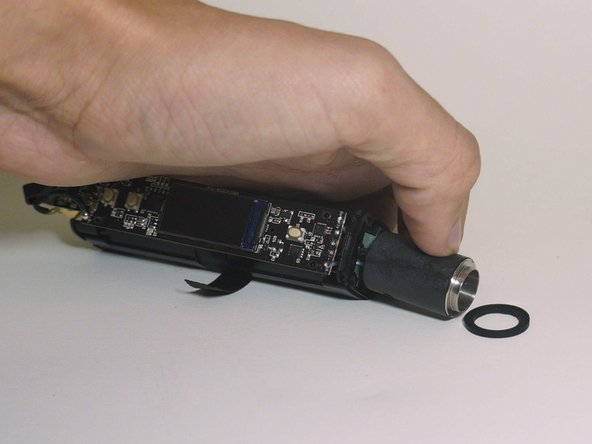
    • Remove rubber gasket, simply slide it down the heater assembly

  12. XMAX V3 Pro Disassembly, O-ring Removal: шаг 12, изображение 1 из 2 XMAX V3 Pro Disassembly, O-ring Removal: шаг 12, изображение 2 из 2
    • Remove rubber o-ring

  13. XMAX V3 Pro Disassembly, Motherboard Screws: шаг 13, изображение 1 из 1
    • Remove four P000 screws

  14. XMAX V3 Pro Disassembly, Desolding of Heater Assembly: шаг 14, изображение 1 из 3 XMAX V3 Pro Disassembly, Desolding of Heater Assembly: шаг 14, изображение 2 из 3 XMAX V3 Pro Disassembly, Desolding of Heater Assembly: шаг 14, изображение 3 из 3
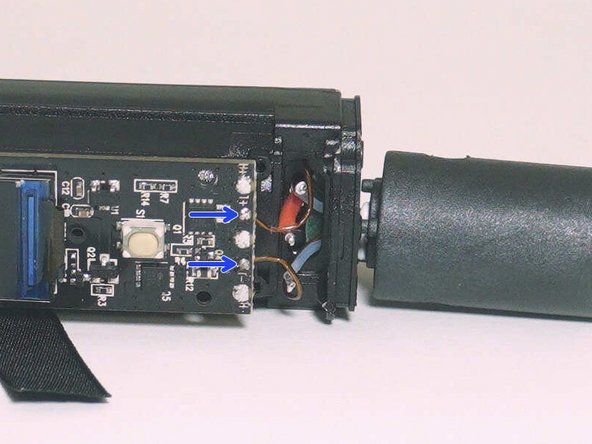
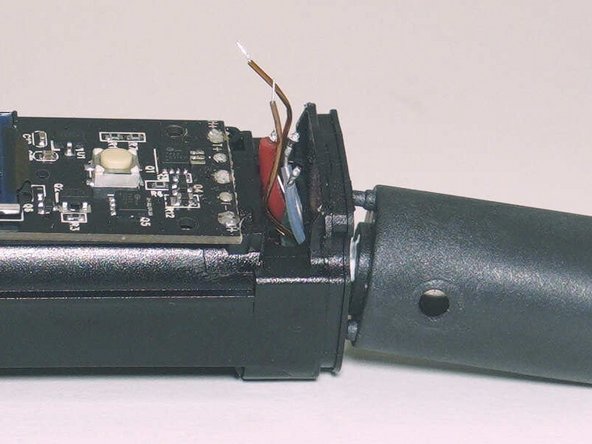
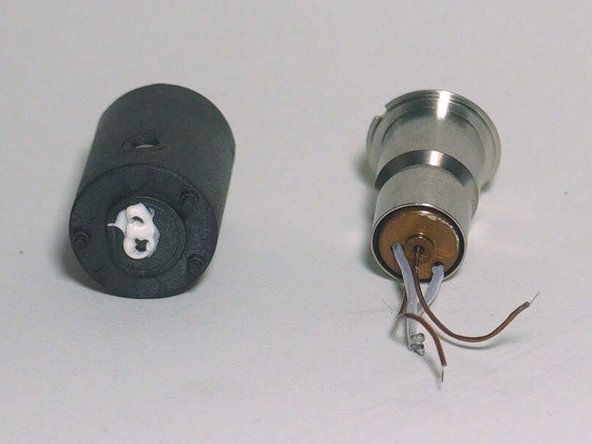
    • Desolder positive battery terminal and both heater wires

    • Desolder both temperature probe wires

  15. XMAX V3 Pro Disassembly, Heater Assembly: шаг 15, изображение 1 из 2 XMAX V3 Pro Disassembly, Heater Assembly: шаг 15, изображение 2 из 2
    • Use your fingers to pull off the heater assembly

  16. XMAX V3 Pro Disassembly, Positive Battery Terminal Assembly: шаг 16, изображение 1 из 3 XMAX V3 Pro Disassembly, Positive Battery Terminal Assembly: шаг 16, изображение 2 из 3 XMAX V3 Pro Disassembly, Positive Battery Terminal Assembly: шаг 16, изображение 3 из 3
    • Remove both P000 screws

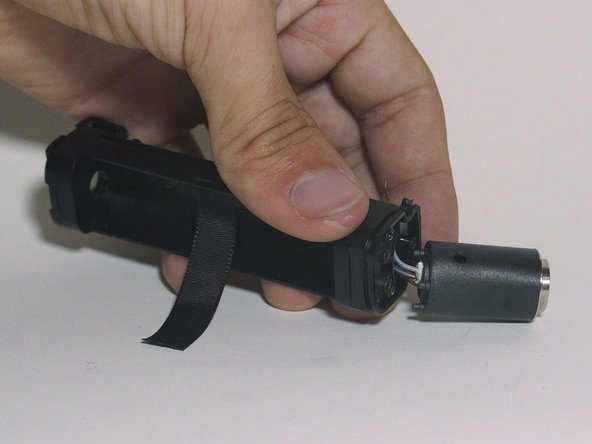
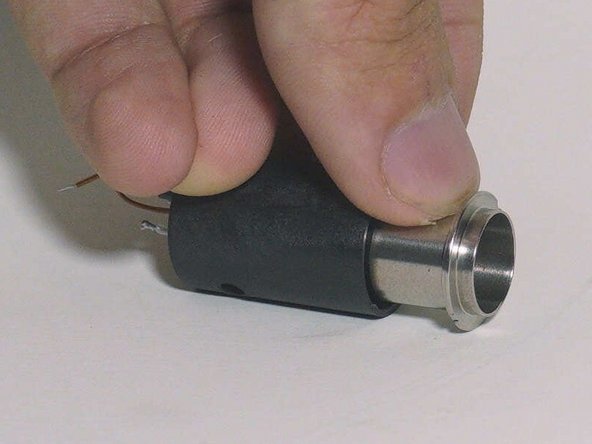
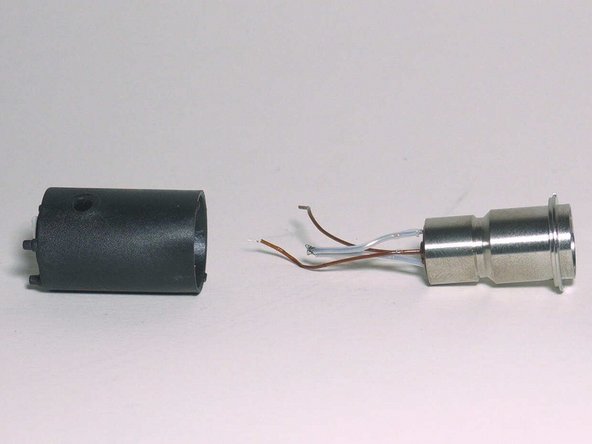
    • Pull out positive battery terminal assembly

  17. XMAX V3 Pro Disassembly, Heater Core: шаг 17, изображение 1 из 3 XMAX V3 Pro Disassembly, Heater Core: шаг 17, изображение 2 из 3 XMAX V3 Pro Disassembly, Heater Core: шаг 17, изображение 3 из 3
    • Use a nail or spudger to remove the heater core from the outside housing

    • There will be some epoxy on the bottom of the casing that is securing the wires

    • This epoxy needs to be placed before reassembling the device. It stops air from the electronics and motherboard area from entering your mouth.

  18. XMAX V3 Pro Disassembly, More Heater Assembly Pictures: шаг 18, изображение 1 из 2 XMAX V3 Pro Disassembly, More Heater Assembly Pictures: шаг 18, изображение 2 из 2
    • Some more photos of the heater assembly

Заключение

To reassemble your device, follow these instructions in reverse order.

4 участников успешно повторили данное руководство.

ShellingRook27

Участник с: 08/21/19

1 790 Репутация

Автор 7 руководств

Команда

Repair For You Участник Repair For You

Business

1 член

Автор 11 руководств

Один комментарий

I wonder how the air gets inside the heater core, it does not seem to have any holes!

WasName - Ответить

Добавить комментарий

Просмотр статистики:

За последние 24часов: 5

За последние 7 дней: 40

За последние 30 дней: 216

За всё время: 3,409