Введение
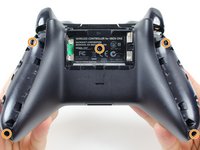
There are several screws located on the back of the controller that you need to remove, in order to take the faceplate off.
Выберете то, что вам нужно
-
-
Grip the controller firmly to remove the side handles, wedging a spudger into the seam between the front and handle plates.
-
Pry the side plate away from the front plate by moving the spudger back and forth. You will need to do this all the way around the side plate's seam.
-
-
-
-
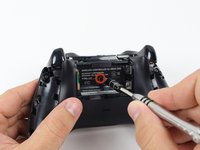
Use a screwdriver and punch a hole directly in the center of the label.
-
Remove the five 10mm screws located on the back of the controller using the TR8 Security Torx Screwdriver.
-


To reassemble your device, follow these instructions in reverse order.
Отменить: Я не выполнил это руководство.
90 человек успешно провели ремонт по этому руководству.
Команда

Cal Poly, Team 20-15, Maness Winter 2015 Участник Cal Poly, Team 20-15, Maness Winter 2015
CPSU-MANESS-W15S20G15
5 членов
Автор 54 руководств
11 Комментарии к руководству
It was a good tutorial, but i have two plastic rings that stay after my instervention... Anyone knows where are-they ?
It was a good tutorial, but i have two plastic rings that stay after my instervention... Anyone knows where are-they ?
Note before starting. You need a T8 security bit (with a hole in the middle), not a standard T8 bit.
I took mine a part because it was looking dirty, gave it a good clean, putting it back together was easy but it wont work with the batteries anymore just the power core, there is nothing broken or cracked, any ideas?
Maybe you forced the battery contact on the wrong side of the case?