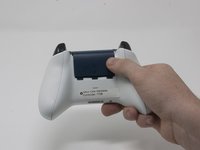
Перейти к основному содержанию

Xbox One Wireless Controller Model 1708 Button Replacement

Выберете то, что вам нужно

  1. Xbox One Wireless Controller Model 1708 Button Replacement, Cover Plate: шаг 1, изображение 1 из 2 Xbox One Wireless Controller Model 1708 Button Replacement, Cover Plate: шаг 1, изображение 2 из 2
    • Slide the battery cover toward the top of the controller to remove it.

    • Lift up the batteries or the battery pack from the battery compartment.

  2. Xbox One Wireless Controller Model 1708 Button Replacement: шаг 2, изображение 1 из 2 Xbox One Wireless Controller Model 1708 Button Replacement: шаг 2, изображение 2 из 2
    • Insert a plastic opening tool into the top seam, and gently work the opening tool to the bottom of the controller.

    • Continue using the opening tool to gently pry the side plate off of the controller.

    • Repeat this process for the second side plate.

  3. Xbox One Wireless Controller Model 1708 Button Replacement: шаг 3, изображение 1 из 1
    • Gently peel the battery label or punch a hole in the center of the sticker in the battery compartment to reveal the hidden screw.

    • Remove the five 9mm torx-9 security screws from the back of the controller.

  4. Xbox One Wireless Controller Model 1708 Button Replacement, Tape Shock Motors in place: шаг 4, изображение 1 из 3 Xbox One Wireless Controller Model 1708 Button Replacement, Tape Shock Motors in place: шаг 4, изображение 2 из 3 Xbox One Wireless Controller Model 1708 Button Replacement, Tape Shock Motors in place: шаг 4, изображение 3 из 3
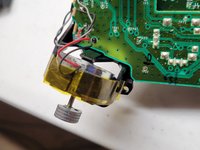
    • Tape the Rumbler/shock motors in place.

    • This will prevent the motors from falling out.

  5. Xbox One Wireless Controller Model 1708 Button Replacement: шаг 5, изображение 1 из 2 Xbox One Wireless Controller Model 1708 Button Replacement: шаг 5, изображение 2 из 2
    • Orient the controller so the front plate is facing up.

    • Lift the front cover off of the controller.

  6. Xbox One Wireless Controller Model 1708 Button Replacement: шаг 6, изображение 1 из 1
    • Turn the controller face down and gently lift the rear plate.

    • Be careful with the rumble motors, as they tend to fall out, risking damage to the motherboard.

  7. Xbox One Wireless Controller Model 1708 Button Replacement, Directional Pad: шаг 7, изображение 1 из 1
    • Turn the device over and remove the directional pad by gently pulling it away from the controller.

  8. Xbox One Wireless Controller Model 1708 Button Replacement, Joystick Caps: шаг 8, изображение 1 из 1
    • Pull the joysticks off of the controller.

  9. Xbox One Wireless Controller Model 1708 Button Replacement, Top Motherboard: шаг 9, изображение 1 из 1
    • If the rumble motors fall out of frame, the wires may disconnect from the motherboard . The wires will have to be soldered to reattach the motor.

    • Turn the device over and remove the two 7mm torx-6 screws in the bottom left and right corners.

  10. Xbox One Wireless Controller Model 1708 Button Replacement, De-soldering required: шаг 10, изображение 1 из 3 Xbox One Wireless Controller Model 1708 Button Replacement, De-soldering required: шаг 10, изображение 2 из 3 Xbox One Wireless Controller Model 1708 Button Replacement, De-soldering required: шаг 10, изображение 3 из 3
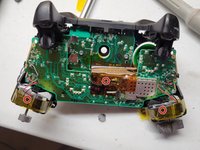
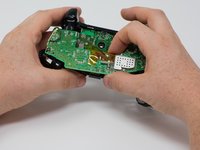
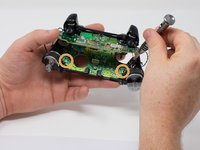
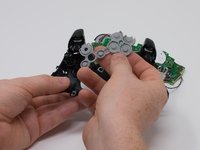
    • Firmly grasp the top and bottom motherboards in opposite hands, then gently pull them apart.

    • The top motherboard is still connected to the bottom motherboard. To fully separate the top motherboard, you will need to use a soldering iron.

    • Warning: Do not attempt to disconnect the shielded (gold colored) connector as it is extremely fragile you will break it. It runs between the two boards.

    • De-solder the shielded cable from the lower board instead of attempting to disconnect the connector. De-solder using micro soldering techniquest.

  11. Xbox One Wireless Controller Model 1708 Button Replacement, 3.5 mm Audio Port: шаг 11, изображение 1 из 2 Xbox One Wireless Controller Model 1708 Button Replacement, 3.5 mm Audio Port: шаг 11, изображение 2 из 2
    • Remove the audio port from the bottom mother board.

  12. Xbox One Wireless Controller Model 1708 Button Replacement, Bottom Motherboard: шаг 12, изображение 1 из 3 Xbox One Wireless Controller Model 1708 Button Replacement, Bottom Motherboard: шаг 12, изображение 2 из 3 Xbox One Wireless Controller Model 1708 Button Replacement, Bottom Motherboard: шаг 12, изображение 3 из 3
    • Remove the three 70mm torx-6 screws from the center of the bottom motherboard.

    • Remove the two 70mm torx-6 screws next to the rumble motors on the bottom motherboard.

    • Remove the one 70mm torx-6 screw located on the left side of the bottom motherboard.

  13. Xbox One Wireless Controller Model 1708 Button Replacement: шаг 13, изображение 1 из 1
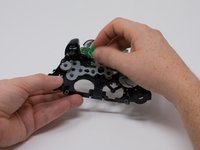
    • Use a plastic spudger to lift the plastic clip off the front pegs.

    • Remove the plastic clip by sliding it upwards.

  14. Xbox One Wireless Controller Model 1708 Button Replacement: шаг 14, изображение 1 из 2 Xbox One Wireless Controller Model 1708 Button Replacement: шаг 14, изображение 2 из 2
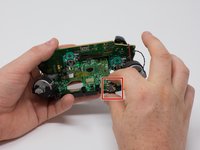
    • Use a spudger to release the small hooks at each end of the left and right bumper.

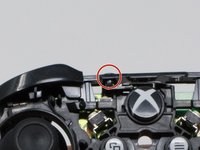
    • After you release these hooks, be careful as you separate the face plate from the back of the controller. The connect/sync button (see second image) is held in by this face plate and will come loose as you perform this step.

  15. Xbox One Wireless Controller Model 1708 Button Replacement: шаг 15, изображение 1 из 1
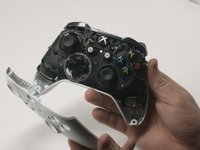
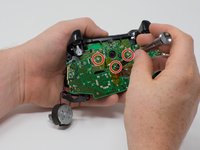
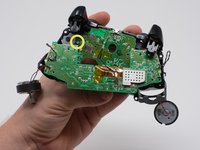
    • To avoid disconnecting the wires connected to the motherboard, lift the mother board away from the plastic frame as if opening a laptop.

  16. Xbox One Wireless Controller Model 1708 Button Replacement, Front Buttons: шаг 16, изображение 1 из 2 Xbox One Wireless Controller Model 1708 Button Replacement, Front Buttons: шаг 16, изображение 2 из 2
    • Lift off the rubber backing strip.

    • With the rubber backing strip removed, the buttons will now fall out of the remaining shell.

Заключение

To reassemble your device, follow these instructions in reverse order.

55 участников успешно повторили данное руководство.

Dylan Gross

Участник с: 09/25/17

4 686 Репутация

Автор 4 руководств

Команда

Cal Poly, Team S18-G3, Forte Fall 2017 Участник Cal Poly, Team S18-G3, Forte Fall 2017

CPSU-FORTE-F17S18G3

4 членов

Автор 32 руководств

8 Комментариев

Thanks for the contribution for you and helped a lot of people.

NELSON ESTREMERA - Ответить

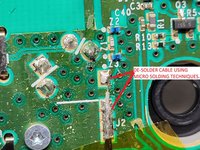
You don't need to desolder anything to remove the top motherboard!

Those black and grey wires go to the vibration motors in the triggers. Remove the covers on the triggers along with the motors, and carefully remove the wires from clips on the front of the controller. Make sure you get the black signal wire. You can now safely remove the two boards from eachother.

randomguy6527 - Ответить

I needed a guide for this because my “X” button was sticking and I ended up doing the whole thing without separating the motherboards, cleaning everything that touches the button, and it worked like a charm. Thank you very much for the guide!

Michael Winay - Ответить

Can you just take off the buttons right after removing the front faceplate?

Zanyar - Ответить

I wore out both the sticks playing COD, this helped me to make it usable enough for P2. cheers!

Nicholas Pratt III - Ответить

Добавить комментарий

Просмотр статистики:

За последние 24часов: 15

За последние 7 дней: 107

За последние 30 дней: 532

За всё время: 37,445